5 Great Ways To Eliminate Image Noise At The Source
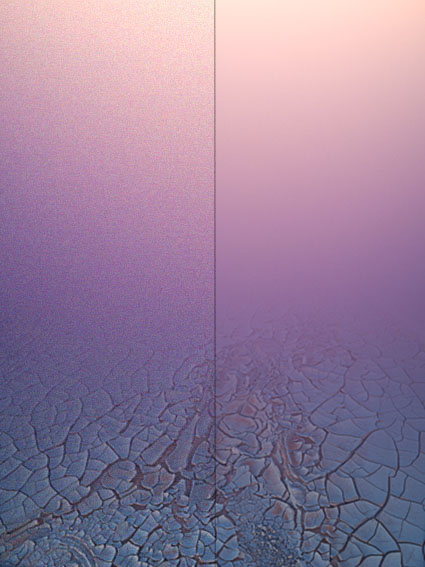
high noise / low noise
Noise happens. There is always some degree of noise present in any electronic device that receives or transmits a signal. Though noise is unavoidable, it can become so small relative to the signal that it is no longer visible. It’s all about a good signal to noise ration (SNR). The image is the signal. The capture and carrier mediums’ biproducts are the noise. (Film grain is noise.)The higher the SNR the more the image overpowers the noise; the lower the SNR the more the image becomes confused with noise. While some noise increases the apparent sharpness of images, the vast majority of noise found in images degrades quality. It’s best to avoid it.
There are a number of things you can do to reduce noise in your digital images at the point of capture.
1 Expose to the right
2 Use lower ISO settings
3 Use bigger sensors
4 Use faster exposure times
5 Keep equipment cool
Start here. Use software to reduce the appearance of noise only when needed. (Of course, reducing noise may not be the only deciding factor when selecting conditions, tools, and techniques. As with all things, you will have to balance many concerns simultaneously. Adhere to the above principles when practical.)
Knowing how noise is produced will help you avoid it.
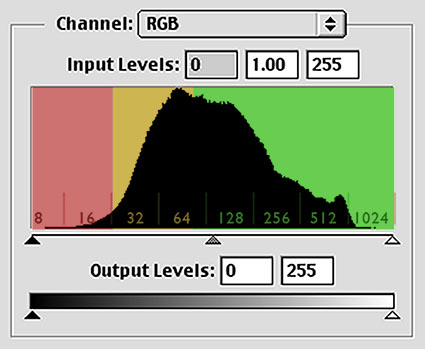
avoid the red zone, caution in the yellow zone, go for the green zone
ETTR
Underexposure results in more visible noise. Darker regions contain more noise than lighter regions in digital capture; the opposite is true of film. This is because the darker regions are recorded with fewer photons and less bits of data. It stands to reason that darker regions of images are produced with fewer photons. But why are they recorded with less bits of data? Digital cameras record data in a linear progression. If a digital sensor is capable of recording 14 bits of data (or 16,384 shades of gray) with a dynamic range of 8 stops, the lightest stop contains half the data in the file; the next lightest stop contains half as much data; and so on; it generates this progression from dark to light – 32 / 64 / 128 / 512 / 1024 / 2048 / 4096 / 8,192. This means you want to expose to the right. Avoid the lower 2 stops whenever possible; they contain less than 1% of the total data in the file. With so little data the signal becomes confused with the noise; the signal to noise ratio is very low. What’s more, when these tonal regions are adjusted, brighter or contrastier, the noise contained there quickly becomes more pronounced and with so few bits of data it also has a tendency to posterize. In addition, significant under exposure greatly increases the chances of producing Bayer pattern noise, a type of noise that is seen in larger areas and is more challenging to remove in post-processing. You’re much better off making a light exposure and darkening the Raw file during post-processing; this way your shadows will be represented with much more data and contain less noise. When light becomes challenging, which should you choose – under expose (without clipping) or raise the ISO? The precise cut off point is different for every camera, but in general avoid the lower 20% of the histogram. You’ll get less noise if you boost ISO and move the histogram up.
ISO
Higher ISOs amplify noise. ISO (International Standards Organization) is a descriptor that signifies absolute sensitivity to light. A digital sensor has one native ISO. Higher ISO settings simply boost the resulting signal. This is useful, but not ideal. When the brightness of the image is boosted, the noise is too.
Use “Shorter” Exposure Times
Longer exposures generate more noise. Hot pixels become hotter. All sensors have a few pixels that heat up faster than others, producing brighter than expected values. Some even have a few dead pixels that never fire, producing only black pixels. During longer exposures hot pixels are given more opportunity to heat up, growing brighter still; slightly hot pixels not visible at shorter exposure times become visible. As digital sensors age, hot pixels may become hotter and more pixels may become hot. Hot pixels produce a consistent fixed pattern of noise that can be recorded for given exposure times, making it easy to reduce. There is a duration at which a sensor suddenly produces a lot more noise; in older models this could be seen in exposures lasting only one minute, but with newer sensors this is greatly extended and most users will not encounter this; if you’re making very long exposures it’s useful test this and find the duration at which this happens for a your specific camera.
Use Bigger Sensor Sites
When it comes to noise, bigger is better – theoretically. Bigger sensors have more light gathering capacity, producing a higher signal to noise ratio, or cleaner images. More isn’t necessarily better. Cameras with more photosites (yielding more megapixels) packed into smaller areas tend to produce a lower signal to noise ratio, or noisier images. That said, a stronger signal does not necessarily guarantee lower noise. It’s the relative amounts of signal to noise that determines how noisy an image appears. The way a camera processes the file it makes has a significant impact on the final quality. Consequently, many medium format cameras that produce beautiful files in daylight typically produce noisier files than DSLR’s with smaller sensors in low light.
Stay Cool
High temperatures exacerbate noise. Thermal energy (leakage current) in semiconductors can generate an electrical signal that is difficult to distinguish from the optical signal. Ambient temperature increases leakage current by a factor of 2 for every 8 degrees Centigrade. Whether due to ambient temperature (You might start to see some effect over 90 F / 32 C degrees.) or storage (Don’t leave your camera in the sun, especially on a car seat, for long periods of time.), your camera can get hot and this will increase noise, which you can reduce by cooling off and keeping your camera cooler.
The best way to avoid noise is to produce as little of it as possible during exposure. These five tips will help you do just that.


No Comments