How To Make Your Photographs Appear More Three Dimensional With Photoshop’s High Pass Contrast
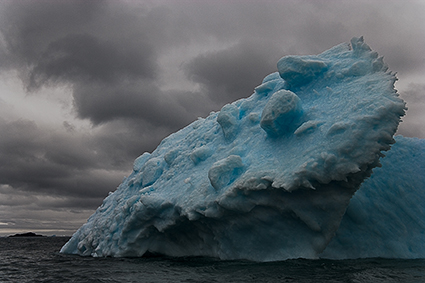
The unfiltered image.
A low High Pass filter setting for sharpening
A high High Pass filter setting for contrast
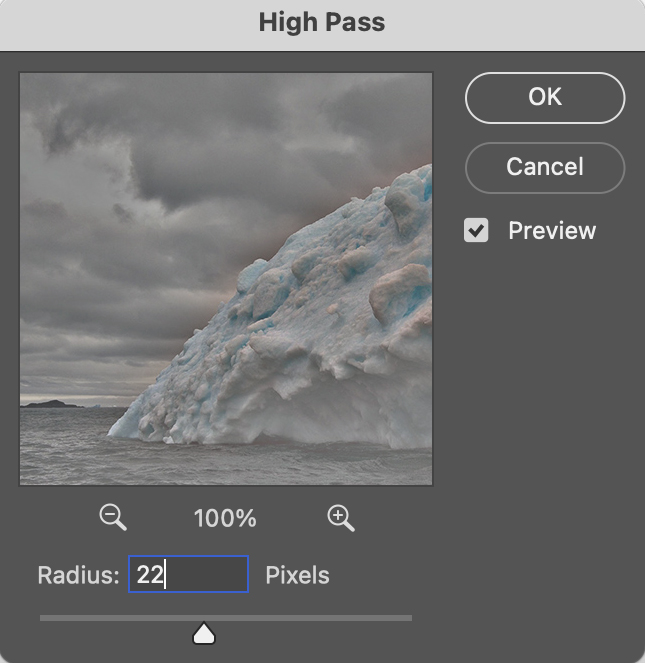
The filter High Pass
Photoshop’s often overlooked filter High Pass is one every user should know. It can be either an edge sharpener or a unique luminosity contrast enhancer that produces a three-dimensional effect unlike any other tool.
When you use high Radius settings with the High Pass filter, it moves beyond sharpening and becomes tonal enhancement. The halos (light lines) and lines (dark lines) it produces become so broad and feathered that rather than only contour contrast (Think edges and thin lines.) they instead accentuate broader image contrast (Think planes chiseled by a sculptor.). In short, images filtered with high High Pass settings look contrastier and more three dimensional, as if all the planes in an image are dodged and burned.
Take these steps to apply High Pass contrast.
Bob Killen
11.08.2024 at 17:34We’ve always thought of this as a great sharpening tool. But using it to enhance contrast it’s a wonderful new approach. Thanks so much.
johnpaulcaponigro
12.08.2024 at 08:57You’re welcome Bob. I can’t wait to see what you do with it.
Jeanne D Tifft
12.08.2024 at 09:47Vastly useful subtleties in High Pass are wonderful to see. I’ve used High Pass for ages, but, the additional specifics described here make me want to dive right in…
johnpaulcaponigro
20.08.2024 at 12:48Excellent! Enjoy!
Doug Herrick
12.08.2024 at 17:52This is a most interesting process! Thank you for sharing .
Would creating an ‘action’ be worthwhile? Maybe you’ve already got one. It’s a lot to remember.
From Mirror Lake, NH
Doug
johnpaulcaponigro
20.08.2024 at 12:48Actions are very helpful, but don’t let them lead you to less than optimal results. Customizing the setting the Radius for a particular image is the key.
John Cate
12.08.2024 at 22:20Having taken workshops from both of you, I look forward to giving this a try. Thanks, JP.
John
johnpaulcaponigro
20.08.2024 at 12:46This is a keeper. I recommend you master it. The steps are easy, developing an eye for how to apply it to specific images comes with practice.
Ralph Mastrangelo
14.08.2024 at 17:44In a word: WOW!!
johnpaulcaponigro
20.08.2024 at 12:45Wow indeed!
Ralph Mastrangelo
15.08.2024 at 13:49Should you apply the inverse of the mask on the low high pass layer to the high high pass layer?
johnpaulcaponigro
20.08.2024 at 12:46Mask wherever you want less of the effect.
Ed Palaszynski
01.09.2024 at 10:07Hey JP,
Good to be reminded of this powerful technique you taught us in one of your workshops. It can make a huge difference. Hope to see you soon…
Tom Sliter
07.09.2024 at 21:06Very useful advice. Now I know why there are higher radius settings in the high pass filter! It gives a very subtle but definitive 3-D effect. Thank you.
And is it better to apply these actions toward the beginning or end of your editing process, or does it matter?
johnpaulcaponigro
09.09.2024 at 11:55I tend to apply high high pass or contrast early (because it influences other contrast adjustments) and low high pass or sharpening late (because it’s a final polishing move).