4 Reasons To Use Abstraction In Photography Plus 20 Experiments To Try

1 Structure Clarified

2 Process Detailed 

3 Concept Visualized

4 Pattern Created

5 Extreme Simplification


Abstraction

To one degree or another, every photograph is abstract. At a minimum, photographs are flat rather than three-dimensional. Some photographs are more graphic than others. And the origins of a few photographs are virtually unrecognizable. Answering to what degree a photograph is abstract, how it is abstract, and why it’s abstract will help you understand more about it and its creator’s intentions – this might be you.

Definitions

So what does abstract mean? First used in the 14th century the word abstract comes from the Latin abstrahere meaning to draw away (ab = away + trahere = to pull) and was used to mean “withdrawn or separated from materials objects or practical matters.” As a noun abstract means a condensed piece of writing. As an adjective or adverb the meanings of abstract are widely divergent; general, summarized, distilled, not specific, qualitative, disassociated, nonmaterial, theoretical, geometric, formal, non-representational, not applied, unreal, transcendent, abstruse … The list goes on until the meaning of abstract becomes diffuse to the point of being more suggestive than specific. Long used in fields as diverse as religion, philosophy, and science, surprisingly, the word abstract wasn’t widely used in the arts until the early 1900s during the modernist movement, when painters and sculptors departed from realism and even representation, which was in part a reaction to photography.

How Abstract Is It?

When looking at images it’s useful to ask a number of questions. Beginning to answer these questions will tell you a great deal about both individual images and their relationships to other images, even if the answers you arrive at are neither definitive nor complete. Sometimes the toughest questions are the most rewarding. They keep giving and giving, for a long time, perhaps even a lifetime.

Regarding abstraction, try these questions.

 “On a scale of 1-10, how abstract is it?” It may be only a little or it may be a lot.

“What’s abstract about it?” While some images are entirely abstract, in other images only certain aspects may be abstract and this may be partial or complete. What’s done and how it’s done can direct attention in specific ways, describe particular graphic qualities, and display interpretation.

“What kind of abstraction is it?” Though they may all coexist in a single image, conceptual, minimal, and non-representational, are three very different qualities, which often identify intent.

 Intent brings us to the most important and often most difficult question to answer. “What purpose does abstraction serve?” This is essential to answer before asking “Is the means appropriate for the end?” and “How well is it done?”

How long visual attention is sustained depends on whether the stylization has purpose, how well it serves the message, and how well it’s done.

The Many Uses Of Abstraction

Abstraction can serve many functions; it can stimulate, structure, inform, and express.


Insights Members can login to read the full article.
Email:
or Sign up

4 Ways To Crop Your Images – Crop, Distort, Retouch

Deciding what’s in the frame and what’s out is a critical decision that can make or break an image. You can look at it very simply. What is an image of? What is an image not of? And how does what’s left over support or distract from the essence of an image?

In the past we had two simple options; one, use the frame to crop; two, crop when printing or post-processing. Now we have two more options to think about; three, distort; four, retouch. Each of these offers different possibilities and becoming familiar with them all will help you choose.

It’s a new mindset. Once you learn to see in these new ways, you’ll find you’ll make images that you previously passed by, leaving them unmade or even unnoticed. As a result, you’ll make many more successful images.

Classic crops eliminate the most information

Crop

You’ve got choices. Choose wisely.

One – Crop Before Exposure

Use the frame to eliminate distracting information around a subject(s). Take extra care with image information that touches the frame, as it will draw extra attention. If part of an object is eliminated by the frame make sure what’s left looks deliberate - just a sliver lopped off or a sliver left over seems careless. Once you’ve made your exposure, you’re committed. You can crop more but you can’t uncrop. When in doubt, shoot both tight and loose.

Two – Crop After Exposure

Shoot loose (more than you need) and you’ll preserve your ability to refine a composition during post-processing, testing, and comparing many variations, even over extended periods of time, before settling on a final solution. Doing this will take more time but you will gain precision.

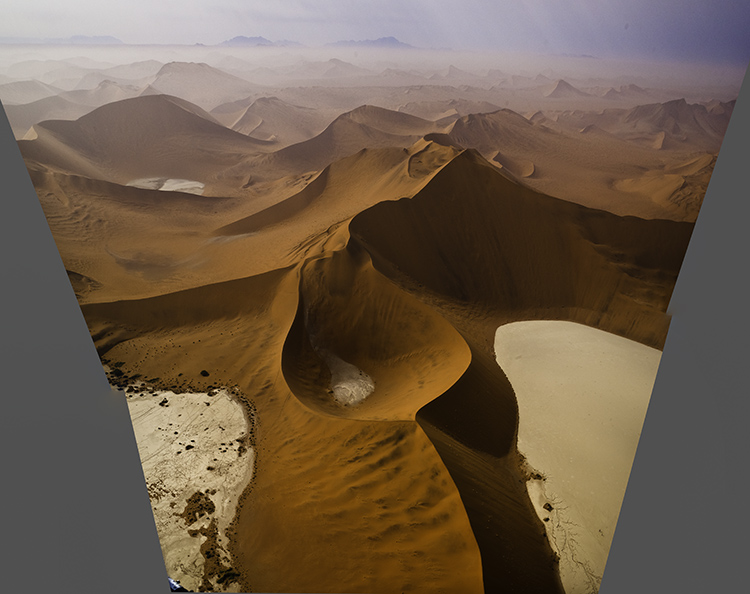
Distorted to fill the frame

Distort

Distorting photographs is widely practiced. But most photographers tend to think of their limited use of distortion as having produced no distortion. In fact, every lens distorts in its own way, some more than others, like wide-angle lenses. Lens profiles are designed to correct for lens distortion during post-processing by ‘undistorting’.

Many people think they aren’t distorting their photographs when in fact they are doing it on most of their images in multiple ways, first by using a lens, second by using a lens profile, and sometimes third by creating panoramas. Why are these practices more acceptable than using distortion and retouching as a part of your cropping practices? In the end, it’s your choice.

You can push one or more sides of an image outside its frame and achieve similar results to cropping. What’s different here is that the proportions of the objects and spaces left within the frame will change, typically getting taller or wider, usually only a little but potentially a lot.

You’ve got options. Test them before you settle on your final solution.

One - Transform

Use Photoshop’s Edit > Transform to distort an image uniformly. To move an entire side, hold the Shift key to move one side without moving the others.  And/or, to move one corner independently, press the Command key before moving a corner point.

(To do this an image’s Background Layer needs to be a Smart Object or a duplicate layer.)

Two - Content-Aware Scale

Use Photoshop’s Edit > Content-Aware Scale to distort an image non-uniformly – smooth areas will expand or contract more than textured areas. Pull the areas you wish to crop outside the frame. Hold the Shift key while you’re doing this if you wish to change one side more than another and the image’s aspect ratio with it.

(Do this on a duplicate layer. Content-Aware Scale doesn’t work on a Smart Object.)

Three - Warp

Want more localized control? Try Warp. (Edit>Transform>Warp) Warp gives you a grid to adjust more points with. It adds the ability to modify the position of elements not just with the edges but also the insides of the frame. Do this on a duplicate layer or duplicate Smart Object. Warp works on Smart Objects but since it is not a filter so you can’t get the future flexibility of a Smart Filter.

Four - Liquify

You can use the Liquify filter to distort small portions of an image. For instance, moving something in the middle of the edge of a frame off frame without moving the corners. To do this,  go to Filter>Liquify, start with the first tool Forward Warp and use the brush to get the effect you desire. It’s worth exploring the other brushes too as Liquify is a powerful distortion tool.

Distorted to fill the frame

Distorted version with aspect ratio changed afterward

Preserve Or Adjust Aspect Ratio

Both cropping and distortion may or may not change an image’s aspect ratio (the proportions of the frame). Cropping can be set to preserve a set aspect ratio but this puts limits on what’s possible as at least two edges, if not all, are adjusted together. if you adjust one edge separately from the others you’ll change the aspect ratio, for better or worse. But if a specific aspect ratio is important to you (either because the original creates consistency between images or because a new ratio is more expressive), after cropping you can distort the entire frame to the aspect ratio of your choice.


Insights Members can login to read the full article.
Email:
or Sign up

See What You’re Missing – 2 Ways To Non-Destructive Crops

We’re responsible for everything that’s in the frame. We’re also responsible for everything that’s not in the frame. Deciding what’s in the frame and what’s out is a critical decision that can make or break an image. Framing and cropping are critical. If you miss a key element during framing you’re out of luck. However, if you overcrop you’re not, if you crop non-destructively and you remember to reconsider your crop from time to time. After you crop, you forget what you’re missing. It’s out of sight and out of mind. But it doesn’t have to be.

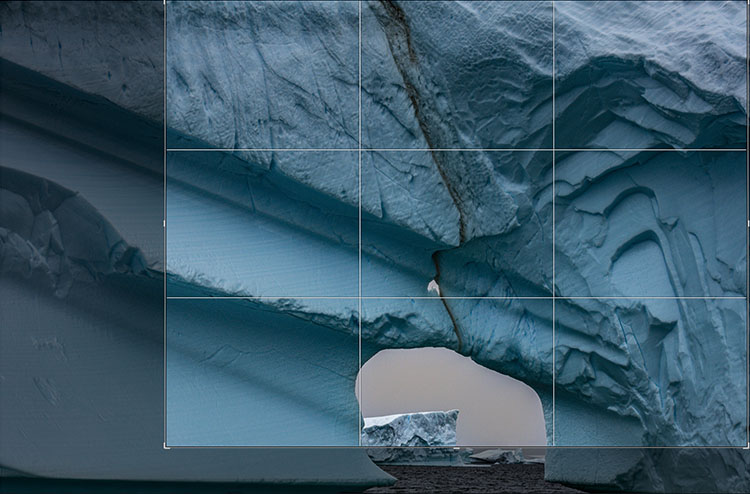
Lightroom and Photoshop’s crop tools allow you to see the image information you’re missing Here’s how …

In Lightroom, highlight an image and tap R. You’ll see the areas eliminated with a darker overlay. You never lose image information when you use Lightroom. It couldn’t be easier. What’s hard is remembering to do it.

Photoshop also makes almost as easy. First you have to open an image. Then press C (or click on the crop tool). Then click on the Crop tool control handles and you’ll see the missing information, again under a darker overlay. When you use Photoshop, be careful. Unlike in Lightroom, you can eliminate image areas permanently. Here are two ways. One, check the Crop tool’s option Delete Cropped Pixels. Two, flatten the file or merge other layers with the Background layer. You may think this has happened when you first look at a file that has been cropped in Photoshop as when you first click on the crop handles you won’t see the larger canvas but simply drag the right corner of the window out and you’ll see the bigger canvas.

Why would you need to reconsider your crop? To make future improvements as your vision evolves. In the analog darkroom photographers never (almost) cut their negative’s or transparencies. They masked them during printing. This means every time them made new prints they reconsidered their crops. Sometimes, after their seeing matured, they changed their minds – significantly. I’ve witnessed the greats reviewing their top images. One day, Arnold Newman adjusted his crop on his portrait of igor Stravinksy. Another day, my father reconsidered his crop for Running White Deer, making subtle but significant shifts in their final compositions.  Those two images are both dramatically influenced by the way they’re cropped. If the masters do it, you may want to consider doing it too.

Small changes can make big differences. But you won’t think to make them if you don’t see what you’re missing. So make it a habit to reconsider your crops from time to time. It only takes a few moments and if you do, perhaps even your best images will improve.

Read more in my Creative Composition resources.

Learn more in my digital photography and digital printing workshops.

How To Control The Proportion Of Your Images’ Frames Expressively


The proportion of an image’s frame (or aspect ratio) is a fundamental part of the statement it makes. Aspect ratio influences the way both the photographer and their audiences see images. Many photographers choose particular camera formats (35mm, 645, 2¼, 6x17, 4x5) because they reinforce particular ways of seeing. For instance, square formats emphasize neither vertical nor horizontal motions and reinforce the geometries framed within them, while panoramic formats encourage the eye to sweep across images in long strokes, typically but not exclusively horizontally.

Of course, all images can be cropped. Through elimination, an image’s aspect ratio is modified. Reasons for cropping an image can vary; one reason is to eliminate unessential image areas; another reason is to change the proportion of the frame.

There are photographers who prefer to standardize the aspect ratio of their images. Many documentary photographers crop none of their images to indicate the objective stance they attempt to approach their subjects with, signaling a host of other related practices, and above all that they have intervened in and interpreted the events their images portrayed as little as possible. Other photographers standardize the aspect ratio of their images to draw attention away from the proportion of the frame to other aspects of their images. Repetition typically deflects attention from an image element, while variation draws attention to itself. Still, other photographers standardize the proportion of their images to make matting and framing easier and more economical. Some do it simply out of habit. No matter what type of photographer you are and what your standard practice is, I recommend you explore your options. (To gain the maximum benefit from your explorations, draw some conclusions from the results of your experiments.) Careful cropping can make your images stronger.

There’s an art to cropping; it can clarify and energize a majority of images and even substantially modify the content of a few. At one time or another, most photographers adopt this practice – some elevate it to an art.

With Lightroom, Adobe Camera Raw, and Photoshop you can non-destructively crop your images so that pixels are hidden rather than eliminated. This is now the default behavior of these softwares. Later, if you wish to change the crop of an image you can reuse the Crop tool to reclaim these hidden pixels and make modifications without having to reprocess the original Raw file they were derived from.

Few photographers explore distorting their images to change aspect ratio. In large part, this is because distortion is a practice so new that not enough time has elapsed for it to become a habitual part of our tradition. In some cases, the practice of distortion is discouraged; it is not appropriate for the creation of forensic or documentary images. In a few cases, it is encouraged; many portrait photographers squeeze their images horizontally making their subjects look thinner, a transformation as little as 5-10% is often undetectable to the casual observer but nonetheless highly flattering to the subject, some think it takes off the ten pounds the camera adds on. Whether you are influenced by the force of habit or respect for tradition, remember that both lead to learned behaviors, which can be modified. Distortion offers extraordinary expressive opportunities. You owe it to yourself and your images to explore this option. Whether you choose to do this often or infrequently, a little or a lot, is something only you and time can tell.


Insights Members can login to read the full article.
Email:
or Sign up

4 Ways To Divide Your Images’ Frames Expressively

Dividing The Frame

The four most important lines of any image are the ones that are often least recognized consciously – the frame.  Second only to these are the lines that divide the frame, creating frames within the frame. Becoming more aware of how the frame can be used and how it can be divided will help you make more successful compositions.

There are many ways the frame can be divided. You can divide the frame horizontally, vertically, or diagonally; in each case the layers included define the virtual space presented. Different areas in an image can be divided differently. You can divide the frame (or a frame within the frame) multiple times; the more times the frame is divided the more packed and dynamic it becomes, progressively growing more design-oriented and finally being reduced to pure texture. Each operation has significant consequences.

One of the most significant results of dividing the frame is the creation of specific proportions. (The combination of the individual aspect ratios of each element creates a new unified aspect ratio.) Much has been made of the ‘rule of thirds’. Dividing the frame into three parts (left/center/right or up/middle/down) is a simple and often useful strategy for making images more directed, by prioritizing one element over another, and dynamic, through imbalance. Too little has been made of other ratios. What of fourths, fifths, sixths, sevenths, or eighths? No musician would be content to only divide an octave into halves and thirds. Every proportion produces particular effects, which are further modified by placement (high/low or left/right) and content. Rather than a rule to be adhered to, proportion is a force to be explored expressively.

When it comes to controlling the division of the frame in your images, you have more options available to you than you might think. You can crop, distort, retouch, or composite.

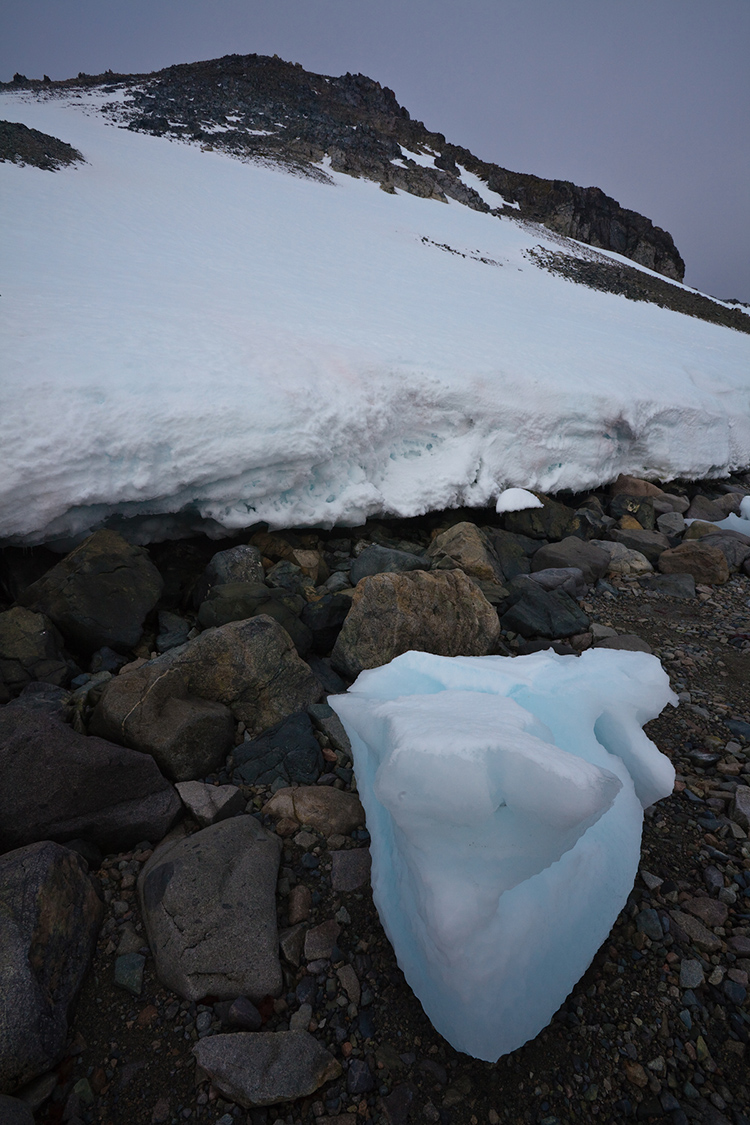
Before and after cropping

Crop

Cropping, either through placing the frame during exposure or by eliminating framed information during post-processing, which changes the aspect ratio, has been the most traditional way of dividing the frame.

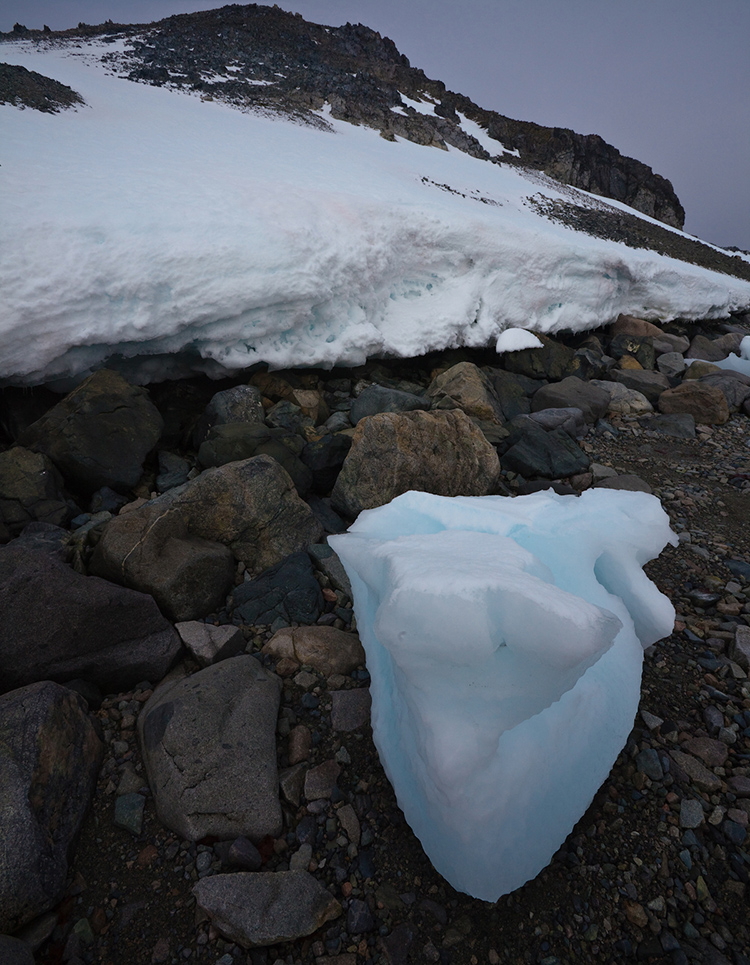
Before and after distortion


Insights Members can login to read the full article.
Email:
or Sign up

Creative Composition

Download your free Preview now!


Use these compositional strategies to strengthen your unique style.


Tools Not Rules | Coming

How To Uncover The Soul Of Personal Composition | Coming

Repertoire | Coming

Use Gestalt Psychology To Make Stronger Compositions

Abstraction

3 Great Books On Abstraction

Why Defocussing Your Images Will Help You See Them Better


How To Use An Image’s Frame Effectively & Expressively

How To Control The Proportion Of Your Images’ Frames Expressively

How To Think Outside Your Photographs’ Frames – It’s Not Just For Panoramas

4 Ways To Divide Your Images’ Frames Expressively


3 Ways To Crop Your Images – Crop, Distort, Retouch

2 Ways To Crop Non-Destructively – See What You’re Missing

7 Tips To Help You Crop Your Photographs Better

4 Alternatives To Cropping Your Photographs


5 Powerful Ways You Can Use Space In Your Images

Point, Line, Shape, Plane, Volume  | Coming

Simplicity / Complexity | Coming

Pattern | Coming

Accent / Counterpoint | Coming

Balance / Imbalance | Coming

Flow | Coming

Proportion | Coming

Number | Coming

Position | Coming

Scale | Coming

Alignment | Coming

Perspective | Coming


Sign up for Insights for news of new content!