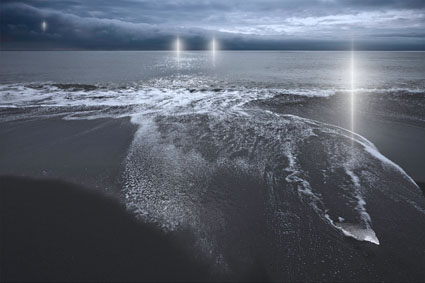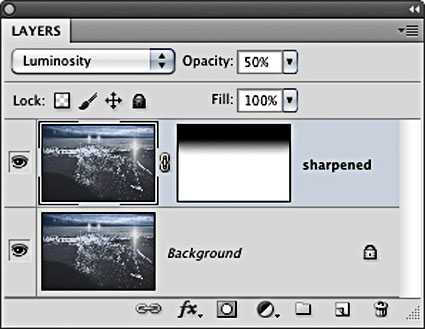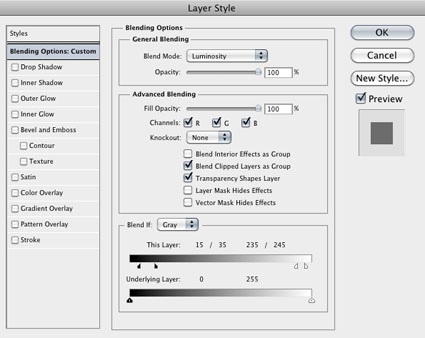
High Pass Sharpening

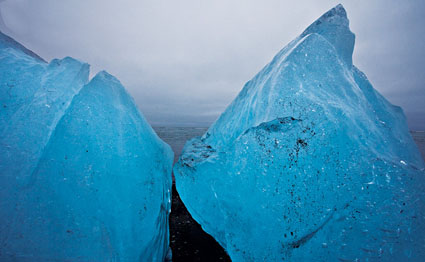
No High Pass sharpening

Low Radius High Pass sharpening

High Radius High Pass sharpening

There are three methods of sharpening in Photoshop that we should all be aware of: Luminance, Edge and High Pass sharpening. In this order, the three methods become progressively more complex and go to greater lengths to reduce the accentuation of noise.


Insights Members can login to read the full article.
Email:
or Sign up

Detail Frequency

High frequency detail

Medium frequency detail

Low frequency detail

Frequency is a term that’s being used more and more. That’s because new tools offer you more control over frequency than ever before. Noise reduction, sharpening, and HDR all offer unprecedented control over the look and feel of detail in our images. Frequency is used to describe the amount of detail packed into a given area of an image. This is measured by the amount of tonal variation between rows or columns of pixels. Imagine measuring an image with a line that passes across it (horizontally from left to right or vertically from top to bottom). The mean or average tonal value along lines can be charted and then compared to values from other measurement lines, especially those nearest to each other.


Insights Members can login to read the full article.
Email:
or Sign up

Capture Sharpening


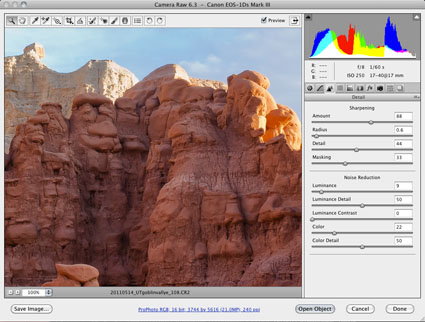
Optimal image sharpening is best done in three stages— capture (do it during RAW conversion), creative (do it in Photoshop) and output (automate it).
Capture sharpening benefits all images. It compensates for inherent deficiencies in optical and capture systems. All lenses and sensors have specific characteristics and deficiencies. They don't all have the same characteristics or deficiencies.
To speed your workflow, default settings for a best starting point for capture sharpening can be determined for all images created with the same lens/chip combination and saved for subsequent use. To optimally sharpen an image, you'll need to modify these settings to factor in additional considerations—variances in noise (ISO, exposure duration, temperature), noise-reduction settings and the frequencies of detail (low/smooth to high/fine texture) in an image.


Insights Members can login to read the full article.
Email:
or Sign up

Adobe’s Lens Profile Corrections


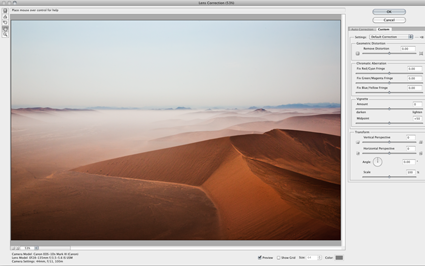
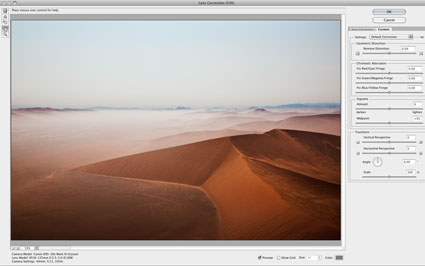
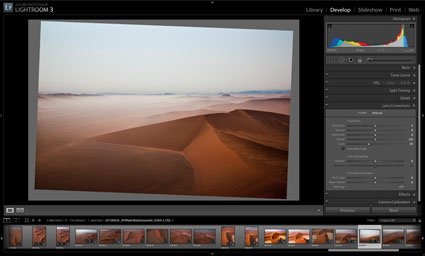
Adobe’s lens profile corrections are simply amazing. Lens Corrections automate correction of standard lens distortions, including geometric distortion, chromatic aberration, and vignette. In addition to correcting lens distortions, this feature can also be used to adjust perspective and rotation.
 
Adobe provides support for a growing list of camera manufacturers, camera models, and lenses: Canon, Nikon, Pentax, Samsung, Schneider, Sigma, Sony, Tamron, and Zeiss.
Adobe Lens Profile Creator
If Adobe doesn’t supply a lens profile for your particular lens you have three choices.
First, you may be able to access a lens profile created by another user on the Adobe Lens Profile Creator forum. Find and share lens profiles at Adobe labs. Of course, these lens profiles will only be as good as the creators were diligent about creating them.
Second, you can visually adjust the parameters of an existing lens profile and save the new settings under a new name for future use. There’s plenty of room for user error with this method but it’s more efficient than creating manual corrections from scratch. Expect to check the results frequently when you apply these settings to different types of images.
Third, you can create your own custom lens profile with the free Adobe Lens Profile Creator utility. Download the Adobe Lens Profile Creator at Adobe Labs.Adobe Lens Profile Creator is a utility designed for photographers who want to create custom lens profiles for their own lenses. The process of creating a custom lens profile for your lens involves capturing a series of images of a printed checkerboard pattern with your specific camera and lens, converting that set of raw images into Digital Negative (DNG) file format (using the Camera Raw plug-in, Lightroom, or the free Adobe DNG Converter), and importing the raw DNG images (or JPEG/TIFF images when creating lens profiles for a non-raw workflow) into the Adobe Lens Profile Creator to generate a custom lens profile. If you create new lens profiles, you can share them with the rest of the user community on the Adobe Lens Profile Creator forums, publishing them directly from inside the Lens Profile Creator. These profiles will then be available via new versions of the Adobe Lens Profile Downloader. This is an extended and complex process few photographers will want to go through, but for those using unsupported cameras and lenses worth the time and effort in the long run.
Using Adobe’s Lens Profile Corrections
You can access Adobe’s Lens Corrections in three locations; Adobe Camera Raw, Lightroom 3, or Photoshop CS5’s Lens Correction filter. (Lens profile corrections were first introduced in Lightroom 3. To get Lens Profile Corrections in Adobe Camera Raw CS5, you need to download a version that has been updated after the release of Lightroom 3. You can download the latest free update at adobe.com.
It’s far less destructive to make these types of adjustments to Raw files during conversion rather than after conversion. It’s also more flexible. (Use a smart object and reaccess the controls any time by simply by double clicking the smart object.) However, if you want to apply Lens Corrections within Photoshop, after a file has been rasterized, you can use CS5’s updated Lens Correction filter.
In ACR and Lightroom, you’ll find two tabs under Lens Corrections; Profile and Manual.
Under Profile, click Enable Lens Profile Corrections to activate this feature. Using the EXIF data in your Raw file, the software will automatically select the Make (of your camera), Model (of your lens), and the Profile (for that lens). You can use the supplied lens profiles, download a custom profile made by another user, or create your own (manually or with Adobe’s Lens Profile Creator).
Checking Enable Lens Profile Corrections will also allow you to access three sliders –  Distortion, Chromatic Aberration, and Vignetting – for manually fine tuning the results. If you like the results of one correction but not another, you can decrease or increase the effects in one or more of the three fields.
Under Manual, you’ll find controls for visually creating your own lens profile corrections …
Read more on Digital Photo Pro.
Read more in my online lessons.
Learn more in my digital photography and digital printing workshops.

Blend It Out


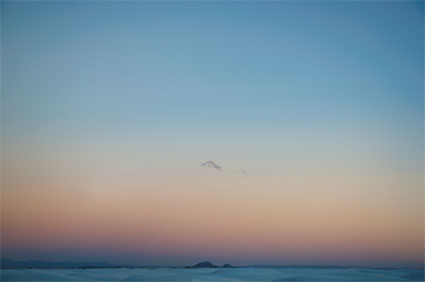
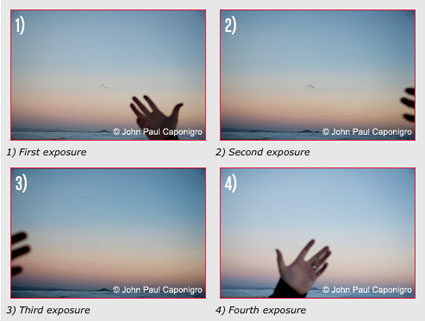
It’s a perfect shot! If only those unwanted moving objects (UMOs, i.e., a person or a crowd) in the scene would disappear. As long as the unwanted elements in your frame move, even just a little, you can make them disappear from your image by taking two or more shots and using Photoshop’s layering and blending capabilities.
You don’t have to retouch your image. Blending is different than retouching. The unwanted elements aren’t covered over with new information by hiding them with replacement information similar to the surround, either from the same source or another. With blends, the information behind the moving subject is revealed. How? It’s contained in the other shot(s).
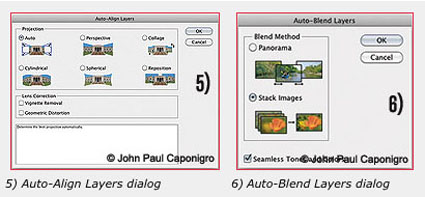
You even can do this with exposures that are made with slightly different angles of rotation or framing, so you can use this technique with handheld exposures, not just those made with a tripod. Camera motion may make manual registration difficult, but Photoshop automatically will align and, in some cases, distort the separate exposures so that they register precisely …
Read more at Digital Photo Pro.
Learn more in my digital photography ebooks.
Learn more in my digital photography workshops.

Crop or Retouch ?


As visual communicators, we’re responsible for everything that’s in the frame; we’re also responsible for everything that’s not in the frame. Deciding what’s in the frame and what’s out is a critical decision that can make or break an image. Here are two essential framing strategies.
1.?Use the frame to eliminate distracting information around a subject.
Take extra care with image information that touches the frame, as it will draw extra attention. Do this with significant compositional elements.
2.?Eliminate space around a subject to focus a viewer’s attention.
A lot of space between the subject and the frame can be used to call on psychological associations with space, such as freedom or isolation. Some space between the subject and the frame can give the appearance of the subject resting gracefully within the frame. Touching the subject with the frame strongly focuses the attention of the viewer and may seem claustrophobic. Cropping the subject with the frame can focus the attention of the viewer on specific aspects of the subject and/or give an image a tense quality, evoking evasion and incompleteness—this often seems accidental if less than half the subject is revealed.
There’s more than one way to apply these strategies. While cropping techniques are simple to practice, the reasons for their application and the choices made about how to apply them, as well as the final effects, may be exceptionally complex. You have two choices ..
1. Reposition the frame before exposure.
2. Contract the position of the borders of an image after exposure
If you plan to retouch, you’ll frame and crop differently …
Read more at Digital Photo Pro.
Find more digital photography techniques here.
Learn more in my digital photography worskhops.

Reduce Color Noise With Photoshop


It’s challenging to reduce the luminance (light and dark) component of noise without compromising image sharpness; often it requires a careful application of specialized software.

However, you can easily reduce the color component of noise using Photoshop.

Here’s how.

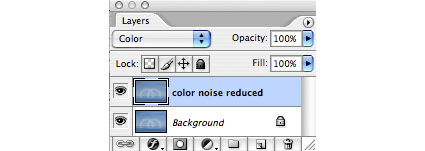
1    Duplicate the Background layer and turn the duplicate layer’s blend mode to Color.

2    Blur the layer (Filter: Blur: Gaussian Blur).

Be careful not to use the blur filter too aggressively. If contours exhibit reduced saturation, use a lower filtration
Using this technique, only the color of an image will be blurred, not its luminance; image sharpness will not be compromised. Luminance noise will persist; other methods are required to remove it.

This industrial strength technique is most useful when dealing with serious color noise when a Raw converter’s features can’t go far enough, such as the larger areas of color noise found in some images from Bayer pattern demosaicing.

Reduce Noise With Dark Slides


Some noise is random; some noise is fixed. Hot-pixel noise is fixed. What are “hot pixels”? Photosites on digital sensors that generate brighter information faster than their neighbors. Hot pixels get brighter at higher ISOs, with longer exposures, and in warmer temperatures. You can map where hot pixels are and exactly how bright they get under specific conditions with a dark slide. Then you can use a dark slide to drop out fixed “hot-pixel” noise with a simple postprocessing technique in Photoshop.
To make a dark slide, simply make a separate exposure made at the same ISO, exposure time and temperature as the image you intend to use it with. Exposure of what? Darkness. Leave your lens cap on.
To use a dark slide in Photoshop, open the dark slide and the image you’d like to use it with and drag and drop the dark slide into that image file, holding the Shift key to make sure it’s precisely registered (wait to crop or rotate an image until after this is accomplished). Change the blend mode of the dark-slide layer to Difference and watch the hot-pixel noise vanish.
Learn more about making and using dark slides on Digital Photo Pro.
Learn more about noise here.
Learn more in my digital printing workshops.

Reduce Noise With Multiple Shots


Got noise in one exposure? Make a bunch of exposures and watch the noise disappear.
You can reduce noise in an image by combining multiple exposures of the same composition in Photoshop. Photoshop can search for the differences between the separate exposures and then blend them, keeping what stays the same and eliminating what changes. Random noise between separate exposures of the same composition will be substantially, even dramatically, reduced or disappear altogether. (This technique won’t eliminate fixed noise, hot pixels, or column and row noise. There are other techniques for that, like using dark slides.)
You’ll find having this option will greatly reduce any reluctance you have toward using high ISOs. This means two things. You’ll be able to make images in lighting situations you thought you couldn’t, and you’ll be able to make handheld exposures in conditions you ordinarily wouldn’t be able to without severely compromising quality.
So how do you do this? Use the following steps.
1. Shoot multiple exposures.
Try to minimize camera motion as much as possible. It’s not necessary to use a tripod, but it’s helpful2
2. In Photoshop, go to File > Scripts > Load Files into Stack.
3. Click Browse and select the exposures to be used in the Stack and check Attempt to Automatically Align Source Images and Create Smart Object after Loading Layers.
This will create a single Smart Object from the multiple exposures. Double-clicking on this Smart Object will allow you to see the layers separately.
4. Go to Layer > Smart Objects > Image Stack Mode > Median to blend the separate exposures.
You’ll see that the noise is re-duced substantially.
5. Optionally, compare Image Stack Mode > Mean.
This works best for exposures containing no movement.
Read more about this technique at Digital Photo Pro.
Learn more about noise here.
Learn more in my digital printing workshops.