How To Achieve Optimum Exposure

Download your free copy now!


Achieve optimum exposures.


Use The Exposure Triangle Creatively | Coming

Setting Your Digital Camera’s File Format

Setting Your Digital Camera’s Color Space 

Using Histograms

Evaluating Histograms 

8 Essentials To Achieve Perfectly Focused Exposures

13 Essential Tips For Low Light & Night Photography

Lens Profiles 

Creating Camera Profiles

Test Camera – Dust | Coming

Test Camera – ISO  | Coming

Test Lens – Sharpest Aperture | Coming 

Get Better Exposures Using Hyper-Focal Distance | Coming

How To Hold Your Camera Steady | Coming

What To Do When You Don’t Have A Tripod | Coming

Shoot In Bursts To Reduce Camera Shake | Coming

Use Camera Motion Creatively | Coming

Crop, Distort Or Retouch ? 


Multi-Shot Techniques


Multi-Shot – Extending Format – Panorama

Multi-Shot – Extending Depth Of Field – Focus Stacking

Multi-Shot – Extending Resolution – 3 Ways Increase Resolution

Multi-Shot – Extending Bit Depth – 32 Bit Tone Mapping

Multi-Shot – Extending Dynamic Range – HDR

Multi-Shot – Remove Or Multiply Moving Objects


Sign up for Insights for news of new content!

Crop, Distort, Or Retouch ?

1_top

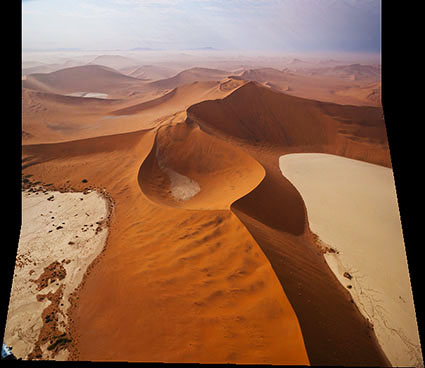
Top frame of a panoramic stitch
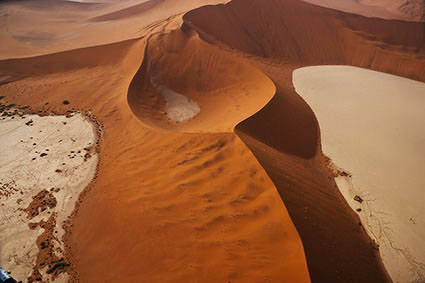
2_bottom

Bottom frame of a panoramic stitch

3_distortedframe

Panoramic stitch

5_filled

Panoramic stitch distorted

4_cropped

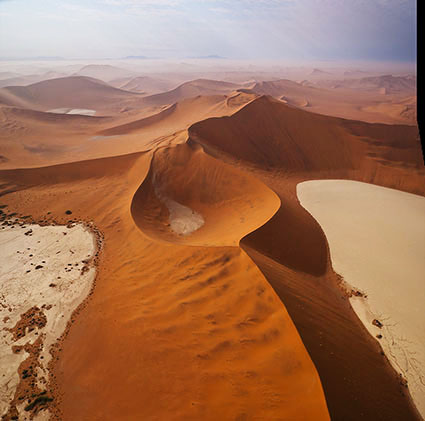
Panoramic stitch cropped

5_filled

Panoramic stitch cropped and retouched
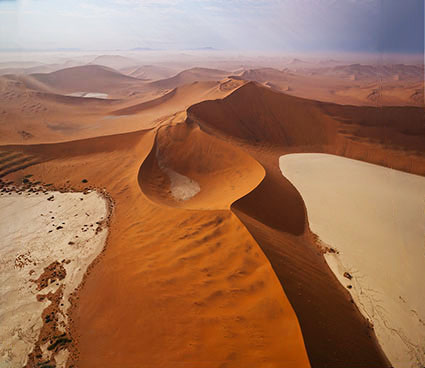
6_filled_large area

Panoramic stitch retouched

The strategies above are not limited to panoramic stitches.

We’re responsible for everything that’s in the frame. We’re also responsible for everything that’s not in the frame. Deciding what’s in the frame and what’s out is a critical decision that can make or break an image.

Here are two essential framing strategies.

One. Use the frame to eliminate distracting information around a subject(s). Take extra care with image information that touches the frame, as it will draw extra attention. Do this with significant compositional elements.

Two. Eliminate excess space around a subject(s) to focus the attention of the viewer. A lot of surround space between the subject and the frame can be used to use to call on psychological associations with space, such as freedom or isolation. Some space between the subject and the frame can give the appearance of the subject resting gracefully within the frame. Touching the subject with the frame strongly focuses the attention of the viewer and may seem claustrophobic. Cropping the subject with the frame can focus the attention of the viewer on specific aspects of the subject and/or give an image a tense quality, evoking evasion and incompleteness – this often seems accidental if less than half the subject is revealed.
Cropping is extremely simple to practice. (While cropping techniques are simple to practice, the reasons for their application and the choices made about how to apply them as well as the final effects may be exceptionally complex.)

Here are two cropping choices.

One. Reposition the frame before exposure.

Two. Contract the position of one or more of the borders of an image after exposure, generally with software.
Because distorting an image during post-processing, by expanding or contracting one or more sides or corners, is a relatively new possibility, most people don’t think of exercising this option. Ironically, anyone who uses lens profiles distorts their images in post-processing to correct lens distortion. Consider this a creative supplement to and extension of that practice. While cropping potentially changes the aspect ratio of an image, distortion does not.

Here are two distortion choices.


One.
 Use Photoshop’s Edit > Transform to distort an image. Push the areas you wish to crop outside the frame. Move one or more sides by pulling the point in the middle.

Two. Use Photoshop’s Edit > Transform to distort an image. Push the areas you wish to crop outside the frame. Move one or more corners by pulling the corner point while holding the Command key.
Retouching used to be complex. Today it can be simple. Never before, has retouching been so easy to do or the results so sophisticated. (To be certain, not all retouching is simple. You can make retouching as simple or as complex as you choose to make it. Retouching is an art that continues to be elevated on a daily basis. But what once required specialized tools and a Herculean effort can now be done with standard software in seconds.)

Here are four retouching choices.

One. There’s cloning. Simply use the Clone Stamp Tool set to Current and Below on a new blank layer. (This will ensure that any retouching can be removed or redone at a later date.) Hold the Option/Alt key and click to sample information to copy, then move the cursor to the area you’d like to copy the information to and click and drag. Repeat until a desired effect is achieved. Typically, donor information is drawn from the same document but you can also clone from one image or file to another.

Two. There’s healing. Use the Healing Brush Tool as you would the Clone Stamp tool. Or, use the Spot Healing Brush, which will automatically select the information sampled for you and can be used within a selection to contain the results. Or, finally the Patch Tool, which will copy information selected with it from or to (depending on whether you check Source or Destination) wherever you drag it to. Healing can’t be done on a transparent layer, so work on a copy of the layer you’d like to retouch. Click on the layer and select Duplicate Layer from the Layer menu or palette. If you need to heal image material contained on multiple layers, create a new composite layer by holding the Option/Alt key select Merge Visible from the Layer palette.

Three. There’s copying and pasting. Just select a region of an image with any selection tool. Copy it. (Edit: Copy) Paste it. (Edit: Paste) Then move the resulting layer into play and mask as needed. (Click the mask icon at the bottom of the layer palette and use a black brush at varying opacities to hide the information.)

Four. There’s filling. Select a region. Fill with Content Aware fill. (Edit: Fill and select Content Aware from the drop down menu in the dialog.) (This feature was introduced with Photoshop CS5.) Photoshop will automatically create an appropriate random texture in the selected area. Like healing, this feature won’t work on transparent layers/areas so, again, use it on a new merged layer.

Software routines such as lens correction and panoramic stitching may distort the frame, subtly but sometimes significantly distorting a composition, and requiring additional measures to restore a rectangular frame. When solving this challenge, you may get better results if you don’t contract the frame as aggressively as you once did and retouch rather than crop to fill in the gap and/or eliminate distracting elements.

Your choice of practices or their application may or may not change the nature of the artifact that you finally create. And, whether the means you choose is appropriate for your objective, the practices you adopt may or may not be accepted by the community of artists you choose to work within – some are more permissive than others. Nevertheless, you should explore your options. You simply won’t know whether it’s for you until you try it for yourself.

Learning to think within the frame is an essential skill for creating strong photographic compositions. But today, learning to think within the frame is only the beginning. You can learn to think outside the frame as well.

It’s a new mindset. Once it becomes second nature, you’ll not only find you have more options for visual problem solving but you’ll also find your visual horizons will have expanded – significantly.

Learn to see in new ways. Combine them with old ways. You’ll find you’ll make images that you once passed by, leaving them unmade or even unnoticed. As a result, you’ll make many more successful images.

Read more in my Exposure lessons.
Learn more in my digital photography and digital printing workshops.

How To Set Your Camera’s Auto-Bracketing

canon_autobracket_back_425

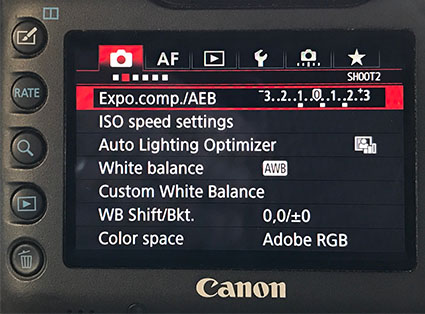
back LCD menu

canon_autobracket_top_425

top LCD menu

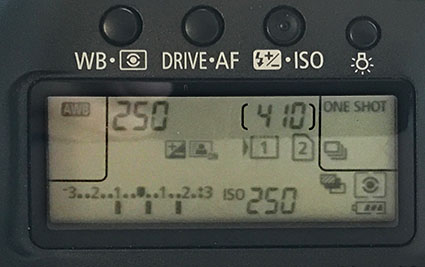
It’s easy to set your camera to auto-bracket. The hardest part of this process is navigating a camera manufacturer’s menu. Once you find it – and do it several times – you won’t forget it.

Here’s how to do it on current Canon cameras – the steps are similar for other cameras but the buttons and menus vary.

First, set the number of frames made in each bracketed sequence. Press the Menu button. Use the main command dial (top) to cycle through the menus on the LCD screen (back) Go to the 4th tab (small camera) > 1st list and then the use the jog wheel (back) to select the 5th item. Press the set button to select it. Use the jog wheel to select the number of shots and press the set button once again. While 3 is the most commonly used, it’s not unusual to use 5 or even 7. Because 3 is the most commonly used number, it’s likely that once you set this, you’ll reset it infrequently.


Insights Members can login to read the full article.
Email:
or Sign up

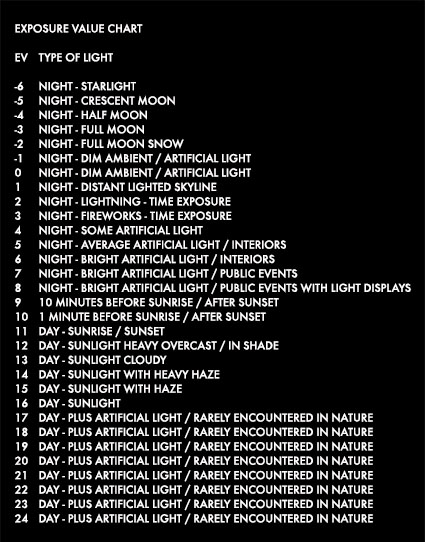
What Is Exposure Value ?

exposurevaluechart
In photography, exposure value (EV0 is a number that represents a quantity of light. Each increase or decrease in number indicates a doubling or halving in the amount of light; often referred to a stop of light.


Insights Members can login to read the full article.
Email:
or Sign up

14 Essential Tips For Night Photography

lead

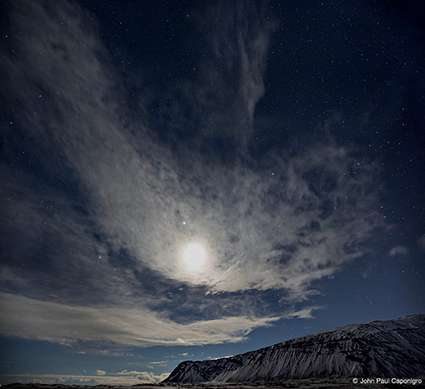
The high ISO capability of today's new camera models is a true game changer. It opens up a range of light previously unexplored in the history of photography. Fearing noise, many people unnecessarily limit themselves to the lowest ISO setting and never explore this incredible range of light with all of its unique qualities—and surprises. (Don't fear noise. Instead, read my series of articles.) Try night photography, and you'll quickly realize the camera eye now can show you more than the eye can see. There have been many times now when I make exposures just to see what's out there. Practice the art of night photography, and you'll learn to see in new ways.

What settings should you use when making exposures in low light or at night? Use a tripod and cable release, set ISO to 800 (or higher), open up to ƒ/5.6 or wider, focus at infinity, and keep exposures below 20 seconds. While this is a good starting point, that's all it is, as you'll need to modify settings based on the specific light(s) in a location, the equipment you're using and the effect you want to produce. Instead, ask yourself what concerns do you need to be mindful of, and what points of control do you have when making low-light or night photographs? Develop your sensitivity to these factors, and you'll know why and when to improvise and even what more you can explore. These tips will give you a solid foundation from which to begin your explorations in low-light and night photography.


Insights Members can login to read the full article.
Email:
or Sign up

3 Ways To Get More Resolution From Your Photographs


There are several ways to get more resolution out of your photographs. Remember these three words: upsample, stack and stitch. Which method you choose will depend on how you shoot a scene. Once you know these techniques, you can choose an exposure and processing method that's best for a given situation.

Upsample
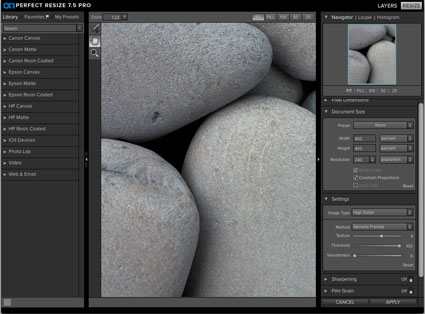
If you have only one exposure, your options are limited to upsampling or using software to create more pixels. While the information rendered by software is never as rich and sharp as information that's optically captured, it nonetheless can be both pleasing and convincing. Upsampling is the best method for images containing moving objects, as other methods require multiple exposures and may produce motion artifacts.

How far can you go? I could give you an overly simple answer: up to 300%. But the true answer is, it depends. Knowing what it depends on will help you choose a method, modify a routine and evaluate results to get optimal results for individual images. How far you can upsample an original depends on many factors found in the source, the destination and the statement you're making.


Insights Members can login to read the full article.
Email:
or Sign up

Extending Format – It’s For More Than Panoramic Formats


No one needs to learn to “think outside the box” more than photographers. The frame, literally a box, is often our greatest ally. Learning to see photographically is, in part, learning to see within the limits of this box and use them creatively. But there are times when this limits our vision unnecessarily. Once we’ve learned to see within the box, we then also need to learn to see outside the box—and start extending the frame with multiple exposures to perfect select compositions. Extending format techniques aren’t just for panoramic image formats. They can be used to give you the extra inch that can make all the difference in the world for your compositions …
Read more on Digital Photo Pro.
Learn more in my digital photography and digital printing workshops.

Extend Depth Of Field With Focus Stacking


How deep would you like your depth of field? The choice is yours. Today, there are virtually no limits. You can extend depth of field beyond the physical limitations of any lens/camera system with multishot exposure practices and software that composites multiple exposures.


Insights Members can login to read the full article.
Email:
or Sign up

8 Essentials To Achieve Perfectly Focused Exposures

Use these 8 essential practices to achieve optimally focused exposures.

1         Focus
Set focus in an image intentionally; placing focus in an image unintentionally is usually a deal breaker. Switch autofocus mode to AI Servo only for subjects that are moving predictably. Use manual focus for times when auto focus is likely to fail you, typically scenes with low contrast, including but not limited to low light and night photography.

2         Eliminate Camera Blur
Use a tripod whenever practical. Lacking a tripod, use a nearby prop to stabilize the camera during exposure. When shooting hand, held brace your body in a stable position. Whenever appropriate use the minimum shutter speed you can hand hold without motion blur; for most people this is 1 second divided by the focal length - i.e. 50mm + 1/50th of a second. Shoot in bursts of three or more; nine times out of ten one exposure will be sharper than the others.

3         Use Sharp Lenses
         Higher quality lenses not only deliver sharper images, they do so from center to edge and with minimal chromatic aberration (caused by a lenses inability to focus all wavelengths of light on the same plane). Compare lens MTF charts to see how sharp a lens is and when it is sharpest.

4         Use The Sharpest Aperture
The sharpest aperture, generally f8 or f11, varies from lens to lens. Test your lens to find out which aperture is sharpest. The smallest aperture (f22 or equivalent) delivers the greatest depth of field (acceptable lack of focus) but slightly compromises sharpness in image areas that are perfectly focused. It’s a trade off; make it only when it’s beneficial.


Insights Members can login to read the full article.
Email:
or Sign up

13 Essential Tips For Low Light & Night Photography

What settings should you use when making exposures in low light or at night? Use a tripod and cable release, set ISO to 800 (or higher), open up f5.6 or wider, focus at infinity and keep exposures below 20 seconds. While this is a good starting point, that’s all it is, as you’ll need to modify settings based on the specific light(s) in a location, the equipment you’re using, and the effect you want to produce. Instead, ask, “What concerns do I need to be mindful of and what points of control do I have when making low light or night photographs?” Develop your sensitivity to these factors and you’ll know why and when to improvise and even what more you can explore. These twelve tips will give you a solid foundation from which to begin your explorations in low light and night photography.


Insights Members can login to read the full article.
Email:
or Sign up