Digital Exposure


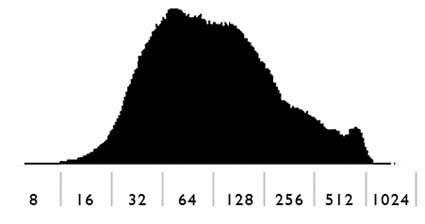
The histogram on the back of your camera is generated by a processed JPEG version of your Raw files. Your Raw files are unprocessed / uncooked, high resolution, uncompressed, wide-gamut, 12-14 bit, and so have more information in them, particularly in the highlights. This means the histogram can be misleading. What looks good is usually underexposed. Weight your histograms high. How high? At what point do highlights clip? It’s uncertain. Practically, it depends on the scene; higher if the scene doesn’t contain delicate highlight detail; less high if it does. To be safe, bracket, one slightly high and one very high. You can even program your DSLR to do this automatically for you. Here are four histograms.

1   Underexposed
2   A good exposure
3   A better exposure
4   Overexposed
Learn this and other techniques in my workshops.

How The Camera Sees


Like the human eye, film has a nonlinear response to light. For film, we adjust the EV to fit the amount and contrast ratio of the available light into the most useful area of its curve response. Using film, you expose generally, and when compromises need to be made, you favor shadows or highlights. Details lost at the point of capture are irrecoverable.


Insights Members can login to read the full article.
Email:
or Sign up

Ken Carl – Extreme Low Light Shooting


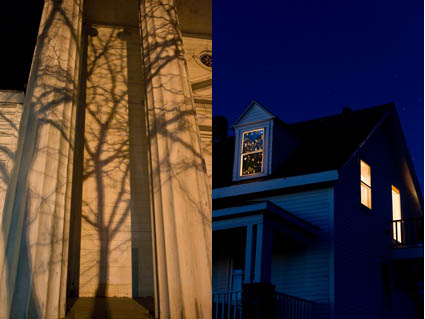
Ken Carl has attended every one of my Fall Foliage workshops. Over the years, he’s turned pro. Just when I think he’s done, he keeps coming back for more. After a long day of shooting past sunset at Pemaquid Point, Ken walked up the streets of Damariscotta while the rest of the group was being seated for dinner – and got some great shots. After dark? Hand held? ISO 8000? Really? And it’s actually useful, with surprisingly little noise by traditional standards. You’ve got to try it to believe it. The LCD on the back of the camera actually shows you more than you can see at that moment. Add a tripod to the equation and you’ll see even more. Today’s cameras can capture more than you can see at any one moment in time. With a little experimentation, you’ll find hours of new possibilities at the beginning and ends of the day. This weekend we tested shooting in many extreme lighting situations. Participants are seeing in new ways. I’m seeing in new ways. I recommend frequently testing new techniques to expand your repetoire and your vision.
Check out Ken Carl’s work here.
Check out my workshops here.

Test Exposure Time Onsite


Sometimes the camera eye sees very differently than our eyes. So, it’s really useful to try new experiments. Getting a preview on screen (back of the camera or portable camera on location) give you immediate feedback. Then you can put that newfound knowledge to use on the spot.
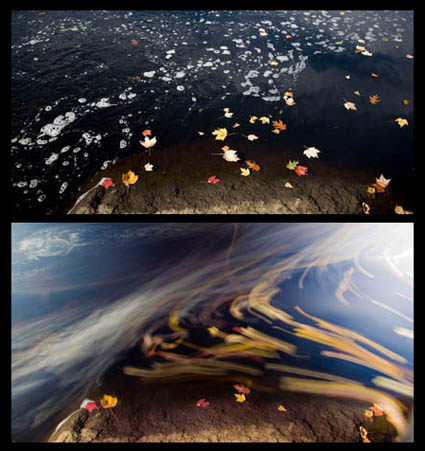
Today in my Fall Foliage workshop, I tested time for everyone. The same stream had many different rates of flow so what worked in one situation wasn’t optimal in another. Here, 1/250th of a second with is compared with 30 seconds. At a waterfall upstream motion wasn’t frozen until 1/1000 of a second and 4 seconds was best for streaking as after 8 seconds the waterfall began to turn vaporous rather than streak.
Check out my workshops here.