Creative Sharpening – Double Pass & Hybrid


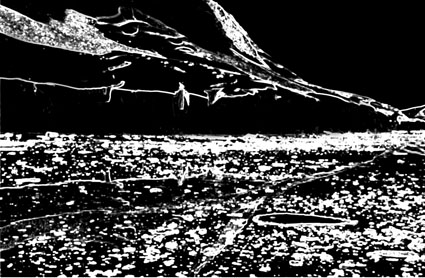
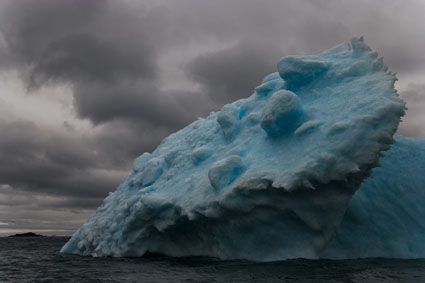
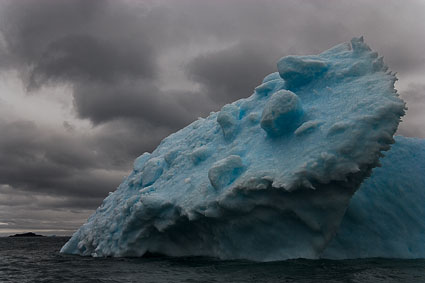
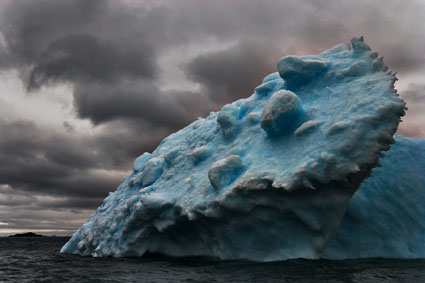
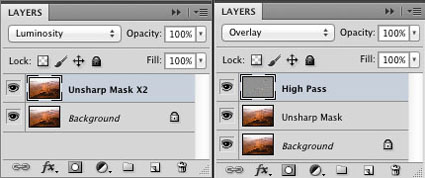
Different sharpening techniques make the world look different. A world of difference can be seen between the thin hard line of Unsharp Mask and the broad feathered line of High Pass Sharpening.Can you choose a combination of both? Yes, you can! You can choose the texture of one, the halo of another, and the line of yet another, applying them either globally or selectively. You can customize the look and feel of detail in any image or image area with astonishing precision and flexibility.


Insights Members can login to read the full article.
Email:
or Sign up

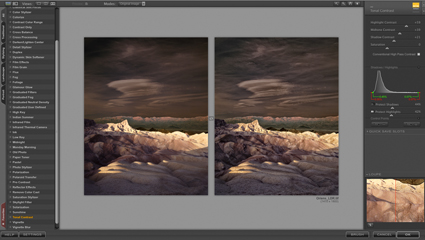
Creative Sharpening With NIK’s Viveza and ColorEfex Pro


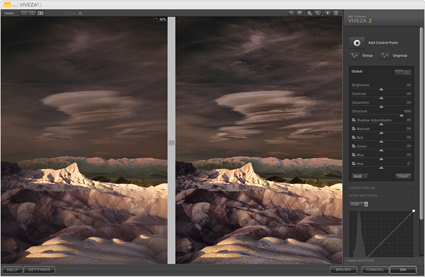
Both NIK’s Viveza and Color Efex Pro offer useful additions to a digital artist’s set of detail enhancement tools. Viveza provides Structure while Color Efex Pro provides Tonal Contrast. Consider them both useful variations of the types of effects you can produce with Photoshop’s High Pass filter. So what specifically are the visual differences?
Like Photoshop’s High Pass filter, Viveza’s Structure provides a single slider but offers more options with the inclusion of negative values for soft focus effects. In contrast to High Pass, Structure enhances contours with a line that is not as pronounced as Unsharp Mask (Structure is almost incapable of producing artificially hard contouring.) and thinner than High Pass (Structure can’t be used for enhancing planar contrast like high values of High Pass.). Structure accentuates texture somewhat, which can enhance noise as well as detail, but not as much as Unsharp Mask. When Structure is applied, luminosity contrast increases, more so in shadows than in highlights where very high values stop just short of compromising shadow detail. Think of Structure as occupying the visual territory that lies between Unsharp Mask and High Pass.


Insights Members can login to read the full article.
Email:
or Sign up

Output Sharpening


Image source, frequency of detail, subject, personal preference, output device, substrate or presentation device, and presentation size all play a role in sharpening.The art of sharpening gives you precise control over various image characteristics—contrast, saturation, contour (halo and line), texture and noise. It's best applied in three stages: capture, creative and output.

While there's an art to sharpening, which provides extraordinary creative freedoms, some aspects of sharpening are best automated, such as output sharpening.

Output sharpening is used to compensate for the softening of detail that a specific device produces. Ink on paper, whether applied with an offset press or an inkjet printer, is notably susceptible to this. When drops of ink hit paper, they deform on impact and spread more or less based on the absorption characteristics of the substrate. This is called dot gain; the dots gain size. Dot gain varies with the type of printer, ink and substrate used. It also can be impacted by environmental factors such as humidity. Output sharpening typically also factors in file resolution and the scale of the final product, which is used to determine an ideal viewing distance—though the actual viewing distance is usually variable.
Insights Members can login to read the full article.
Email:
or Sign up

7 Sharpening Artifacts To Avoid


If you know what to look for, you’ll know what path to choose and how far down it to go.
Identifying and developing a sensitivity for the artifacts digital sharpening produces will help you choose a sharpening method and what settings to use during any stage of your sharpening workflow.
You can easily see the artifacts digital sharpening produces by overdoing it.
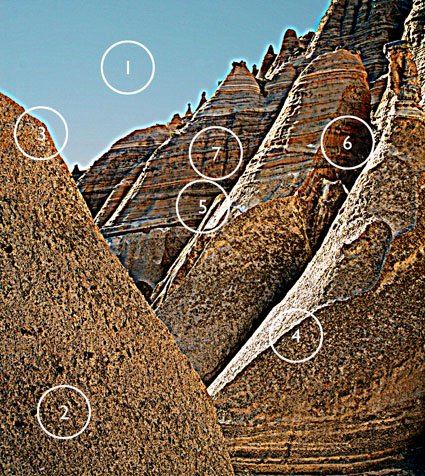
Here are the seven most common digital sharpening artifacts.
1         Noise
2         Exaggerated Texture
3         Visible Light Halos
4         Visible Dark Lines
5         Loss of Highlight Detail
6         Loss of Shadow Detail
7         Increased Saturation
Each of these artifacts can be reduced in one or more ways.
Here’s a list of options.


Insights Members can login to read the full article.
Email:
or Sign up

Creative Sharpening – Control Halo & Line Separately


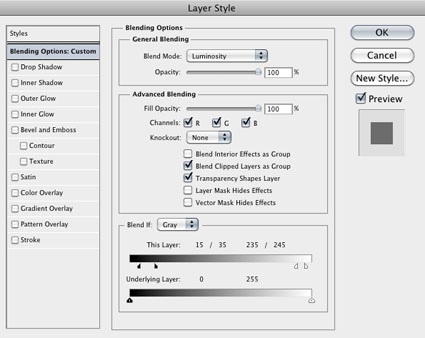
Digital sharpening produces its affects by accentuating contrast, both of texture and of contour. The accentuation of contrast along contours is produced by creating both a dark line and a light halo. While the filters used to sharpen images, such as Unsharp Mask or High Pass, don’t offer independent control of the light and dark components of a contour, you can control them separately using layers. It will take two layers to separate halo from line; one for the halo and one for the line. Filter the two layers differently to produce different thicknesses (Radius) and intensities (Amount) of halos/lines. Then, you can use the Blend If sliders of layers to specifically target either high or low values by moving either the shadows (black triangle) or highlights (white triangle) sliders of This Layer, making those values no longer visible. Some people like to set the Opacity of these two layers to 50% before filtration, so that they can conveniently readjust the intensity of the affect, moving the opacity slider up to make it stronger or down to make it weaker. If you do this too, remember that only the filter’s Radius setting can adjust the thickness of the contours it produces.


Insights Members can login to read the full article.
Email:
or Sign up

Target Image Contours With Edge Masks


Edge masks target only the contours in an image. (Think of edge masks in Photoshop as the creative sharpening equivalent to the Masking slider in ACR or Lightroom’s capture sharpening.) They keep smooth areas smooth, while accentuating the contrast/sharpness of contours. They can be particularly useful for images that contain moderate to significant amounts of noise. In many cases, they allow the use of more aggressive applications of sharpening effects. Edge masks can help you take all of the creative sharpening effects you design up a notch – or two.


Insights Members can login to read the full article.
Email:
or Sign up

High Pass Sharpening

No High Pass sharpening

Low Radius High Pass sharpening

High Radius High Pass sharpening

There are three methods of sharpening in Photoshop that we should all be aware of: Luminance, Edge and High Pass sharpening. In this order, the three methods become progressively more complex and go to greater lengths to reduce the accentuation of noise.


Insights Members can login to read the full article.
Email:
or Sign up

Sharpening With Layers


There are many reasons to use layers when sharpening your digital images.
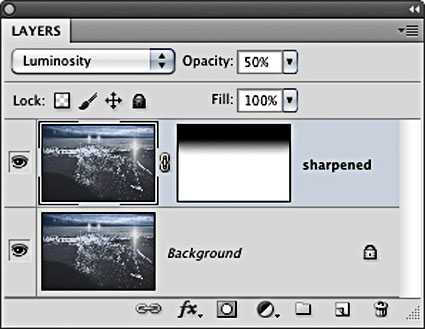
Layers can be used to eliminate saturation shifts. Change the Blend Mode of a sharpening layer from Normal to Luminosity. Color noise will be reduced this way.


Insights Members can login to read the full article.
Email:
or Sign up

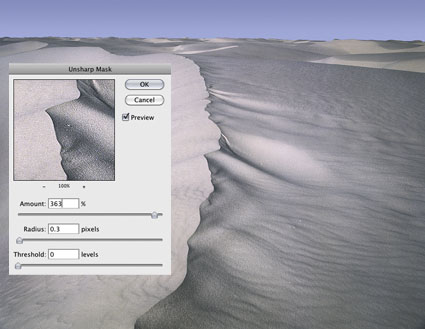
Unsharp Mask


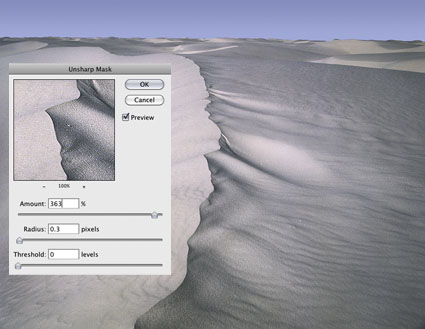
Precise sharpening can improve almost any image. It helps to know when to apply it, what type of sharpening to apply, how to apply it and where to apply it. Forget the filters Sharpen, Sharpen More and Sharpen Edges. They're just default settings of Unsharp Mask. Even Smart Sharpen offers few advantages over Unsharp Mask; it's particularly useful for compensating for trace, but not substantial, amounts of motion blur. My advice? Start with the classic and master it.
Why is a filter that makes images appear sharper called Unsharp Mask? In silver-halide-based photography, unsharp masks are made with out-of-focus negatives that are registered with an original positive image. During exposure, the blurring adds contrast around contours, making images appear sharper. Digital unsharp mask works the same way; it uses blurring algorithms to add contrast to contours, again making images appear sharper.


Insights Members can login to read the full article.
Email:
or Sign up

Detail Frequency

High frequency detail

Medium frequency detail

Low frequency detail

Frequency is a term that’s being used more and more. That’s because new tools offer you more control over frequency than ever before. Noise reduction, sharpening, and HDR all offer unprecedented control over the look and feel of detail in our images. Frequency is used to describe the amount of detail packed into a given area of an image. This is measured by the amount of tonal variation between rows or columns of pixels. Imagine measuring an image with a line that passes across it (horizontally from left to right or vertically from top to bottom). The mean or average tonal value along lines can be charted and then compared to values from other measurement lines, especially those nearest to each other.


Insights Members can login to read the full article.
Email:
or Sign up