9 New Awesome Mobile Apps From Adobe

AdobeApps2
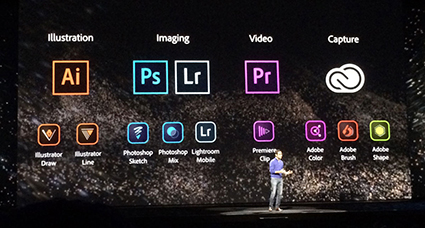
“Bring the power of desktop apps like Photoshop CC and Illustrator CC to your phone or tablet with all-new connected mobile apps. Capture colors and other inspiration, sketch and draw, and edit photos and videos — all on the go. Your Creative Profile lets you bring those assets into companion desktop and mobile apps, so you have everything you need to do your best work anywhere.”
Adobe just released 9 new mobile apps. Six of them are extensions of its major desktop apps. Photoshop Mix and Photoshop Sketch and Lightroom Mobile are for photographers; Illustrator Draw and Illustrator Line are for graphic artists; and Premiere Clip is for videographers. The other three allow you to capture content from the real world and quickly turn it into assets for use within the Creative Cloud; Adobe Brush and Adobe Color (formerly Kuler) and Adobe Shape.
My favorite? Adobe Illustrator Draw (formerly Ideas). I use it all the time!
Find out about these new Adobe Apps here.
Watch the demo for Adobe Photoshop Mix here.
Watch the demo for Adobe Lightroom Mobile here.
Find out about Adobe Photoshop Sketch here.
Watch the demo for Adobe Brush here.
Watch the demo for Adobe Illustrator Draw here.
Watch the demo for Adobe Illustrator Line here.
Watch the demo for Adobe Shape here.
Watch the demo for Adobe Color here.
Watch the demo for Adobe Voice here.
Watch the demo for Adobe Clip here.
Find out about Adobe Ink & Slide drawing tools.


New NIK’s HDR Efex Pro 2 – Save 15%


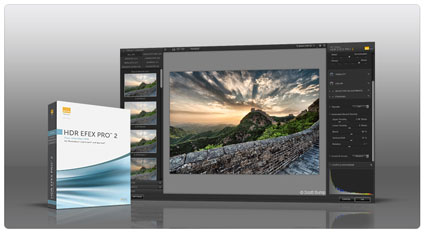
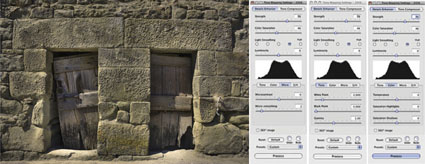
NIK recently announced a new version of their exceptional software for HDR imaging – NIK’s HDR Efex Pro 2. It’s the HDR solution with the best visual interface, one that helps you compare your options at a single glance.
Use the code JPCNIK to get a 15% discount on all NIK software
NAPP’s RC Concepcion (Check out his HDR book here.) demonstrates the latest version in this video.

New features include …
Improved Tone Mapping Engine – Develop superior results with better color rendering and improved natural styles
Interface, Interaction, and Workflow – Benefit from improvements to the merging interface, tone mapping and enhancement controls, visual presets, and more
Depth Control – Enjoy added depth and realism in images with the new and proprietary Depth control, which helps counteract the flattened look commonly associated with HDR images
Full GPU Processing and Multi-Core Optimization – Gain even faster performance with GPU processing that takes full advantage of the processors found on modern display adapters
Ghost Reduction – Improved ghost reduction algorithm ensures that artifacts created by moving objects are removed with a single click
Chromatic Aberration Reduction – Reduce color fringes around objects
Graduated Neutral Density Control – Access the full 32-bit depth of the merged image, providing a natural effect especially on images with a strong horizon line
Full White Balance Control – Take full advantage of the white balance in an image with a new Tint slider, which along with the Temperature slider, can be applied both globally as well as selectively using U Point technology
History Browser – Easily review adjustments and different HDR looks via the History Browser which records every enhancement used in an editing session
Extended Language Support – International users benefit by the addition of Brazilian Portuguese and Chinese (Simplified and Traditional) to a list of languages that includes English, French, Spanish, German, Italian, and Japanese
Find out about even more features here.
Learn more in my digital photography and digital printing workshops.

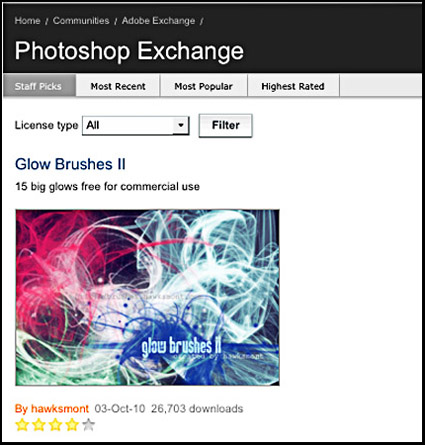
Photoshop Exchange


“Where do you go to access over 10,000 unique Photoshop presets, templates, tutorials, plug-ins and more? Visit Photoshop Exchange, the Adobe hosted website for customers who want to discover and share Photoshop content with each other. They recently crossed the 10,000th item milestone, adding 600 new submissions since January. The majority of the content is free, and those few paid pieces of content average about $4.
If you’re looking for inspiration, or just want to try out some new styles, effects or practically anything else that can be customized in Photoshop, you will find Actions (51% of Exchange’s content), followed by Styles (15%) and Brushes (10%), as well as shapes, tutorials and patterns, and many elaborate and useful Templates (.PSD files, ranging from Web components and complete site designs, brochures, flyers, 3D presentation graphics, print ads and the like), which can save you time and even help you explore how advanced users build complex and beautiful files.”

Visit Photoshop Exchange here.

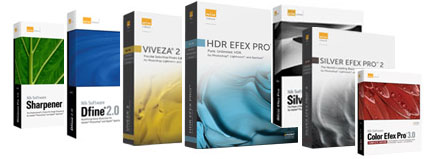
NIK Software Discount – 15% Off


Get %15 off all NIK software products with this code – JPCNIK.
HDR Efex Pro
Color Efex Pro
Silver Efex Pro
Sharpener Pro
Dfine
Viveza
Capture NX
NIK software is among the best of the best in the digital imaging industry.
Just look at all the awards it’s won.

It makes complicated tasks easy. How?
“Photoshop plug-ins take away some of the most labour-intensive photo manipulations and replace them with an easier to use “script”, or presets. Nik plug-ins go one step further and provide the user with a unique ‘U-Point’ technology, allowing for customisation of individual image parameters. And all presets can be further customized to each photographer’s taste.”
With so many great choices, where do you start? I recommend you look very closely at HDR Efex Pro (the most visual and intuitive HDR interface available) and at Tonal Contrast in Viveza or Structure in Sharpener Pro (Clarity or High Pass sharpening on steroids).
Find NIK Software products here.

Adobe CS5.5


Adobe has announced a mid-cycle upgrade to their entire Creative Suite.
This paid for upgrade (ships in 30 days) has minimal impact on Photoshop imaging but significantly impacts application uses for digital publishing, generating web content, and mobile devices.
Also announced are three iPad Apps – Adobe Color Lava, Eazel, and Nav (estimated release May).
Read Adobe’s press release here.
Read More

X-Rite i1Photo Pro


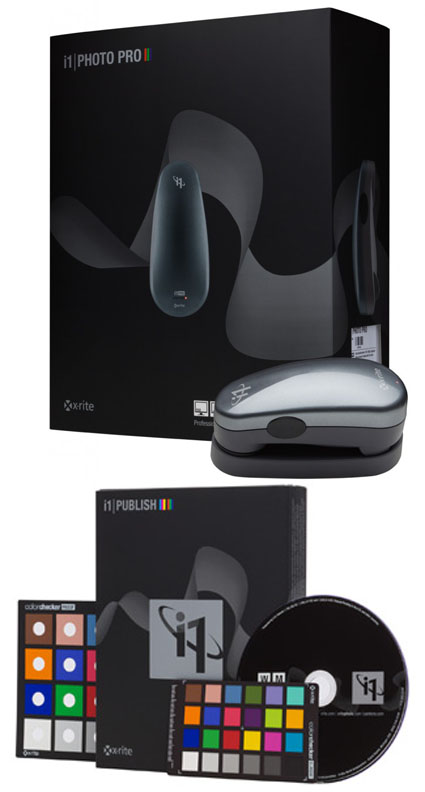
“The long awaited day is here!  X-Rite i1 Professional solutions, which includes the new i1Photo Pro, are now available. Each solution features the all-new i1Profiler software application designed to delivers superior color results!  i1Profiler is driven by a new color engine, sports a dual mode interface (basic and advanced) and new quality assurance features, plus so much more. The new i1Photo Pro was designed specifically for discerning photographers to attain the highest quality color results and color control throughout your complex digital photo workflow, at a very attractive price.
The new portfolio is comprised of three software/hardware/target bundles ­– i1Basic Pro, i1Photo Pro, i1Publish Pro – and i1Publish, a software/target solution. All four feature groundbreaking new i1Profiler software technology designed to accommodate all levels of proficiency and expertise, and provide the power and control needed to create the highest quality color profiles. The new PANTONE Color Manager color swatch bridging software,  ColorChecker Proof, a new ColorChecker target for direct viewing analysis against a printed target and ColorChecker camera calibration system are also featured.
Upgrade packages are available for those who have i1Pro devices as well as MonacoPROFILER 4 and ProfileMaker 5 users. Read more about the upgrade opportunities and review the features of i1Profiler software at www.xritephoto.com.”
The advances in software make every function more precise.
Printer profiling takes a major leap forward with easy to make light temperature and image specific profiles.
If you haven’t invested in X-Rite technology do it now.
If you have, upgrade now.
This is a major upgrade that all users should seriously consider.
Find out more about i1Photo Pro here.
View more in my DVD 6 Simple Steps to Good Color Management.
Learn more in my digital printing and digital photography workshops here.

Save 15% On Photomatix HDR Software


Get 15% off Photomatix with this code – johnpaulcaponigro.
Beyond Photoshop, there are a number of HDR software options, both plug-ins and stand-alones. Some of the better-known programs include Artizen HDR, easyHDR, FDRTools, pfstools, HDR Efex Pro, and Photomatix. HDRsoft’s Photomatix is the longest standing and perhaps most robust and sophisticated solution.
Photomatix can be used either as a Photoshop plug-in or as a stand-alone product. It offers a variety of ways of combining exposures, including some non-HDR options. Photomatix offers impressive controls over essential image elements affected by HDR merges. Chief among these are control over halos, micro-contrast accentuation, micro-smoothing and control of saturation in highlights and shadows (areas that tend to need aggressive tone mapping).
With a little care and attention, the effect you produce with these tools can be one of your choosing. If used aggressively, you can produce a contemporary HDR effect that can give your images a new look. If used conservatively, you can produce a classic effect that’s virtually unnoticeable.
Every photographer can benefit from learning HDR techniques …
Read my review of Photomatix here. Stay tuned for the update.
Read more about HDR techniques here.
View more about HDR in my DVD Extending Dynamic Range – HDR Imaging.
Learn more in my digital photography workshops.

Save Up To 20% On Chromix’s ColorThink Software


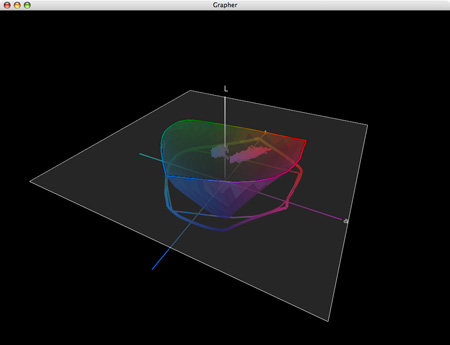
They say “A picture is worth a thousand words.” In some cases, it’s worth far more. That’s certainly true of the images generated by CHROMiX’s ColorThink. The folks at CHROMiX say, “You can’t manage your color if you don’t understand it. Nothing gets the idea across faster than the graph of a printer gamut.” They’re right.

CHROMiX ColorThink is the award-winning color management toolset that helps you understand your color more than ever before, primarily (but not exclusively) by graphing it. The ColorThink toolset is an application for managing, repairing, evaluating and graphing ICC profiles, composed of nine modules that are proven to “keep your brain on color”.

Profile Manager
Organize your profiles individually or in sets

Profile Inspector
Open all types of ICC Profiles and inspect their color data and other details. Change default settings to fit your workflow. Display neutral rendering curves.

2D Graphing
2D graphing gives you both general and specific views, allowing the overlay of multiple profiles and data sets.

3D Graphing
3D graphing gives you the whole picture. Analyze your devices and workflow. See the cause of proofing and printing problems. Graph measurement files and image colors to compare with device gamuts.

Image Inspector
Open images and see the embedded profile. Export, change(mac only) or delete(mac only) it at will. Learn to handle the files your customers are sending.

Profile Renamer
Profiles have two names; internal and external. Confused by what appears in menus? Change the internal and external names with this tool.

Profile Linker
Some RIPs allow linked profiles to be loaded for proofing purposes. Profile Linker will build those profiles for you, quickly and easily.

Profile Medic
Multi-point integrity checks can be performed on one or all the profiles in your system. If Profile Medic finds fixable problems with a single click it will get you back to work.

Color Lists
Open measurement files from most profiling applications. View them in list form with rendered colors. Apply profiles to the lists for testing and graphing.

ColorThink is a very robust color management software. Only a few advanced users will use its full toolset. But almost everyone can benefit from using a few of its most essential features.

For me, graphing color is the core utility of this tool. Graphs are useful abstractions. When you’re dealing with a lot of information, graphs can condense and focus information from specific perspectives revealing useful information. This is certainly true of color. Because color has three dimensions (luminosity, hue, and saturation), graphs of color in 2D always leave something out, while graphs of color in 3D give you a more complete picture and more useful perspectives.

ColorThink gives you powerful tools for graphing color in both 2D and 3D. You can graph ICC profiles (input, display, output), color, color lists, or images. You can graph multiple profiles simultaneously for comparison. You can graph profiles and images simultaneously for comparison. You can view graphs in multiple formats such as shaded objects, wireframes, points, and vectors. You can change color and transparency to make comparison easier. And you can rotate, pan, and zoom your viewpoint dynamically.
Every time I lecture on color, I use ColorThink. Every time I evaluate a new inkset or substrate or printing profile, I use ColorThink. While I don’t graph every image before I print it, I do graph particularly challenging images to print and ColorThink always reveals useful information. I recommend it highly.

This utility not only expanded my understanding of color and color management but it has also helped me refine an advanced perspective on color theory (the conceptual tools artist’s often use to help structure color palettes and make color choices). It’s my hope that in the 21st-century 2D color wheels (such as Leonardo’s, Goethe’s, and Itten’s) will be replaced with 3D color volumes.


1    An image.
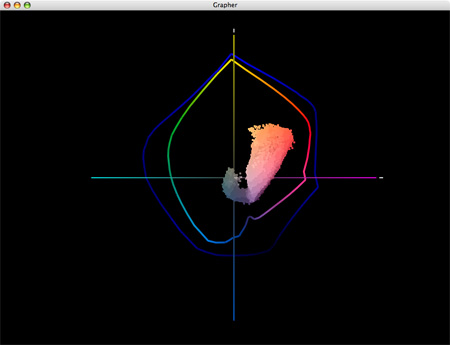
 

2    A 2D graph (two profiles and an image) tells only part of the story. The gamut of semi-gloss papers seem moderately extended when compared to matte papers; the image appears in gamut for both.
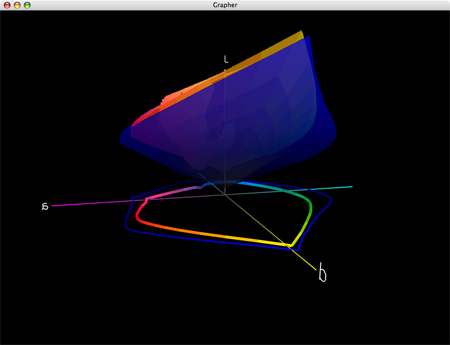
 

3    A 3D graph of two profiles tells you more. Semi-gloss papers have greatly extended dmax and gamut in dark values but reduced gamut in lighter hues; warm highlights are out of gamut for both (better highlight saturation is found in matte) and cool shadows are out of gamut for matte.
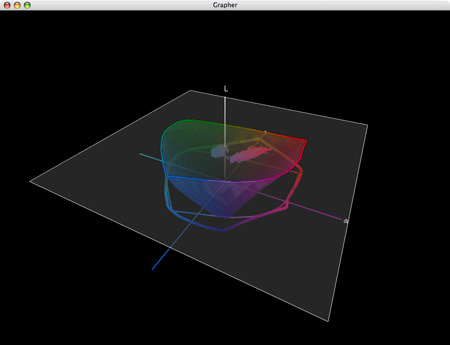
 

4    Gamut can be sliced at specific luminosity values.
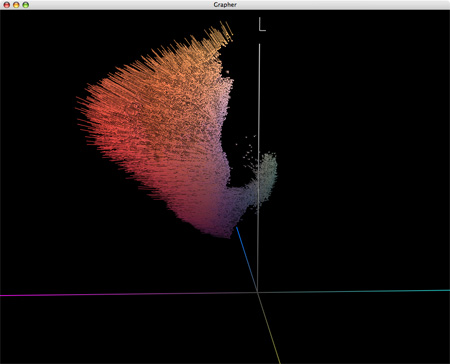
 

5    Display the effects of profiles on colors in images with vectors.


Visit the ColorThink product pages at www.chromix.com to learn more.


Read more on Color Management here.

Learn more in my digital photography and digital printing workshops.
Adobe’s Lens Profile Corrections


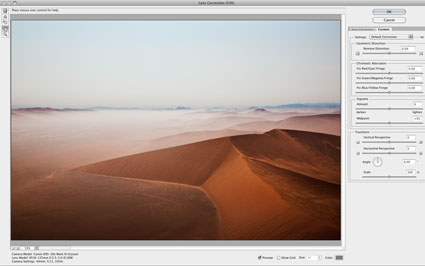
Adobe’s lens profile corrections are simply amazing. Lens Corrections automate correction of standard lens distortions, including geometric distortion, chromatic aberration, and vignette. In addition to correcting lens distortions, this feature can also be used to adjust perspective and rotation.
 
Adobe provides support for a growing list of camera manufacturers, camera models, and lenses: Canon, Nikon, Pentax, Samsung, Schneider, Sigma, Sony, Tamron, and Zeiss.
Adobe Lens Profile Creator
If Adobe doesn’t supply a lens profile for your particular lens you have three choices.
First, you may be able to access a lens profile created by another user on the Adobe Lens Profile Creator forum. Find and share lens profiles at Adobe labs. Of course, these lens profiles will only be as good as the creators were diligent about creating them.
Second, you can visually adjust the parameters of an existing lens profile and save the new settings under a new name for future use. There’s plenty of room for user error with this method but it’s more efficient than creating manual corrections from scratch. Expect to check the results frequently when you apply these settings to different types of images.
Third, you can create your own custom lens profile with the free Adobe Lens Profile Creator utility. Download the Adobe Lens Profile Creator at Adobe Labs.Adobe Lens Profile Creator is a utility designed for photographers who want to create custom lens profiles for their own lenses. The process of creating a custom lens profile for your lens involves capturing a series of images of a printed checkerboard pattern with your specific camera and lens, converting that set of raw images into Digital Negative (DNG) file format (using the Camera Raw plug-in, Lightroom, or the free Adobe DNG Converter), and importing the raw DNG images (or JPEG/TIFF images when creating lens profiles for a non-raw workflow) into the Adobe Lens Profile Creator to generate a custom lens profile. If you create new lens profiles, you can share them with the rest of the user community on the Adobe Lens Profile Creator forums, publishing them directly from inside the Lens Profile Creator. These profiles will then be available via new versions of the Adobe Lens Profile Downloader. This is an extended and complex process few photographers will want to go through, but for those using unsupported cameras and lenses worth the time and effort in the long run.
Using Adobe’s Lens Profile Corrections
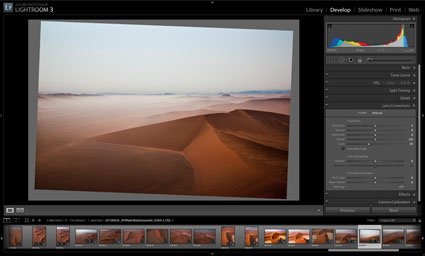
You can access Adobe’s Lens Corrections in three locations; Adobe Camera Raw, Lightroom 3, or Photoshop CS5’s Lens Correction filter. (Lens profile corrections were first introduced in Lightroom 3. To get Lens Profile Corrections in Adobe Camera Raw CS5, you need to download a version that has been updated after the release of Lightroom 3. You can download the latest free update at adobe.com.
It’s far less destructive to make these types of adjustments to Raw files during conversion rather than after conversion. It’s also more flexible. (Use a smart object and reaccess the controls any time by simply by double clicking the smart object.) However, if you want to apply Lens Corrections within Photoshop, after a file has been rasterized, you can use CS5’s updated Lens Correction filter.
In ACR and Lightroom, you’ll find two tabs under Lens Corrections; Profile and Manual.
Under Profile, click Enable Lens Profile Corrections to activate this feature. Using the EXIF data in your Raw file, the software will automatically select the Make (of your camera), Model (of your lens), and the Profile (for that lens). You can use the supplied lens profiles, download a custom profile made by another user, or create your own (manually or with Adobe’s Lens Profile Creator).
Checking Enable Lens Profile Corrections will also allow you to access three sliders –  Distortion, Chromatic Aberration, and Vignetting – for manually fine tuning the results. If you like the results of one correction but not another, you can decrease or increase the effects in one or more of the three fields.
Under Manual, you’ll find controls for visually creating your own lens profile corrections …
Read more on Digital Photo Pro.
Read more in my online lessons.
Learn more in my digital photography and digital printing workshops.