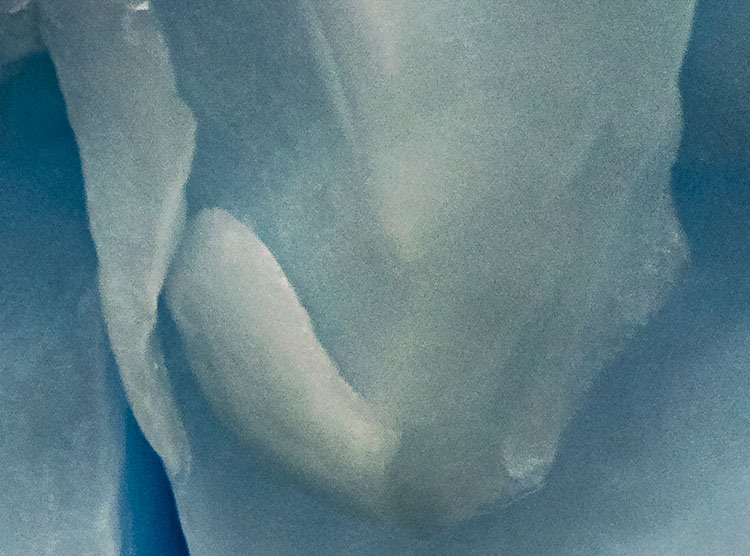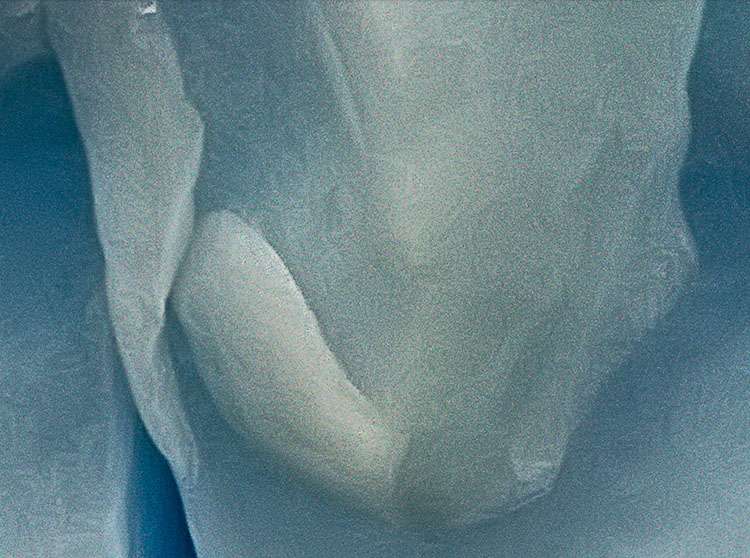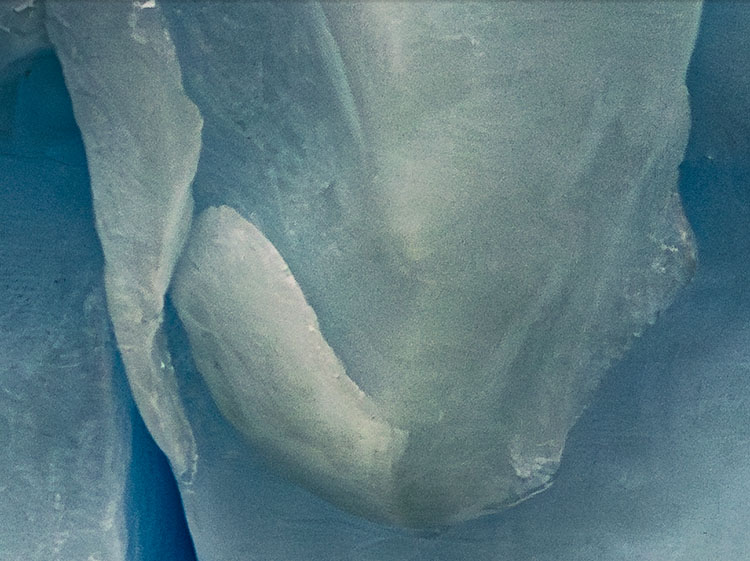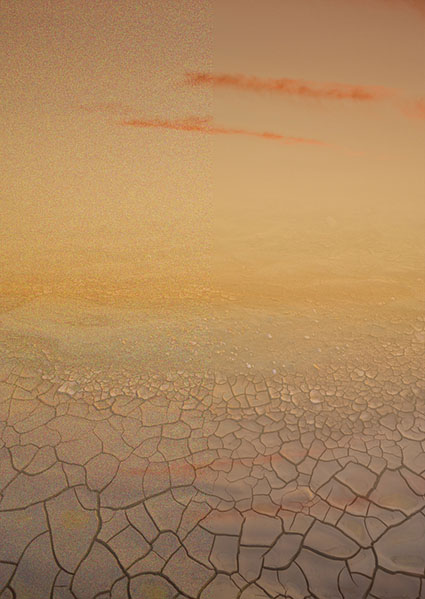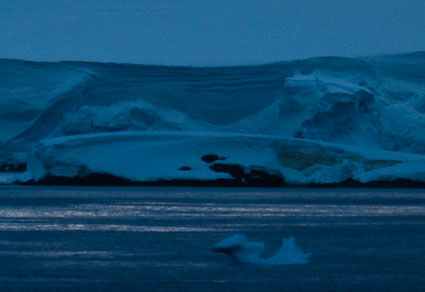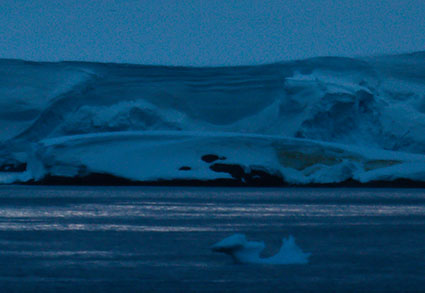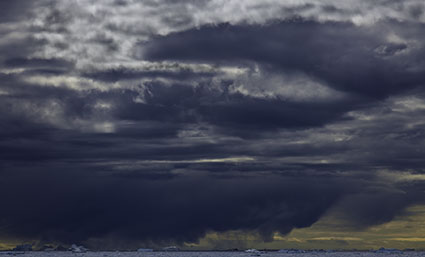
3 Photographic Noise Reducers Compared

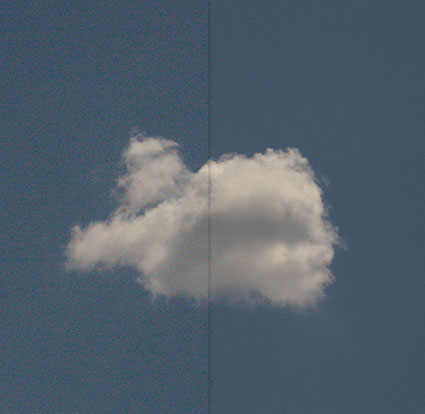
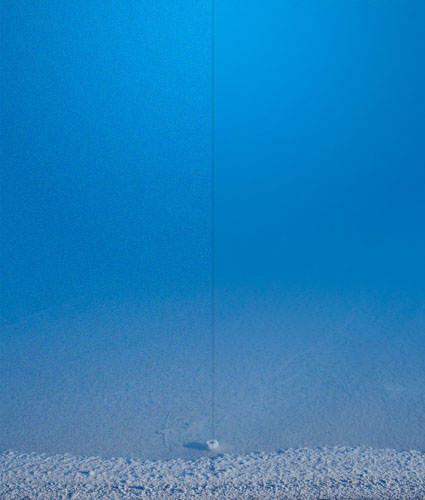
Zero noise reduction

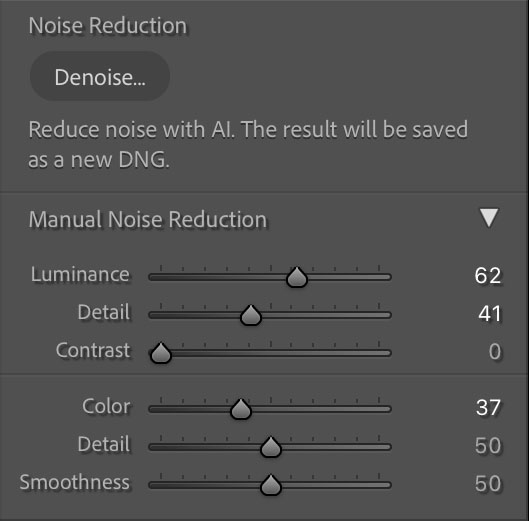
Adobe’s Camera Raw / Lightroom Manual Noise reduction

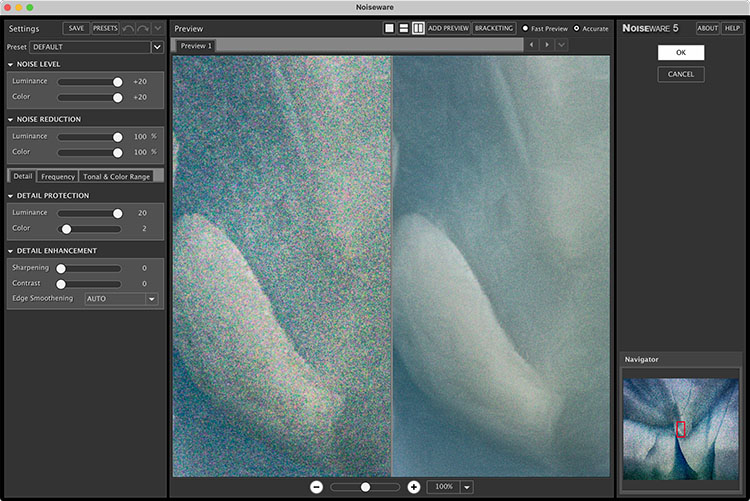
Imagenomic’s Noiseware

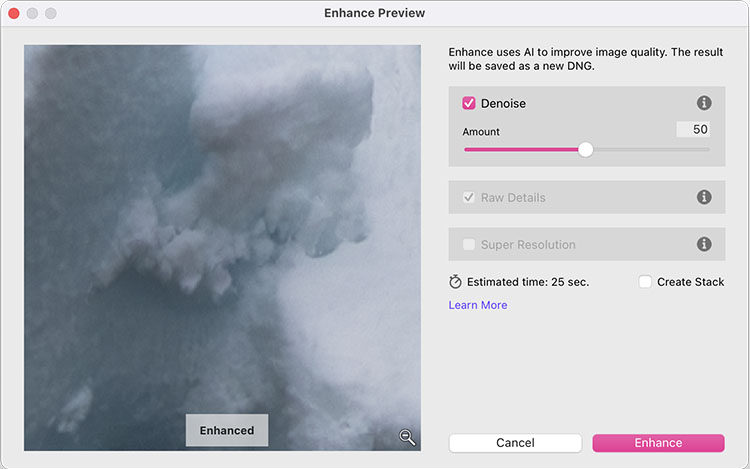
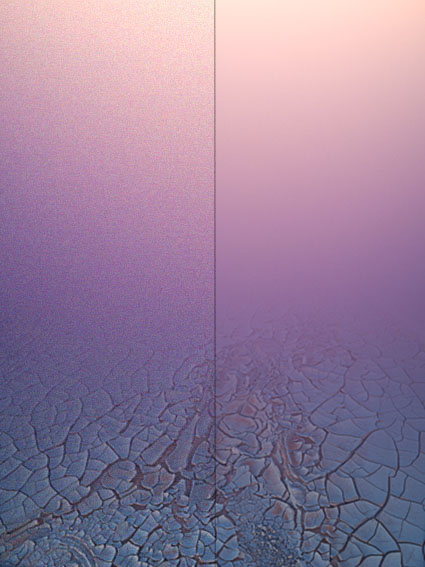
Adobe’s Camera Raw / Lightroom AI Noise Reduction


There’s noise in every file. This is why noise reduction is applied to every image you open in Camera Raw / Lightroom, unless you turn this default setting off.  What tool you use to remove noise depends on how much noise there is. Moving from a little to a lot, here are the three options and why you would choose one over the other.

1 – A little

If you’ve got only a little noise Adobe’s Manual Noise Reduction is up to the task.

Read more on Lightroom Manual Noise Reduction here.

2 – Some

If you’ve got significant noise in non Raw file formats (like JPEGs) or in layers in a Photoshop file, use Imagenomic’s Noiseware.

Read more on reducing noise with Noiseware here.


3 – A lot

If you’ve got substantial noise in a Raw file, use Adobe’s AI Noise Reduction.

Read more on Adobe’s AI Noise Reduction here.

In a nutshell, for Raw files choose Manual Noise Reduction (a little noise) or AI Noise Reduction (more than a little noise). For other file types use Imagenomic’s Noiseware.

Read more about noise here.
Learn more in my digital photography and digital printing workshops.

How To Use Adobe’s AI Noise Reduction


It’s a game-changer – and it will modify your workflow.

When processing image files, noise reduction used to be one of the last things I did; now, it’s the first thing I do, if I plan to use Adobe’s AI Noise Reduction.

When don’t I use it? When I’m processing files with only a little noise and Adobe’s Manual Noise Reduction has no problem getting the task done.

Whenever I encounter substantial image noise, Adobe’s AI Noise Reduction is the best solution currently available, bar none.

It’s really easy to use; that’s an understatement.

1

Click Denoise and in the new Enhance window set Amount.

Start at 100 and lower the value until edges look crisp and realistic texture is restored.

Applying Denoise will automatically apply Raw Details.

2

If, and only if, you want to upres an image (4X larger) check Super Resolution. 

In many cases it’s unnecessary, but when it’s needed it’s exceptional.

3

Click Enhance.

The results will be saved in a new DNG file.

When you continue processing the new DNG file, Manual Noise Reduction sliders will be set to zero, but still available, though no longer needed in the vast majority of cases.

You’d think something this sophisticated would be more complicated. It’s not. Welcome to the new world of AI.

Read Eric Chan’s detailed explanation here.

Read more about noise here.
Learn more in my digital photography and digital printing workshops.

The Art Of Noise

Download your free copy now!

Control noise in your images with these techniques.

Detail Frequency 
Understanding this term will help you know how to reduce noise in your images.

How To Avoid Noise – 3 Types & 2 Kinds 
Identify the type and kind to find a cure.

5 Ways To Eliminate Noise At The Source 
Eliminate noise at the source.

3 Photographic Noise Reducers Compared
Learn how to choose between Adobe’s AI and Manual Noise Reducers Plus Noiseware.

How To Use Adobe’s AI Noise Reduction 
It’s the next best thing to not having noise.

Reduce Noise With Adobe Camera Raw And Lightroom 
Adobe Camera Raw and Lightroom both offer easy-to-use noise reduction controls…

Reduce Color Noise with Photoshop 
You can easily reduce the color component of noise using Photoshop.

Reduce Noise With Photoshop Filters 
Despeckle, Dust & Scratches, Median and Reduce Noise…

Noiseware – The Best Plug-In 
Noise happens. When you have it, there’s a lot you can do about it.

Multiple Exposures 
Make many exposures and watch the noise disappear.

How To Use Noise Creatively
Use Noise to reduce banding and create texture fx.

Sign up for Insights for full access and new content!

Use Multiple Exposures To Reduce Image Noise

BeforeAfter_425

Single Exposure / Multiple Exposures

Need to make an exposure at a setting that’s sure to produce noise? Make a bunch of them. Then watch the noise disappear.
You can reduce noise in an image by combining multiple exposures of the same composition in Photoshop. Photoshop can search for the differences between the separate exposures and then blend them, keeping what stays the same and eliminating what changes. Random noise between separate exposures of the same composition will be substantially reduced, even dramatically, or disappear altogether. (This technique won’t eliminate fixed noise; hot pixels or column and row noise. There are other techniques for that, like using dark slides.)
You’ll find having this option will greatly reduce the reluctance you have towards using high ISOs. This means two things. You’ll be able to make images in lighting situations you thought you couldn’t and you’ll be able to make hand-held exposures in conditions you ordinarily wouldn’t be able to without severely compromising quality.

So how do you do this? Take these steps.

MultipleExposures_425
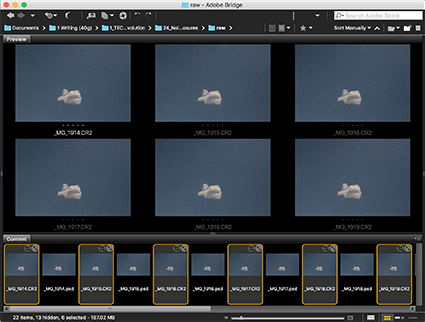
1      Shoot multiple exposures.

(Try to minimize camera motion as much as possible. It’s not necessary to use a tripod, but it can be helpful.)

ScriptLoadFilesIntoStack_425
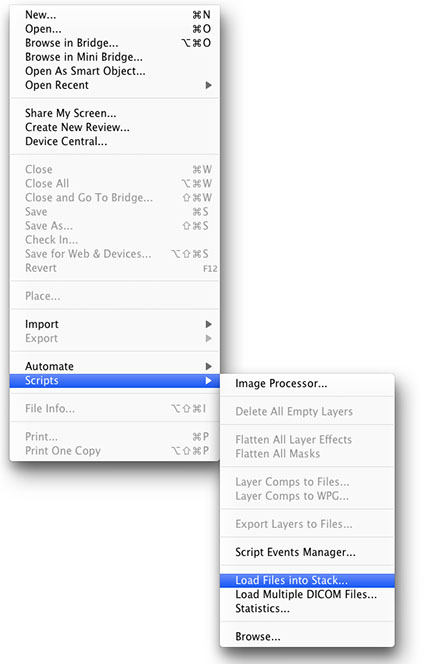
2     In Photoshop go to File >  Scripts > Load Files into Stack

LoadLayers_425
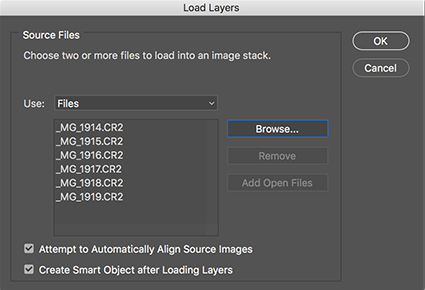
3     Click Browse and select the exposures to be used in the Stack and check Attempt to Automatically Align Source Images and Create Smart Object after Loading Layers.

(The resulting Smart Object will contain all exposures in a single layer.)

StackMode_425
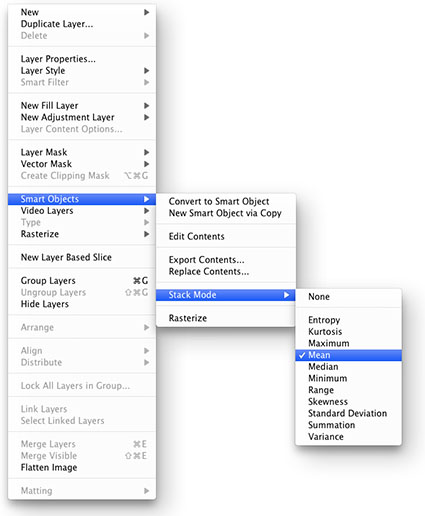
4     Go to Layer > Smart Objects > Image Stack Mode > Median to blend the separate exposures.

(You’ll see the noise substantially reduced.)

5     Optionally, compare the Image Stack Mode > Mean.

(This works best for exposures containing no movement.)

So what is Photoshop doing? Photoshop first aligns a series of images as separate layers, converts them into a Smart Object, and blends them, reducing or amplifying the differences between the layers with a variety of rendering modes. You can choose one of eleven rendering modes; Entropy, Kurtosis, Maximum, Mean, Median, Minimum, Range, Skewness, Standard Deviation, Summation, and Variance. Few people will ever use all of them; most won’t use any of them; but I recommend you try two – Median and Mean. (Stacks were designed for analytical tasks in various scientific fields, like astrophotography or forensics and they’ve since been put to many other uses.)

Median and Mean select values in between the highest and lowest values, smoothing out the differences between aligned layers in a stack. Median works best for images with some motion, either subject or camera, to remove moving objects or noise. Mean works best for processing exposures without motion. (Astrophotographers typically make many exposures, sometimes dozens or more, of the same subject and use Mean to reduce noise.)

The more exposures you make and combine the better the noise reduction. Only practical limits apply. How many exposures can you make? How many exposures can Photoshop process on your computer? You can stack and process as few as two images. Three is my recommended minimum. Six is better. After that, you get diminishing returns. (Try using your camera in burst mode more frequently.) The most challenging part of this technique is identifying situations where it’s helpful and remembering to make multiple exposures. If you have the exposures you can take advantage of this great feature; if you don’t have the exposures you can’t.

Combine the recent advances in digital cameras that offer exceptionally low noise at high ISOs, with new exposure techniques, with new post-processing techniques by the latest software, and you’ve got a profound paradigm shift in photography.

Learn these techniques and you’ll find your photographic options will expand dramatically. The most challenging thing isn’t learning the techniques; the most challenging thing is redefining what’s possible and practical. You’ve got to experience it to truly understand it.

How To Use Noise In Images Creatively

Noise_Lead

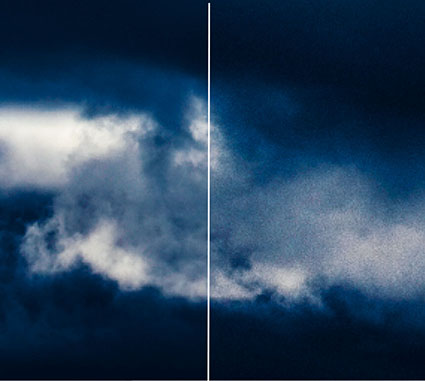
Noise happens. Most of the time you want to lose it, but sometimes it’s better to use it. There are many reasons to use noise in your photographs.
Noise_BeforeAfter_425

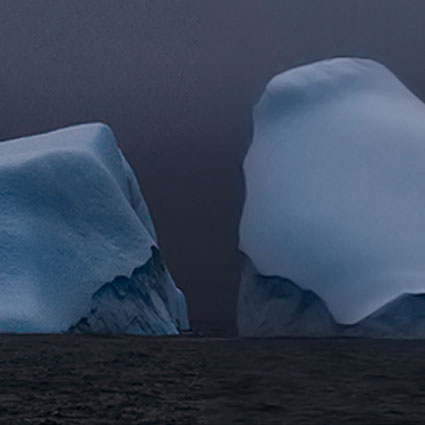
Detailed areas look sharper with less noise reduction.

Make Images Look Natural & Sharper
Be careful not to reduce noise so much that your images begin to look synthetic like they’ve been rendered by software rather than captured by hardware. When you need to aggressively reduce noise, you’ll find there will be times when adding back a little noise will produce more satisfying results. You can also use noise to restore a more naturalistic appearance to highly retouched areas and even synthetically rendered elements. Surprisingly, adding a touch of noise will make even slightly out of focus images appear sharper.
Noise_Banding
Reduce Banding
You can use noise to reduce or eliminate banding. Don’t confuse the linear banding sometimes produced by different output devices; this kind of banding can only be removed by maintaining the machine. However, irregular banding that follows color or tonal transitions in digital files, usually the result of aggressive image editing, often in 8 bit instead of 16-bit mode, can be substantially reduced or removed altogether by adding a little noise. Before you try this, try to identify where banding was introduced during your editing and redo those edits so that banding doesn’t occur; prevention is the best cure. Consider adding noise as a solution only when this is either unavoidable or impossible.

Unite Images From Multiple Sources
You can use noise to unify images from multiple sources with varying noise structures. One day, you may find you need to composite images with different noise characteristics, either from multiple sources (different resolutions and capabilities) or from one source used under very different conditions (different ISOs or exposure times).

First, reduce noise in each source separately, as much as possible without compromising image quality adversely. Next, using the noisiest element as a baseline, add noise to the other elements to make them seem as if they were all drawn from a single source used under the same conditions. In some cases, you may decide to have variances, small or large, in noise between different elements for creative effect. Textured elements, like the foreground in a landscape, hide noise better than smooth ones, like skies, so consider treating them differently. How far should you go? There are no formulas here as different people have different tastes and many different solutions will work within a range of acceptability. Look carefully and use your best judgment to create an effect that is pleasing or convincing to you; that’s the best way to ensure it will be pleasing or convincing to others.

Build Creative Effects
You can use noise as a creative effect. Many great photographers have used noise for creative effect. Shiela Metzner, Michael Kenna, and Robert Farber are three. Images may become more evocative because they contain noise. Many people use words like rough, gritty, nostalgic, impressionistic, mysterious to describe the effects of noise. For some, noise can be merely a gimmick (a meaningless distracting stylization unrelated to a way of seeing or relating to images) for others, noise can be a truly compelling artistic device (a meaningful element that enhances or creates a way of seeing and relating to images and thus a useful clue to artistic intention). In your images, one way or another, noise will either be there or not. Either one is a choice and a statement. So think carefully about what level of noise is most appropriate for your images.
RealGrain_425

Imagenomic’s RealGrain

Customize The Look And Feel Of Noise
Noise can come in many forms. Organized or random patterns. Small, medium or large-sized or some combination of all three. Hard-edged or soft-edged. Monochromatic or polychromatic, of any hue and saturation level. Light or dark. Targeted in specific tonal ranges (shadows, midtones, and/or highlights). You can customize the look and feel of noise in your images with a relatively simple digital imaging toolset.
Photoshop offers two filters that are particularly useful for noise effects.

Noise (Filter: Noise: Add Noise) offers simple controls; Amount controls the intensity of the effect; Uniform and Gaussian control the random pattern generated; and a monochromatic checkbox. (The color of noise can be controlled more precisely with an adjustment layer. Apply noise in full color to an effect layer – 50% gray set to a Blend Mode of Overlay. Make a Hue/Saturation adjustment layer clipped to the noise layer. Use the Saturation slider to control saturation. Use the Hue slider to control Hue. You can even use the Edit pull-down menu to control a specific color of noise. For instance, to have only red noise, you can change all the blue and green noise to red.)
Grain (Filter: Texture: Grain) offers more control over the patterns generated; Regular, Soft, Sprinkles, Clumped, Contrasty, Enlarged, Stippled, Horizontal, Vertical, Speckle. All of them are useful. Horizontal and Vertical create patterns that are so regular that they are the least likely to be chosen.

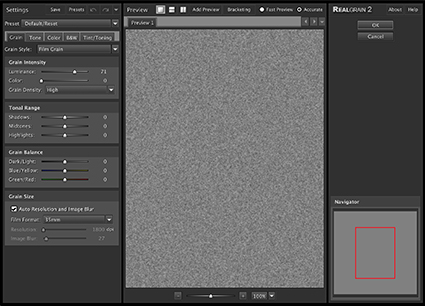
After exploring these two filters, if you still haven’t found what you’re looking for, consider third-party plug-in noise generators such as Imagenomic’s RealGrain or Nik’s Color FX and Silver FX Pro.

Try Multi-pass Noise
Noise applied multiple times adds up differently than noise applied once. This is true of all filters that involve an element of randomization. In rare instances, when one application of noise won’t do the job, consider applying a filter (or filters) multiple times at reduced intensities. There are three ways you can do this. One, use a lower filter setting and apply it multiple times to the same layer. Two, apply the filter at full strength and then reduce the Opacity (or Blend Mode) by fading it (Edit: Fade) – and repeat. Three, apply a reduced application of noise to multiple effect layers. Multipass applications of noise can be particularly useful when trying to reduce extreme banding. If one pass won’t do, try two.
Noise_Layer
Add Noise Effects On Separate Layers
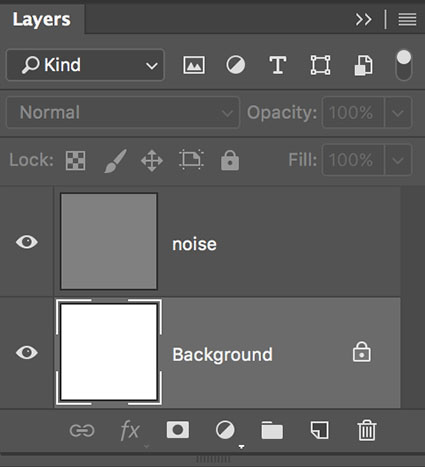
When you add noise to digital files, place it on a layer that is separate from the image(s) so you can control both independently of one another. This way you’ll have extraordinary control and flexibility. When noise is placed on its own layer you can eliminate or change it at any time in the future, reduce its opacity, localize it with masking, desaturate it, target it into specific channels, move it, scale it, blur it and much more. Here’s how to do it in Photoshop.

1     Create a new layer (Layer: New Layer) set to Overlay blend mode filled with 50% gray.

2     Filter the layer with noise (Filter: Noise: Add Noise or Filter: Texture: Grain).

3     Add a Hue/Saturation Adjustment layer clipped to the noise layer to reduce the saturation of the effect only.

4     Optionally, double click the layer to activate Layer Styles. Uncheck specific Channels to remove the noise from them. Use the This Layer sliders to reduce the amount of the dark and/or light noise. Use the Underlying Layer sliders to remove the effect from shadows and/or highlights.

5     Optionally, add a Layer Mask to the noise layer to localize the effect using either a selection,brush or gradient.

6     Optionally, use Edit:Free Transform to resize the effect.

7     Optionally, use Filter: Blur: Gaussian Blur to soften the effect. (Or use any other blur filter, like Motion Blur, to add unique distortion effects.)

You can modify the effect at any time in the future, without compromising the original image information. You’ve got a lot of options. That’s the point. You’ve never had so much control over noise – until now.
Let’s go into some of the finer points.
Noise_LayerSeparate

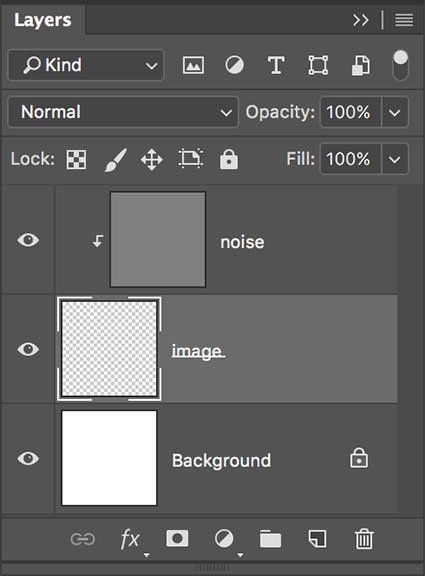
Noise can be clipped to a single layer.

Make Noise Layer Specific
You can clip noise effect layers to a single image layer. Simply press the Option/Alt key and click the line separating the two layers in the layers palette. Photoshop will then apply the noise only to the pixels on that layer. When a layer has transparency, like a retouching layer, no masking will be necessary once the noise layer is clipped to it.

Build FX Layers That You Can Use Again And Again
It can take some time and experimentation to create a custom noise you like, but once you find it, you can use it again and again. Noise on effects layers can be quickly and easily dragged and dropped between open files.

Try Noise On Image Layers
Noise builds up differently on the varied tonal structure of image layers than it does on effects layers whose pixels are all 50% gray. In most cases the difference is not significant or useful. In rare cases, it can be. In some extreme cases of banding, filtering a duplicate image layer multiple times (at lower intensities) may be helpful.

Avoid adding noise to the Background layer as long as possible. Instead, try duplicating the Background layer and then applying noise to the copy. If you have multiple image layers that you’d like to apply a single noise effect to multiple layers, you have two options. One, merge them into a new layer. Hold the Command/Control key before selecting Merge Visible from the layers palette submenu. Make sure adjustment layers are turned off and that the noise layer is moved to an appropriate position in the layer stack. Two, place the layers you want to affect into a group; pressing the Shift or Command key highlight them all and then select New Group From Layers in the layers palette submenu. Change the blend mode of the group from Pass Through to Normal, so the noise layer will only affect the layers inside the set. Finally, add the noise layer inside the group.

Explore Your Options
Take a little time to explore your options here. This toolset is relatively easy to master. The key to applying it masterfully is in looking carefully and responding sensitively to what you see. Use noise consistently in your images and you can mimic any other preexisting noise structure or customize a unique look no one has seen before. Noise is an essential quality of photographic images. With a little preparation and effort you can virtually have as much or as little of it as you like.
 

How To Avoid 3 Types & 2 Kinds Of Noise

Reflection XII Adagio

high noise / low noise

noise_banding

column and row noise / severe under-exposure

noise_fixedpattern

hot pixel noise / very long exposure or very hot conditions

noise_bayer

Bayer pattern noise / substantial under-exposure

noise_random

random noise / high ISO

While it’s best to eliminate noise in images at the point of capture (by choosing optimum tools and making exposures), taking the steps to do this may be impractical and/or lead to unacceptable trade-offs, so you may need to make a compromise settling for reducing it (first during exposure and second during post-processing). But which compromises should you make? Knowing the types of noise that are produced in digital images and how they are produced will help guide you to solutions that will eliminate, reduce, or remove it.

There are three types of noise; random noise, fixed pattern noise, and banding noise.

Random Noise

Random noise appears as both luminance (light and dark) and chrominance (hue/saturation) variations not native to an image but produced by the electrical operation of a capture device. The electrical signal produced in response to photons is comingled with electrical variations in the operation of the capture device. Random noise patterns always change, even if exposure conditions are identical. Random noise is most sensitive to ISO setting. Again, digital cameras have one native ISO setting; higher ISO settings artificially boost the signal produced by the sensor and the noise accompanying it. The results? You get a brighter picture from less light and exaggerated noise. Since the pattern is random it is challenging to separate the noise from the image, especially texture, and even the best software used to reduce it through blurring may compromise image sharpness; how much depends on the level of reduction.

Fixed Pattern Noise

Fixed pattern noise (“hot pixels”) is a consistent pattern specific to an individual sensor. Fixed pattern noise becomes more pronounced with longer exposures. Higher temperatures also intensify it. Since the pattern is consistent, it can be easily mapped and reduced or eliminated.

Column & Row Noise

Banded noise is introduced with the camera reads the data produced by the sensor. It’s camera-dependent. Banding noise is most visible at high ISOs, in shadows, and when an image has been dramatically brightened. This type of noise quickly becomes obvious and objectionable; the regular row and column patterns from the sensor quickly call attention to the capture device; it is challenging to reduce without severely compromising image sharpness.

Noise can be broken down into two kinds; chromatic (hue/saturation variances) and luminance (brightness variances).

noise_chrominance

chrominance / color noise

Chromatic Noise

Chromatic noise produces a more ‘unnatural’ appearance, it is easier to reduce without compromising image sharpness than luminance noise. Chromatic blurring is less noticeable than luminance blurring, as human perception tends to see color contained within contours, even when it is not precisely true. It’s a convenient optical illusion. Larger chromatic variances may result from bayer pattern demosaicing. (Digital sensors typically capture photons with an array of two green, one red, and one blue photosites that register separate luminance values for each site. This data is then processed, ‘averaged’ if you will, to generate a final color, such as brown or lavender, or even a specific green, red, or blue. If done under suboptimal conditions, such as underexposure, larger areas of color variances may occur and will require additional post-processing. Extreme amounts of chromatic noise reduction may results in reduced saturation, especially along contours separating strongly contrasting colors.

noise_luminance

luminance / light & dark noise

Luminance Noise

The presence of luminance noise is more readily accepted than chrominance noise. Luminance noise is harder to reduce than chrominance noise. Luminance information encodes contour, volume, and texture, key elements in representational images. Aggressive amounts of luminance noise reduction subdue image texture, creating a synthetic or overly smooth appearance, and blurs contours, lessening the appearance of focus. Camera noise reduction tends to be crude. Raw conversion software produces significantly improved results. For more extreme noise reduction, third-party software (such as Define, NoiseNinja, and NoiseWare) offer superior functionality and results.

Noise also varies in both magnitude and spatial frequency. Noise occurring over short distances has a high frequency (it’s ‘fine-grained’), while noise occurring over long distances has a low frequency. Noise magnitude, often described by the statistical measure of ‘standard deviation’, quantifies the variance a pixel will have from its ‘true’ value. Higher magnitude noise overpowers fine texture and becomes exceptionally difficult to remove.

The noise floor dominates other forms of noise. It is created by the type of read circuits in the sensor, the transistor characteristics, and support circuits such as the analog to digital converter. As light levels increase the noise associated with light (‘photon shot noise’) exceeds the noise floor. If the signal is increased by a factor of two (one f-stop), then the noise increases by a factor of one and the signal to noise ration increases by one. A higher signal to noise ratio makes noise less visible. When the signal exceeds the maximum value the sensor is capable of capturing (dynamic range is a measure of the largest ratio of the capture signal to the noise floor), the noise drops because the signal is pinned at the saturation value.

With a thorough understanding of what produces noise, how it is produced, what kinds and types of noise to be on the lookout for, you can take steps to reduce it at the point of capture. You want to start with as little noise as possible. If you want noise, you can always add it later, which gives you the possibility of customizing it with almost infinite precision. If you begin with noise in your originals, you’re locked in, and it can be challenging to reduce it without compromising image quality – sharpness, texture, saturation, and hue variety. Given that noise isn’t the only concern you balance, for some uses this may be an acceptable trade-off.

.

5 Great Ways To Eliminate Image Noise At The Source

Reflection XXXVII

high noise / low noise

Noise happens. There is always some degree of noise present in any electronic device that receives or transmits a signal. Though noise is unavoidable, it can become so small relative to the signal that it is no longer visible. It’s all about a good signal to noise ration (SNR). The image is the signal. The capture and carrier mediums’ biproducts are the noise. (Film grain is noise.)The higher the SNR the more the image overpowers the noise; the lower the SNR the more the image becomes confused with noise. While some noise increases the apparent sharpness of images, the vast majority of noise found in images degrades quality. It’s best to avoid it.

There are a number of things you can do to reduce noise in your digital images at the point of capture.

1       Expose to the right
2       Use lower ISO settings
3       Use bigger sensors
4       Use faster exposure times
5       Keep equipment cool

Start here. Use software to reduce the appearance of noise only when needed. (Of course, reducing noise may not be the only deciding factor when selecting conditions, tools, and techniques. As with all things, you will have to balance many concerns simultaneously. Adhere to the above principles when practical.)

Knowing how noise is produced will help you avoid it.

histograms_zones_caution

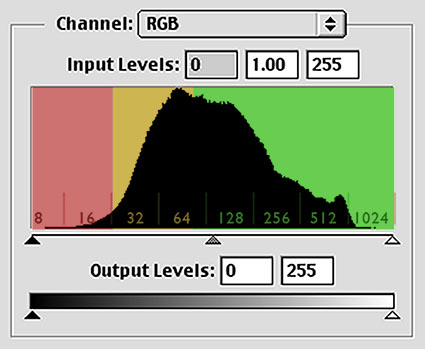
avoid the red zone, caution in the yellow zone, go for the green zone

ETTR
Underexposure results in more visible noise. Darker regions contain more noise than lighter regions in digital capture; the opposite is true of film. This is because the darker regions are recorded with fewer photons and less bits of data. It stands to reason that darker regions of images are produced with fewer photons. But why are they recorded with less bits of data? Digital cameras record data in a linear progression. If a digital sensor is capable of recording 14 bits of data (or 16,384 shades of gray) with a dynamic range of 8 stops, the lightest stop contains half the data in the file; the next lightest stop contains half as much data; and so on; it generates this progression from dark to light – 32 / 64 / 128 / 512 / 1024 / 2048 / 4096 / 8,192. This means you want to expose to the right. Avoid the lower 2 stops whenever possible; they contain less than 1% of the total data in the file. With so little data the signal becomes confused with the noise; the signal to noise ratio is very low. What’s more, when these tonal regions are adjusted, brighter or contrastier, the noise contained there quickly becomes more pronounced and with so few bits of data it also has a tendency to posterize. In addition, significant under exposure greatly increases the chances of producing Bayer pattern noise, a type of noise that is seen in larger areas and is more challenging to remove in post-processing. You’re much better off making a light exposure and darkening the Raw file during post-processing; this way your shadows will be represented with much more data and contain less noise. When light becomes challenging, which should you choose – under expose (without clipping) or raise the ISO? The precise cut off point is different for every camera, but in general avoid the lower 20% of the histogram. You’ll get less noise if you boost ISO and move the histogram up.

ISO
Higher ISOs amplify noise. ISO (International Standards Organization) is a descriptor that signifies absolute sensitivity to light. A digital sensor has one native ISO. Higher ISO settings simply boost the resulting signal. This is useful, but not ideal. When the brightness of the image is boosted, the noise is too.

Use “Shorter” Exposure Times
Longer exposures generate more noise. Hot pixels become hotter. All sensors have a few pixels that heat up faster than others, producing brighter than expected values. Some even have a few dead pixels that never fire, producing only black pixels. During longer exposures hot pixels are given more opportunity to heat up, growing brighter still; slightly hot pixels not visible at shorter exposure times become visible. As digital sensors age, hot pixels may become hotter and more pixels may become hot. Hot pixels produce a consistent fixed pattern of noise that can be recorded for given exposure times, making it easy to reduce. There is a duration at which a sensor suddenly produces a lot more noise; in older models this could be seen in exposures lasting only one minute, but with newer sensors this is greatly extended and most users will not encounter this; if you’re making very long exposures it’s useful test this and find the duration at which this happens for a your specific camera.

Use Bigger Sensor Sites
When it comes to noise, bigger is better – theoretically. Bigger sensors have more light gathering capacity, producing a higher signal to noise ratio, or cleaner images. More isn’t necessarily better. Cameras with more photosites (yielding more megapixels) packed into smaller areas tend to produce a lower signal to noise ratio, or noisier images. That said, a stronger signal does not necessarily guarantee lower noise. It’s the relative amounts of signal to noise that determines how noisy an image appears. The way a camera processes the file it makes has a significant impact on the final quality. Consequently, many medium format cameras that produce beautiful files in daylight typically produce noisier files than DSLR’s with smaller sensors in low light.

Stay Cool
High temperatures exacerbate noise. Thermal energy (leakage current) in semiconductors can generate an electrical signal that is difficult to distinguish from the optical signal. Ambient temperature increases leakage current by a factor of 2 for every 8 degrees Centigrade. Whether due to ambient temperature (You might start to see some effect over 90 F / 32 C degrees.) or storage (Don’t leave your camera in the sun, especially on a car seat, for long periods of time.), your camera can get hot and this will increase noise, which you can reduce by cooling off and keeping your camera cooler.

The best way to avoid noise is to produce as little of it as possible during exposure. These five tips will help you do just that.

Noise Reduction With Noiseware – The Best Photoshop Plug-In

BeforeAfter

Before & After Noiseware

Who doesn’t have noise? If you don’t run into noise in your digital images, at least once in a while, you may not be pushing the envelope enough. You can photograph long after dark; if you haven’t tried it, you owe it to yourself to experience this—it’s magical. And if you find you don’t have a DSLR on hand, this should be no reason not to make pictures with a point-and-shoot or cell phone.

Whether you’re using a cell phone, a point-and-shoot digital camera or a DSLR at high ISOs or with very long exposures, you’re bound to run into some noise. Noise happens. When you have it, there’s a lot you can do about it. There are many ways you can reduce noise during postprocessing; you could even say there’s an art to it. Learning these techniques can improve good exposures and save others.

If Lightroom and Photoshop fail to adequately reduce noise in your images, it’s time to move to third-party plug-ins. For years, they’ve done a superior job of reducing noise, and they still do. While there are many fine third-party plug-ins for Photoshop (Noise Ninja, Neat Image, Dfine, etc.), one stands out from all the rest: Imagenomic Noiseware Professional.

For me, Noiseware is the most robust noise-reduction software available. Ironically, while it offers the most sophisticated feature set, very often the default settings when you first open an image are all you’re likely to need. In many cases, very little, if any, additional tweaking is necessary.

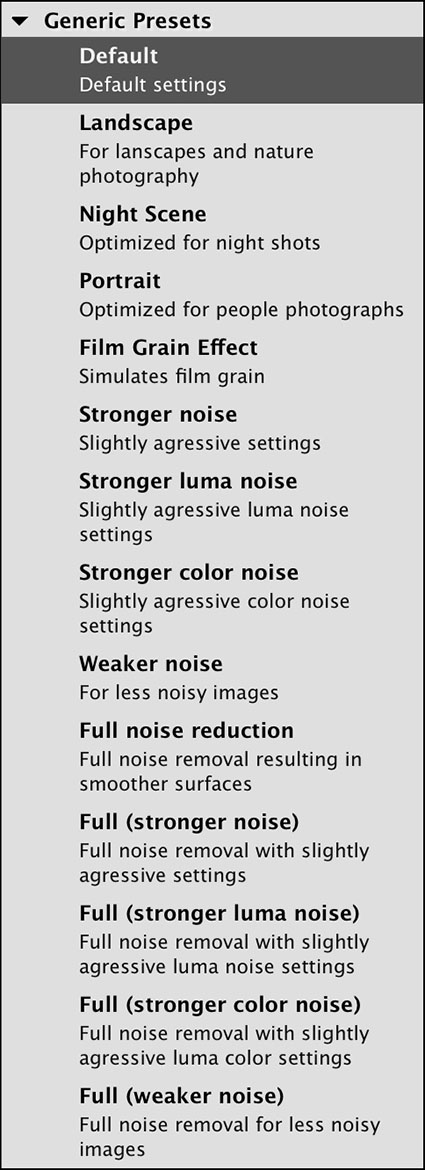
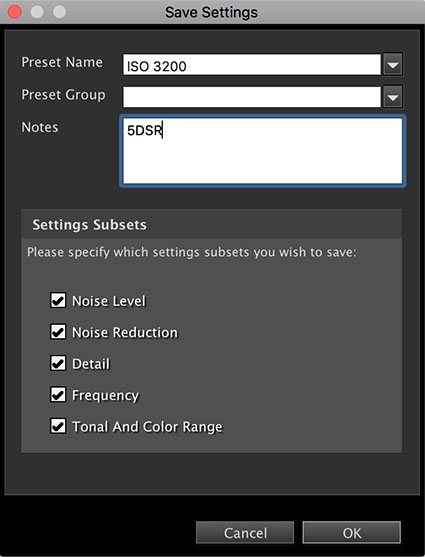
In part, this is because Noiseware analyzes the images you process and creates “profiles” or saved settings that it uses every time you open a new image. It intelligently learns your needs by tracking your past images and analyzing your new images. You can also use Noiseware’s tools to create your own profiles, which can be saved and reused. You can save your own Preferences for how you’d like Noiseware to behave and learn. Noiseware also offers 13 default settings (like Landscape, Night Scene, Portrait, Stronger Noise, etc.) and allows you to save your own custom settings, which can be created from scratch or by modifying the provided presets.

PresetsGeneric Standard Presets

PresetsCustom

Custom Preset

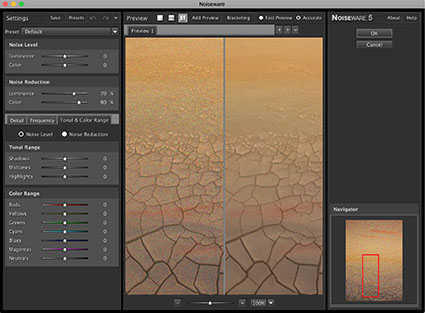
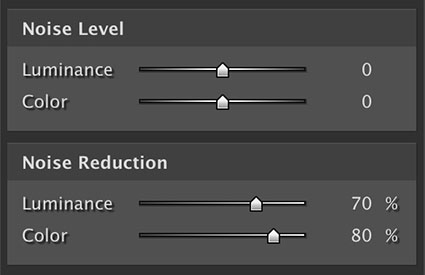
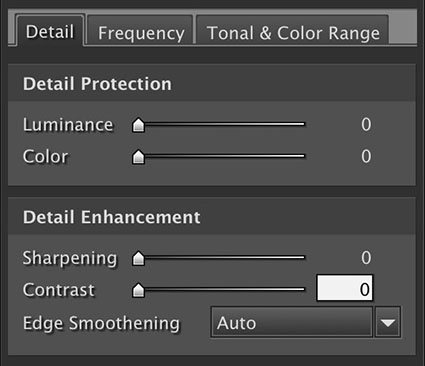
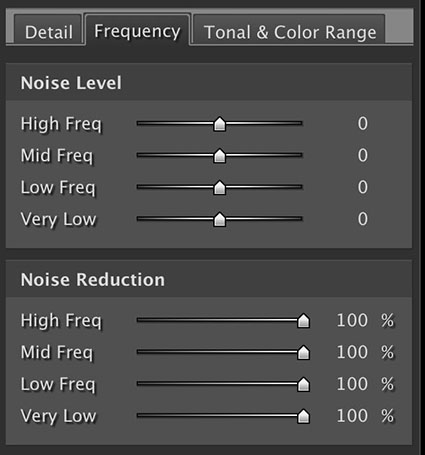
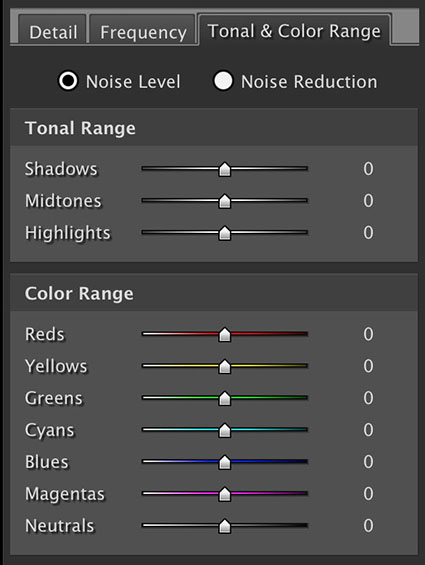
Noiseware’s ability to target noise reduction to specific aspects of an image is what makes it unparalleled. You can adjust Noise Reduction based on Luminance or Chrominance; higher settings produce stronger noise reduction. You can target Noise Level based on Luminance or Chrominance; higher settings tell the software there’s more noise. You can target Color Range; Noise Reduction and Noise Level can be customized by hue—reds, yellows, greens, cyans, blues, magentas, neutrals. You can target Tonal Range; Noise Reduction and Noise Level can be customized for shadows, midtones and highlights. You can target image areas based on Frequency (or amount of detail); Noise Reduction and Noise Level can be customized to High, Mid, Low and Very Low frequencies. Finally, you can enhance detail, first, by using Detail Protection to reduce the effect based on Luminance or Color, and second, by using Detail Enhancement, which provides Sharpening, Contrast and Edge Smoothening.

TonalColorRange

Defaults

LevelReduction

Noise Level helps prepare the filter by analyzing the image

Noise Reduction is the blurring effect

Detail_Only

Detail Enhancement – turn it off and use Photoshop instead

Frequency_Only

Frequency (of detail) targeting

TonalColorRange_Only

Tonal & Color Range targeting

Noiseware’s ability to provide this level of selectivity is extraordinary. It allows you to easily customize noise reduction for separate areas of an image without making complex masks. You’ll want to do this. Here’s just one example, among many, of why you want to do this. Smooth image areas reveal noise much more readily and they support more noise reduction, while highly textured image areas hide noise, but don’t support as much noise reduction without compromising apparent image sharpness.

Use Noiseware’s sharpening sparingly (if at all) and only for the most modest boosts to image sharpness, as you can create much more sophisticated and selective results in Photoshop—and almost every image can use a little sharpening after noise reduction. Always reduce noise before sharpening.

Combine today’s digital cameras with the latest software, and you’ll find that you’ll rethink many things about when and where you make exposures. You’ll shoot at higher ISOs that you once thought were unusable. You’ll shoot in low levels of light where you once thought it was impossible to get an exposure, much less a usable one. You’ll look at your digital files, and where once you thought noise was a deal-breaker, you’ll find it no longer is. Noise-reduction skills and noise-reduction tools are essential to any photographers skill set and toolkit. Master them, and liberate yourself.

.

Reducing Noise with Adobe Camera Raw and Lightroom

1_Antarctica_2009-XC
2_LRACRnoise

Lightroom’s Detail panel

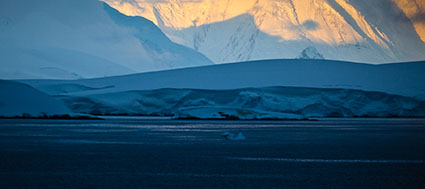
Reducing noise in Adobe Camera Raw and Lightroom (the controls and results are identical) is easy.

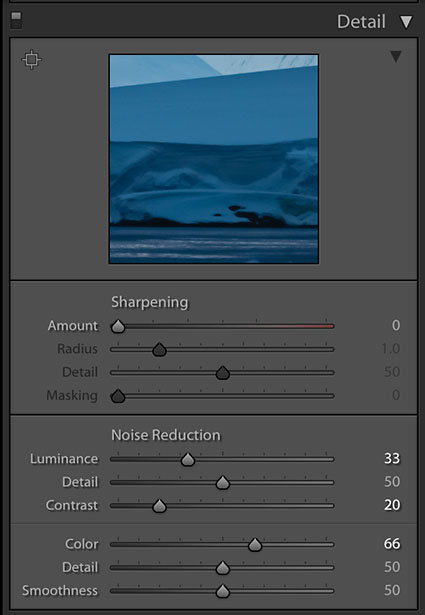
The Detail panel provides tools to reduce two kinds of noise – Luminance (light and dark) and Color. Results can be targeted with the Detail slider into smoother (low setting) or more textured (high setting) areas. The effects for luminance noise reduction can be further modified by adjusting the Contrast slider; a higher setting affects only high contrast noise, while a lower setting affects even closely matched values. And finally, the effects for color noise an be further modified with the Smoothness slider, a higher setting creates a more aggressive effect.
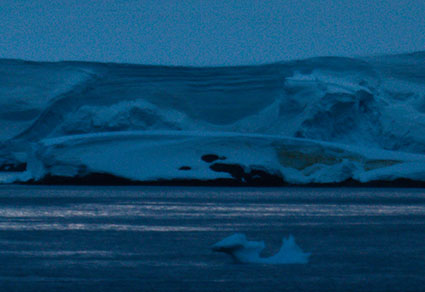
Zoom into an image at 100% magnification and move the sliders until noise is reduced, but image quality isn’t compromised. Use restraint. In a majority of situations, it’s better to preserve a little noise than to blur the image substantially.

All noise reduction blurs images. Sharpening after noise reduction during RAW conversion is recommended. Knowing that you’ll sharpen an image after noise reduction, you may reduce noise slightly more aggressively initially.

3_noNRorsharp

no noise reduction

5_appropriateNR

appropriate noise reduction

7_excessluminanceNR

excessive noise reduction

There are limits to how far you’ll want to go. Noise can be so aggressively reduced that surfaces within images become textureless and begin to seem synthetically rendered with software rather than optically captured photographically. This effect may become more pronounced if contours are strongly exaggerated during sharpening. While sharpening, take care not to accentuate noise further. Develop a sensitivity to texture and contour, and use your best judgment. You know what things look like. Make your images look convincing to you, and you’ll quickly convince others.
RAW converter tools have limits. RAW converter tools do a good job with moderate amounts of color noise. Even high settings don’t tend to compromise image quality; sharpness, saturation and hue variety are all preserved. But sometimes they don’t go far enough. For aggressive noise reduction, especially for larger noise produced by Bayer pattern demosaicing, turn to Photoshop and possibly third-party noise-reduction software.
RAW converter tools do a reasonable job with luminance noise, but aggressive applications may compromise sharpness (some, but not all of this can be compensated for with RAW converter sharpening tools), and at times they don’t go far enough. When you encounter situations like this, turn to Photoshop and third-party noise-reduction software.

Most images can benefit from a little noise reduction and sharpening during RAW conversion. For many situations, this is all the noise reduction you’ll need. Many exposures don’t require substantial post-processing. However, some exposures require more power and finesse than these tools can deliver. When you encounter these, move to more sophisticated tools found in Photoshop and third-party plug-ins. But always start here.