This is one of the best exhibits I’ve seen in ages!
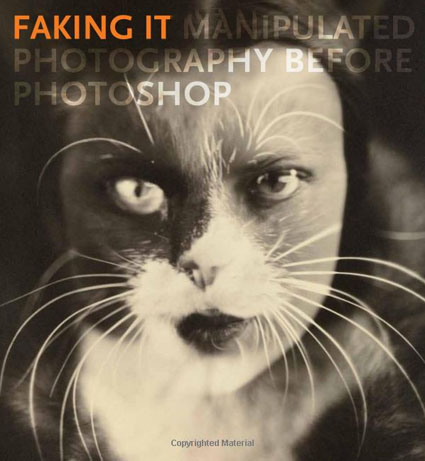
“While digital photography and image-editing software have brought about an increased awareness of the degree to which camera images can be manipulated, the practice of doctoring photographs has existed since the medium was invented. Faking It: Manipulated Photography Before Photoshop at The Metropolitan Museum of Art (NYC) is the first major exhibition devoted to the history of manipulated photography before the digital age. Featuring some 200 visually captivating photographs created between the 1840s and 1990s in the service of art, politics, news, entertainment, and commerce, the exhibition offers a provocative new perspective on the history of photography as it traces the medium’s complex and changing relationship to visual truth.
The photographs in the exhibition were altered using a variety of techniques, including multiple exposure (taking two or more pictures on a single negative), combination printing (producing a single print from elements of two or more negatives), photomontage, overpainting, and retouching on the negative or print. In every case, the meaning and content of the camera image was significantly transformed in the process of manipulation.
Faking It is divided into seven sections, each focusing on a different set of motivations for manipulating the camera image … “Picture Perfect”, “Artifice in the Name of Art”, “Politics and Persuasion”m “Novelties and Amusements”, “Pictures in Print”, and “Protoshop.”
The exhibit runs from October 11, 2012 through January 27, 2013.
Find out more about the exhibit here.
Whether you can or can’t see the exhibit, get the book.
The exhibition is accompanied by a fully illustrated, 296-page catalogue written by Mia Fineman.
“Photographic manipulation is a familiar phenomenon in the digital era. What will come as a revelation to readers of this captivating, wide-ranging book is that nearly every type of manipulation we associate with Adobe’s now-ubiquitous Photoshop software was also part of photography’s predigital repertoire, from slimming waistlines and smoothing away wrinkles to adding people to (or removing them from) pictures, not to mention fabricating events that never took place. Indeed, the desire and determination to modify the camera image are as old as photography itself—only the methods have changed.
By tracing the history of manipulated photography from the earliest days of the medium to the release of Photoshop 1.0 in 1990, Mia Fineman offers a corrective to the dominant narrative of photography’s development, in which champions of photographic “purity,” such as Paul Strand, Edward Weston, and Henri Cartier-Bresson, get all the glory, while devotees of manipulation, including Henry Peach Robinson, Edward Steichen, and John Heartfield, are treated as conspicuous anomalies. Among the techniques discussed on these pages—abundantly illustrated with works from an international array of public and private collections—are multiple exposure, combination printing, photomontage, composite portraiture, over-painting, hand coloring, and retouching. The resulting images are as diverse in style and motivation as they are in technique. Taking her argument beyond fine art into the realms of politics, journalism, fashion, entertainment, and advertising, Fineman demonstrates that the old adage “the camera does not lie” is one of photography’s great fictions.”
Preview the book here.