Google Liquid Galaxy
Google Maps is amazing and look what’s coming soon!
Google Maps is amazing and look what’s coming soon!
SE3TNFkJQ&hl=en_US&fs=1&”>
Google founders discuss how the most influential search engine works.
An essential quality of color is temperature. Temperature can be used to attain a color balance. Temperature can be used to enhance spatial relationships within an image. Temperature can be used to elicit psychological responses within the viewer. Understanding and exploring the dynamics of temperature in color can benefit any visual artist.
There are physical characteristics of color linked to temperature. The color temperature of light (Kelvin degrees) is determined by measuring a black body radiator (an object heated so that it emits light). As the physical temperature of the object rises, color transitions from red (long wavelengths – low energy) to blue (short wavelengths – high energy) through ROYGBIV (red, orange, yellow, green, blue, indigo, violet). When it comes to light sources, physically, blue is warmer than red.
There are also psychological qualities of color linked to temperature. Psychologically, blue is cooler than red. These associative qualities of color with regard to temperature are almost universally accepted. This is due in large part to our physical environment – water is blue, plants are green, sunshine is yellow, fire is red.
Using the qualities of one sense (touch) to describe the qualities of another (sight) can be a tenuous affair and may lead to ambiguity and confusion. The more precise a language is the more useful it is. The language of HSL (hue, saturation, luminosity) is a very precise language. When using the language of HSL, hue values mark a position measured in degrees on a color wheel. A circle has 360 degrees, so the scale is 0 – 359.
I discuss many of my primary passions in this new video from X-Rite.
Find out more at X-Rite.
Learn about the i1Photo Pro here.
View videos on X-Rite’s i1Photo Pro here.
Use Blurb’s plug-in for Adobe® Photoshop® Lightroom® to export selected photos from your Lightroom library directly into Blurb Bookify™ to make a simple photo book online. It’s great for quick books or proofs.
Find out more here.

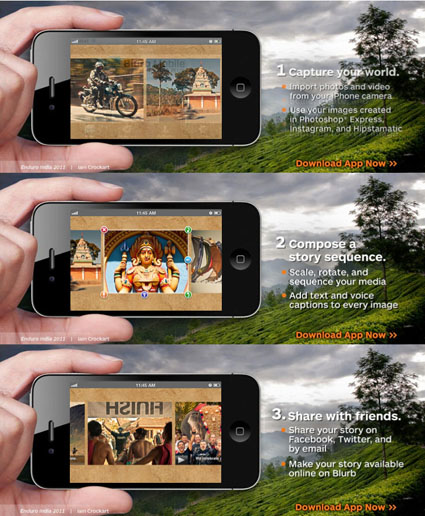
Blurb Mobile helps you share your stories.
It’s easy to create fun and engaging stories using all of your iPhone media and then instantly share it with your social network using Facebook, Twitter, and email.
Blurb Mobile’s standard version is free, then you can choose the in-app upgrade to add more video, audio and image capabilities, plus eight additional theme styles. Download now on the App Store.
Find out more here.
.
Renaissance Fine Art & Design Gallery and John Paul Caponigro’s Next Step Alumni present a beautiful collection of their work May 20 – June 24, 2011. You are cordially invited to view this diverse work at the Renaissance Fine Art & Design Gallery, One South Range Line Road Carmel, IN. The opening for the exhibit will be Friday, May 20 at 5 pm. Many alumni will be on hand to discuss their work personally with you.
The exhibit and book contain the work of 22 artists, all from John Paul’s Next Step Alumni group, who met the rigorous criteria for the exhibition: each artist produced a cohesive body of work, an artist’s statement, a biography, a book, and a website.
The work, as diverse as the individuals, includes journalism, editorial, still life, floral, nude, landscape and abstraction, and is bound together by their community, their creativity, and the fearlessness in their search of their individual next steps.
View the exhibit catalog above.
Find out more about the exhibit here.
Find individual member’s books here.
Find out more about my Next Step Alumni here.


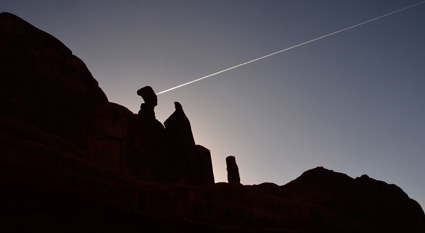
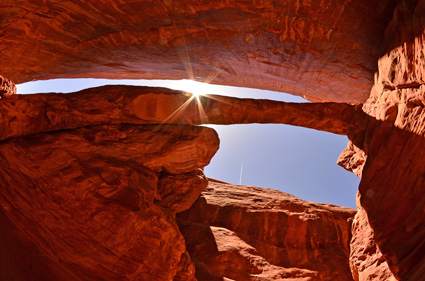
During my Arches digital photography workshop, Barry Boulton expected to make pristine landscapes untouched by man. But during our initial reviews of his work, he was struck by the realization that a majority of his images either had people in them or showed signs of their being there. So he pursued the idea to see how far he could go with it. It worked for him – consistently.
Very often we don’t recognize that we’ve already started to do the work we’re called to do. All we have to do is recognize the call and then answer it. You can learn a lot about your voice if you only look closely and find the patterns that exist between the images you’ve already created.
What themes and patterns can you identify in your work? Which ones are you most excited to pursue further?
Find out more about my Arches digital photography workshop.
Learn more in my digital photography workshops.

