How To Get Out Of A Rut – Tales of Mere Existence
Levni Yilmaz’sTales of Mere Existence are creative, funny, and insightful.
Find more Tales of Mere Existence here.
Find more creativity videos here.
Read more in my creativity ebooks here.
Learn more in my creativity workshops here.
My Favorite Artistic Device – Tales of Mere Existence
Levni Yilmaz’s Tales of Mere Existence are creative, funny, and insightful.
Find more Tales of Mere Existence here.
Find more creativity videos here.
Read more in my creativity ebooks here.
Learn more in my creativity workshops here.
Printer Profiling Data Analysis – X-Rite i1Photo Pro
Embedded in the i1Photo Pro program are no nonsense instructional videos that walk you through the software step by step.
i1Profiler Data Analysis allows you to look at and compare printer measurement data. This can be from two different printing devices, to see how closely they perform. Or from different sheets throughout a print run, or day to day, to determine if your device is running within standards.
Read more in my digital photography ebooks here.
View more in my color management DVD.
Learn more in my digital photography and digital printing workshops.
Patagonia Digital Photography Workshop – Dec 10-14, 2011

Digital Photo Destinations announces a new workshop exploring the highlights of Torres Del Paine, Patagonia, South America.
4 world-class photographers guide this adventure. Leaders John Paul Caponigro and Seth Resnick will be accompanied by Eric Meola and Arthur Meyerson.
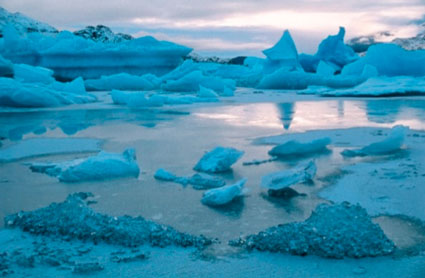
Experience sunset on the Perito Moreno Glacier, the coast of Lake Argentino, Brazo Rico and the Iceberg Channel and all that is just on day 1.
We will also have a full day boat tour in Los Glaciares National Park where we will see the North wall of the Perito Moreno Glacier, the Upsala Glacier, Spegazzini Glacier and Los Tempanos (Icebergs) Channel.
Additional photography sessions include the Grey Glacier, Big Fall, Nordenskjold Lake and Paine River Fall with spectacular views of French Valley, Paine Grande Massif and The Horns and a trip to visit the Blue Lagoon with absolutely magical color.
One of the highlights of this trip will be several trips trekking on glaciers.
Visit Digital Photo Destinations for more information.
It’s over half full now. Only 12 spots are left.
Sign up now!
Contact Paul.Schuster@quarkexpeditions.com
Email jpc@johnpaulcaponigro.com for advance notice on future Digital Photo Destinations events.
Printer Profiling QA – X-Rite i1Photo Pro
Embedded in the i1Photo Pro program are no nonsense instructional videos that walk you through the software step by step.
i1Profiler Printer Quality Assurance, or Printer QA can help you determine whether your printer or digital press is within tolerance of defined print standards. You can also use this tool to validate that the printer is staying in tolerance for proofing or production.
Read more in my digital photography ebooks here.
View more in my color management DVD.
Learn more in my digital photography and digital printing workshops.
Advanced Printer Profiling Options – X-Rite i1Photo Pro
Embedded in the i1Photo Pro program are no nonsense instructional videos that walk you through the software step by step.
X-Rite’s i1Photo Pro offers four advanced printer profiling options.
Linearization
OBC Correction
Profile Optimization
ColorChecker Proof.
Read more in my digital photography ebooks here.
View more in my color management DVD.
Learn more in my digital photography and digital printing workshops.
Printing Printer Profiling Targets – X-Rite i1Photo Pro
Embedded in the i1Photo Pro program are no nonsense instructional videos that walk you through the software step by step.
Print targets directly out of i1Photo Pro – not CS5.
When producing printer profiles it’s important to set the print driver properly.
1 Set media type
2 Set resolution
3 Turn off all color management in the print driver
Read more in my digital photography and digital printing ebooks here.
Learn more in my digital photography and digital printing workshops.
Martin Parr
Martin Parr shares his photographic insights.
Find out more about Martin Parr here.
Find more photographers’ videos here.
How to Layout and Design Your Book Like a Pro
How to Sequence and Design Your Next Book Like a Pro from Blurb Books on Vimeo.
“Pro photographer and book designer Mat Thorne presents an introduction to book design principals. This webinar covers an overview of typography, essentials of cover design, and laying out front & back matter. Mat also shares examples and offers inspiration from published photography books.”
Find more bookmaking resources here.
Learn more in my digital printing and digital photography workshops here.

