.

How To Control Blur FX In Photoshop With Amazing Precision

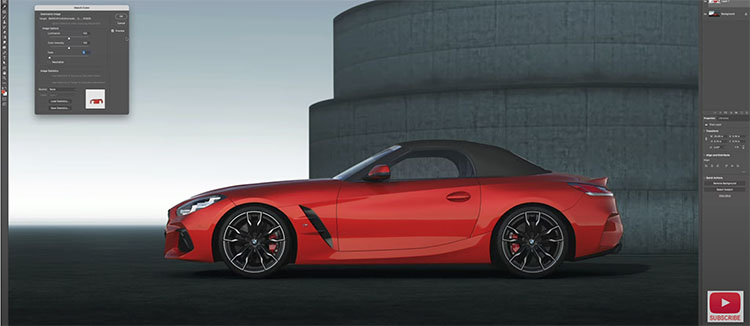
Photographers use blur (or bokeh) for a variety of reasons: to enhance space through depth of field; to add interesting visual artifacts; to simplify them; to change the quality of their expression. In the past, blur was controlled almost entirely through exposure; now it can also be controlled during post-processing, giving photographers an unprecedented array of options and ways to customize the look and feel of their images. Knowing what you can do, how far you can go, and when you can do it may change the way you shoot, one time, sometimes, or all the time.

There are many blur filters in Photoshop; Field Blur, Iris Blur, Tilt-Shift, Gaussian Blur, Lens Blur, Motion Blur, Radial Blur, Shape Blur, Smart Blur, Surface Blur, in order of appearance in the Filter: Blur drop-down menu. (See A Quick Visual Comparison Of Photoshop's Blur Filters here.) The choices are extensive and it pays to familiarize yourself with your options by experimenting with them; you’ll find you have an extraordinary set of options that you can modify and combine creatively. If you only use the filters Gaussian Blur and Lens Blur, you’ll still have game-changing control at your fingertips, once you learn how to extend and modify them.

Photoshop's Lens Blur filter

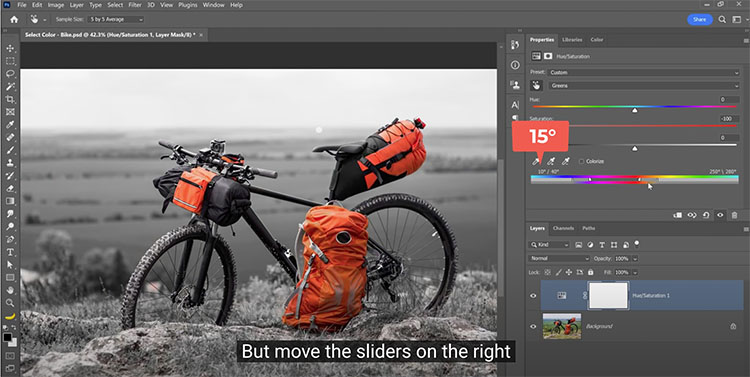
There are several important non-destructive strategies you can use to gain more control over all filter effects that will enable you to go further in your explorations and generate more sophisticated and compelling results. Try one or all of the moves in this classic progression. Apply a filter to a duplicate layer and then modify its Opacity, Blend Mode, Blend If Sliders, and add a layer mask.


Insights Members can login to read the full article.
Email:
or Sign up

How To Discover & Develop Your Visual Voice – A Talk With Photographer Matt Payne

Recently, I had a great conversation with Matt Payne (FStop & Collaborate).

We talked about …

  • My journey into photography and how I differentiated myself as an artist,
  • The difference between what art “is” and what it “is about,”
  • Discovering the extraordinary in the ordinary through photography,
  • Finding our voice as artists (and is that even a thing?),
  • And a lot more!

In bonus content, we discuss studying creativity, ways to do it, and how it has helped me as an artist.

Listen to the bonus content on Patreon.

Find more of Matt Payne’s great content here.

A Quick Visual Comparison Of All Of Photoshop’s Blur Filters

A_1_BlurFiltersBefore

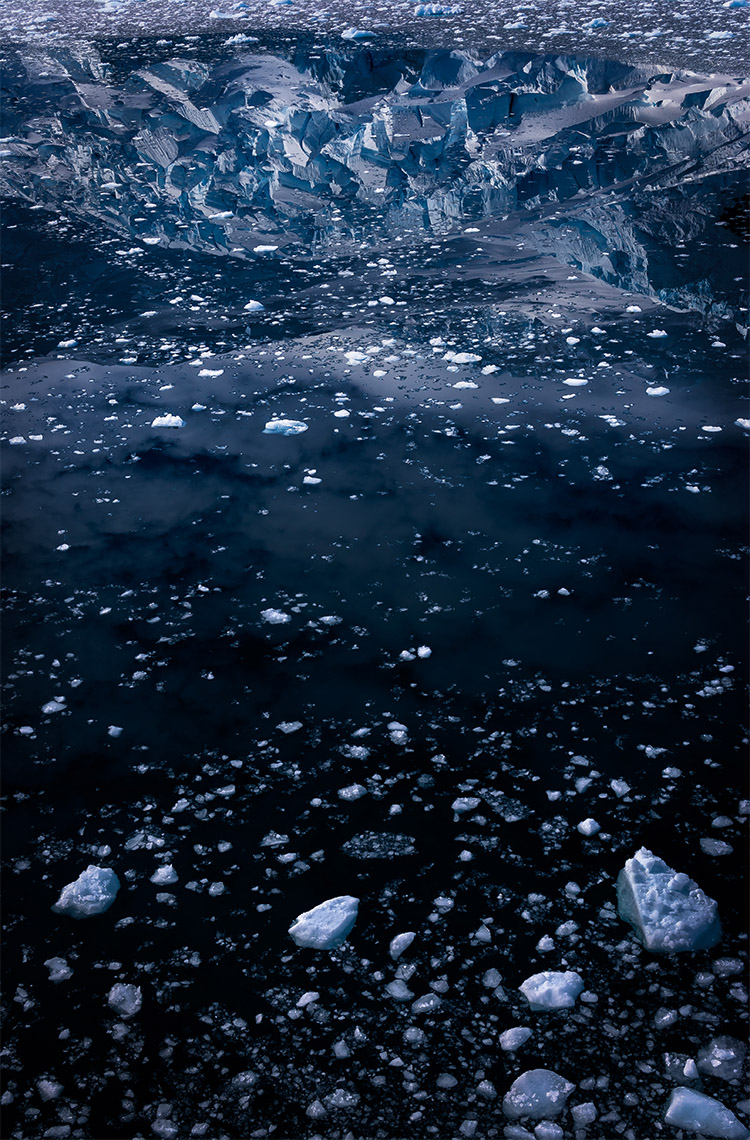
Before Blur FX

B_15_Tilt-ShiftBlur_full

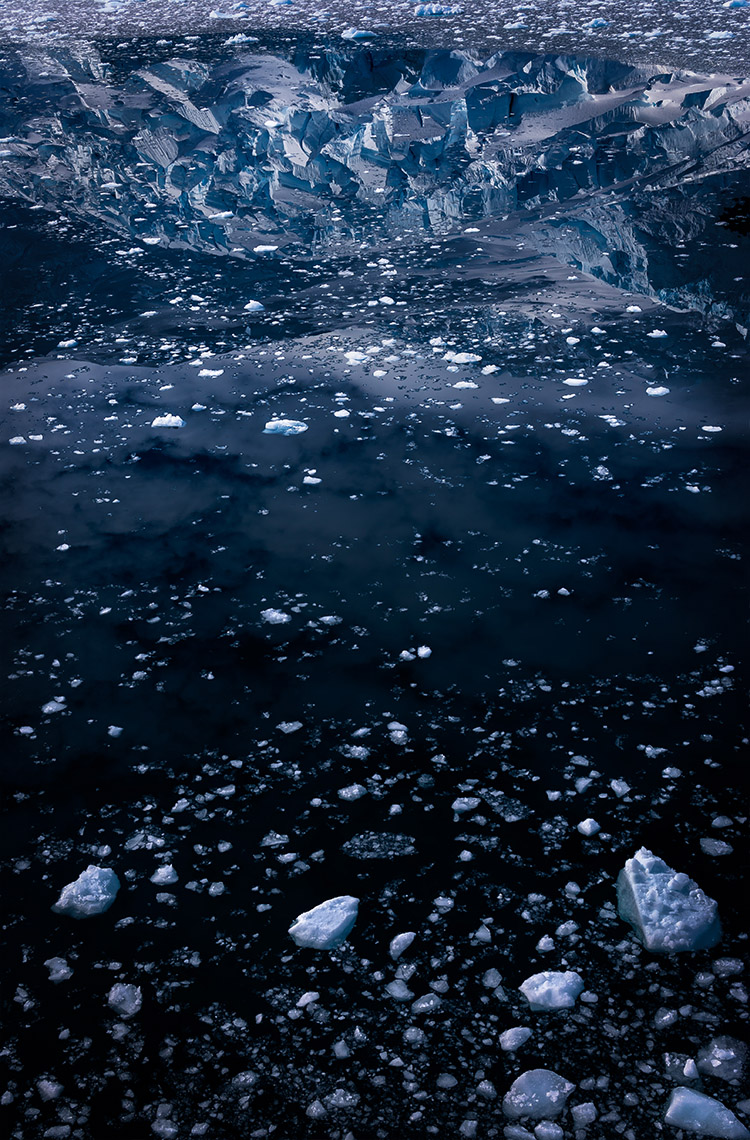
After Blur FX

There are many reasons to explore blur in your images: remove distractions, direct attention, enhance space, modify mood and add interesting visual artifacts are a few among many. Blur can be controlled at the point of capture and in post-processing. Thoroughly understanding your post-processing options will help you make choices about when and how to control blur in your images before, during and after exposure.

When it comes to post-processing blur, you’ve got options! Photoshop currently offers 14 filters: Field Blur, Iris Blur, Tilt-Shift, Average, Blur, Blur More, Box Blur, Gaussian Blur, Lens Blur, Motion Blur, Radial Blur, Shape Blur, Smart Blur, Surface Blur – in order of appearance in the Filter > Blur drop-down menu. (If you want to extend your software palette even further, explore onOne Software’s FocalPoint.)

At first glance, the list is overwhelming. Where do you start? Get started with this quick visual survey of available options.

Read More

2021 In Review – The World’s Best Photographs


Enjoy viewing 2021’s top photography collections!


History

Al Jazeera

AP News

Atlantic

Atlantic Top 25

BBC

BBC Sports

Bloomberg

CNN

CNN Historic

CNN Drone

The Guardian

National Geographic

National Geographic 10 Memorable

National Geographic – Travel

New York Times

New Yorker

Reuters

TIME’s Top 100

Time Top 10

Time

Washington Post

Washington Post The Year Of Endurance

World Press


Nature

NANPA Nature

Audubon

CNN Wildlife

CNN Comedy Wildlife

The Guardian Wildlife

The Guardian Ocean

National Geographic – Animals

National Geographic – Science

Nature Best Science

Atlantic Close-up

Reuters – Animals

Reuters – Environment

CNN Environment


View My Best Images Of 2021. 

How To Intensify Photoshop’s Go To Filter High Pass With Curves

Indispensable, Photoshop’s High Pass filtration offers contrast and sharpening effects no other tool does.

(Read Curves, Clarity, Dehaze, High Pass, Texture and Sharpening Compared.)

With only one slider, High Pass filtration slip streams between sharpening or detail enhancement (at a low setting) and luminosity contrast adjustment (at a high setting). The two are intimately tied to one another; the difference is the granularity that the contrast is applied. At a low setting, High Pass filtration accentuates contrast along contours with a thin feathered line, while the flat gray areas surrounding contours on the high pass layer tend not to accentuate texture or noise. At a high setting High Pass filtration creates stronger contrast so broadly feathered that it creates a localized vignetting effect, accentuating the illusion of volume in the process.

(Read more here on How To Apply High Pass Filtration.)

The intensity of either or both of these High Pass effects can be accentuated by adding more contrast to the High Pass layer with Curves. Unlike raising the High Pass filter slider while you apply it, which increases the width of the lines on it, increasing the contrast of the layer with Curves does not; it simply makes the lines darker and the haloes brighter.

Take these steps ...


Insights Members can login to read the full article.
Email:
or Sign up

Three Ways To Tell A Story More Creatively – It, I, You

Using words can help you find new perspectives that can be translated into images. How? Tell a story, from at least three different points of view – it, I, and you.

First, tell the story in the third person (it) as a distant observer – “Just the facts ma’am.” 

What images are needed to tell your viewers a complete story about your subject?

This perspective tends to be more objective, emphasizing facts and linear timelines so you do more research. It values clarity, balance (all sides of a story), and completeness (the whole story). It tends to avoid metaphor and stylistic distortion. It’s rarely the easiest way to build empathy for you subject. Be careful not to keep too much distance from your subject and find ways to make your viewers care.

Next, tell the story in the first person (I) as an involved participant – “How do I feel?” 

What images are needed to tell your viewers the story or you experience with your subject?

This perspective makes it personal and so draws your viewers closer to you by helping them to live vicariously. This viewpoint can become highly subjective and opens up a lot of room for interpretation. It can become like a journal. In translating this to images you might include the traces of things you do and leave behind or even yourself. (Go ahead and stand by or with your subject but be careful not to leave your subject behind.)

Finally, tell the story in the second person (you) as if you were the subject – “How does it feel to be you?” 

What images are needed to tell your subject’s story from the inside out?

This perspective encourages empathy, initially in you and later in your viewers. You can move deeper into this perspective by asking, “If I were you I would sense, think, and feel …” It might seem strange at first to do this with inanimate subjects – like rocks or buildings or roads. Remembering what it was like to be a kid playing these kinds of games will help you a great deal here. (We all know how creative kids can be, so have fun and play a little.) This perspective may encourage you to photograph from different perspectives; get closer or further, lower or higher, or turn around and photograph what your subject might see. Often, this voice will help you discover the most unusual perspectives.


Read more in my Storytelling resources.

Learn more in my Creativity & Photography workshops.

The Quickest Way To Get 200% Or More From Lightroom’s Adjustment Sliders

Did you ever wish you could get more out of a slider in Lightroom (or Adobe Camera Raw)?

Here’s how to go beyond the maximum amount a slider allows.

Use Create New Mask and make a Gradient or Brush … outside the image area. Click the gradient outside the border and drag away from it. Or, click the brush outside the border and check the Invert box. Then use one or more sliders to go beyond their maximums. 

You can do this as many times as you like. 150%, 200%, 300%, 400%, 500% … there’s no limit.

This is faster and more uniform (less uneven) than brushing the entire frame.

This only works with the sliders available in the Masking panel.

If you want to do this with sliders that aren’t in the Masking panel, open the file in Photoshop and apply the Camera Raw filter.

But wait, there’s more. You can apply this principle selectively too. If you’re in Lightroom or Camera Raw use a brush to add more. If you’re in Photoshop, use a Camera Raw smart filter with a mask. There are no limits.

Find more resources on Raw processing here.
Learn more in my digital photography workshops.

The Art of Visual Storytelling – Sarah Leen & John Paul Caponigro

.
Tuesday, December 14, 2021 – 6:00-7:00 pm (Mountain Time)
.

Creativity Continues at Santa Fe Workshops with The Art of Visual Storytelling, a conversation between photo editor Sarah Leen and photographic artist John Paul Caponigro.

During this informative and captivating hour, Sarah and John Paul discuss personal projects and how they often lead us deeper into creativity and to our greatest growth both personally and professionally. But how do you start and sustain them towards completion?

Sarah and John Paul dive deeply into the craft of visual storytelling, essential skills for every photographer that will inspire a lifetime of creative exploration. Through the fine art of deliberate image selection, you can transform a collection of photographs into a compelling, dynamic narrative. Join them to learn strategies for choosing, combining, and sequencing diverse images into cohesive bodies of work for presentation online, in print, or for exhibition. We’ll celebrate personal projects as our best way to discover and develop our authentic visual voices. You’ll see real-world examples and hear the stories behind them that are sure to inspire you. This program finishes with a lively question and answer session open to all participants.

Join Santa Fe Workshops worldwide community of photographers and writers as Creativity Continues this fall.

.

A Quick Q&A On The Importance Of Photo Editing With Sarah Leen

Tuesday, December 14, 6:00-7:00 pm (Mountain Time)

Creativity Continues at Santa Fe Workshops with The Art of Visual Storytelling, a conversation between photo editor Sarah Leen and photographic artist John Paul Caponigro.

Register for this free event now.

Sarah Leen offers many insights into the importance of photo editing.

What are some of the benefits of developing projects?

It is to the photographer’s advantage to work on something they feel passionate about. It can lead to the creation of a body of work that might draw in clients, exhibits or assignments that could support the project. Be the captain of your own fate! 

Are you more satisfied with a single image or a project?

A project can give me a better idea of how the photographer’s mind works, and it shows that they can sustain and accomplish a project from inception to completion. Out of the project comes the single images I like for my walls!

When you’re faced with many possibilities how do you recommend, we choose between possible projects?

What is the work you want to be known for? What is the work that you will do whether you are being paid or not? Follow your bliss and your passion for a project and you won’t go wrong. 

How do you know you’re done?

Great question! Some projects are never done. They continue to evolve into another chapter or form. So, if it is helpful you might need to give yourself some deadlines. Ask yourself is it ready to become a book? An exhibition? A magazine story. This will help you focus your work and give you something to reach for and look forward to. 

How often do you find that projects incorporate more than one form of presentation – website, audio-visual presentation, exhibit, publication, etc.

Often. A project can be, and perhaps should be, many things. There are so many ways to reach your audience and find new audiences for your work that utilizing more of them will help broaden the reach and audience for you work. 

What are your thoughts on how much or how little text to include with photographs?

I like to know what I am looking at. That is the photojournalist in me. But, depending on the platform where the work will live, the information does not always need to be contiguous with the images. So, the information could be at the back of the book or in small text with the image or in the image catalog for the exhibition. Or in a separate document that comes with a print. Obviously, for an editorial use like a magazine or a website more information will be needed, and it would reside with the image.

What kinds of texts work better than others?

For an editorial project, the 5 Ws are key. Who, What, Where, Why and When? For a more artistic production like an exhibit, an art book, or prints, that is probably not necessary. I like to know where an image was taken and when. But that might just be me. 

Do you advise artists to write their own texts or find a writer to write for them?

Really depends on where the work will live. For an editorial publication, they will most likely have their own writer they want to use but there are always exceptions. But for a photobook, I love to hear the photographer’s voice. While an intro or preface or an essay to accompany a book is a great place to bring other voices. 

How often do projects finish exactly the way they were conceived?

Being flexible to chance and serendipity is a good attitude to have. Be open to all possibilities and welcome surprises. That may be where the really good stuff lives. 

How often do you find that one project leads another?

I think the photographers who have been able to sustain a long career are always finding ways to evolve their ideas into the next one. A body of work can have any chapters and iterations. 

What are the most important things that a picture editor brings to a project?

Another set of trusted eyes who can give you honest feedback and encouragement. A shoulder you can cry on or celebrate with. Someone to brainstorm with and who brings an often-needed skill set to the table just when you need it. 

Is picture editing a talent you’re born with or skill that can be learned?

Good question. I don’t know. Starting out as a photographer taught me how to edit first my own work and then others. As a photographer, you are editing every time you make an image. You have made many choices as to where to photograph, what to photograph, what is inside or outside the frame. So, it can be a natural progression to continue that process when looking at the images after they are made. What to keep and elevate and what to let go. 

How have your picture editing skills helped advance your own photography?

As per above being a photographer first advanced my photo editing skills for sure.

What personal benefits do you receive from teaching?

Oh, so much personal satisfaction when a photographer succeeds, when they have learned a new skill and the light bulbs are coming on over their heads. And when they are inspired with new ideas and new motivation for their work. It is totally like being a mother with a child in a talent show. I am totally invested in their success. Their success is my success. 

Find out more about Sarah Leen here.

Register for our free webinar now.


The Great Animal Orchestra: Bernie Krause and United Visual Artists

The Great Animal Orchestra from United Visual Artists on Vimeo.

.
The Great Animal Orchestra on view at The Peabody Essex Museum November 20, 2021 through May 22, 2022

The Peabody Essex Museum and the Fondation Cartier pour l’art contemporain are proud to present the North American premiere of The Great Animal Orchestra.

Step into an immersive audio-visual experience that celebrates our planet’s rich biodiversity. Over the course of nearly fifty years, Bernie Krause collected more than 5,000 hours of recordings of natural environments, including at least 15,000 terrestrial and marine species from around the world.

Trained as a musician, Krause found animal vocalizations in the natural world to be akin to musical harmony and orchestral organization. Krause’s soundscapes reveal that within any ecosystem, each species has its own acoustic niche and human activities are increasingly silencing these great animal orchestras. United Visual Artists (UVA) worked with Krause to visualize these recordings as animated spectrograms, which immerse us in the heart of these wild soundscapes. This unique installation makes a plea for preserving the wondrous diversity of the animal world.

The Great Animal Orchestra, a collaboration between Bernie Krause and United Visual Artists, was commissioned in 2016 by the Fondation Cartier pour l’art contemporain, and is now part of its permanent collection. The exhibition is organized by the Peabody Essex Museum and the Fondation Cartier pour l’art contemporain.