Constellation

Constellation

Constellation

Constellation

Constellation

Revelation

Revelation

Revelation
This is a selection of my top images of 2019.
Check back later – there will be some late entries.
This selection doesn’t reflect sales, publication, or activities on the web. It simply reflects my opinion.
Geography
The locations include Antarctica, Scoresbysund Greenland, Iceland, and Namibia.
Process
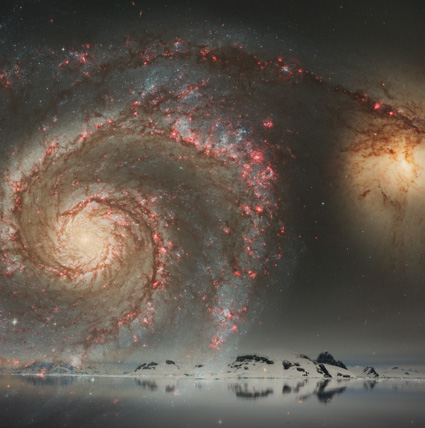
Continuing the momentum from the previous year’s experiments I combined more images from the Hubble telescope (in the public domain ) with my own exposures, expanding my series Constellation with new images of deep space as well as stars observed with the naked eye.
Fog and glassy smooth waters in Scoresbysund Greenland offered surprise “straight” additions to my series Revelation. There are many other successful exposures waiting to be finished as composites. The images I released in 2019 all have a primal quality, a felt sense of being in the presence of another consciousness.
Concepts
Ideas about a living earth have been expanded to a living universe.
Where images in my Land In Land series present married views of the same land in both an overview and a detail seen by looking very closely, images in Constellation present married views of lands and the stars that surround them offering a glimpse into deep space and time. What’s beyond the object, behind the surface, and perhaps even within it shows through.
Magic Moments
We had ten straight days of full sunshine in Antarctica. Amazing!
Still waters and thick fog persisted for several days in Greenland’s, Scoresbysund.
Standing out the door on the rail of a helicopter above Icelandic rivers was thrilling.
It was a very productive year; more than 75 new works released; more than 150 new studies made.
It’s challenging to choose so few images from so many – but it’s insightful. Try selecting your own top 12 images. Try selecting the top 12 images of your favorite artist(s).
View more of my Annual Top 12 Selections here.
View more images in my ebooks here.
View my full Works here.
View my Series videos here.
View new images in my newsletter Collectors Alert.


