Check Your Inboxes! My Newsletter Insights Is Out!
My newsletter Insights is out Monday morning!
This issue features valuable resources on How To Write About Your Images.
Sign up for my free newsletter here.
My newsletter Insights is out Monday morning!
This issue features valuable resources on How To Write About Your Images.
Sign up for my free newsletter here.
Writing an artist’s statement is something I initially resisted. For years I’d heard all of the excuses from many great artists, “Pictures should be seen and not heard.””If I could say with words what I want to say with images, I’d have become a writer.””Those critics got it all wrong.” But, did you ever notice how the people who write about other people’s art always have to address what the artists wrote about their work? Van Gogh’s and Edward Westons’ journals are both excellent examples of this – and worth reading.
I broke down and wrote my first artist’s statement when a gallery insisted they needed one for their exhibit and the response was positive. (A professor at Stanford later asked permission to share it as an example of how to do it well.) I was surprised not only by the positive response to my writing but also by how much I learned about my images while I was writing about them. I knew how to make the work – physically, emotionally, subconsciously – but did I understand what I had done fully. My conscious mind had some catching up to do … and in the process, I found new ideas. Now I make writing about my images a regular practice. Why? I understand them better. Other people connect with them more. And I find new ideas.
I’ve collected some valuable resources that will help you write about your images.
Start with my free PDF.
9 Ways Of Writing About Your Images
Then move to this collection of quick tips.
6 Tips for Artists on How to Talk about Their Art
4 Tips for Writing a Good Artist Statement
How to Write an Artist Statement
4 Ways to Write an Artist Statement
An Authentic and Easy Artist’s Statement | 10 Powerful Tips
Want even more? Try these three information-packed resources.
What Should An Artist’s Statement Contain?
The Language of an Artist’s Statement
Examples Of Artist’s Statements
There’s even an entire website dedicated to helping you write better artist’s statements.
Artist’s Statement.com – Resources To Help You Write A Good One
It’s easy to make fun of artists statements when they’re done poorly or for the wrong reasons –while you’re doing it just be clear about what makes them funny and you’ll learn a lot while you’re having fun. You can learn a lot about how to write well by looking at examples of bad writing. So, don’t use this to write your artist’s statement, instead, use it to figure out what and how not to write. And don’t forget to laugh along the way.
Learn more in my digital photography and digital printing workshops.
Get more curated content in my Newsletter Insights.
Follow me on Facebook, Twitter, and Instagram.
Plus check out The Complete Guide To Writing Your Amazing Photography About Page
“Michael Michalko is one of the most highly acclaimed creativity experts in the world and author of the best sellers Thinkertoys, Cracking Creativity, and ThinkPak. In this interview with NCR Radio he talks about his book, Creative Thinkering: Putting Your Imagination to Work. He explains why creative thinking is often counterintuitive and some methods that may help you develop your next fantastic idea.”
Michalko’s books are brilliant. I give them my highest recommendation.
View more Creativity Videos here.
Learn more in my Creativity workshops.
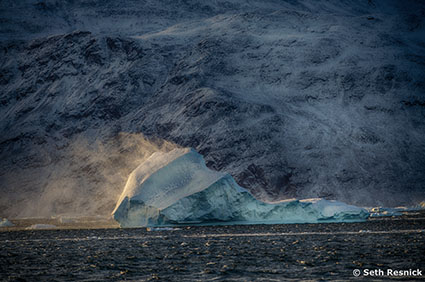
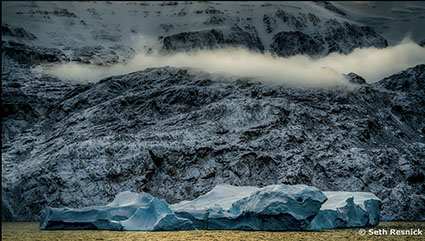
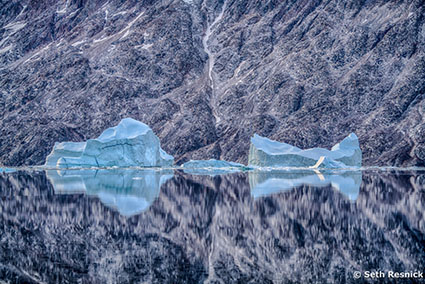

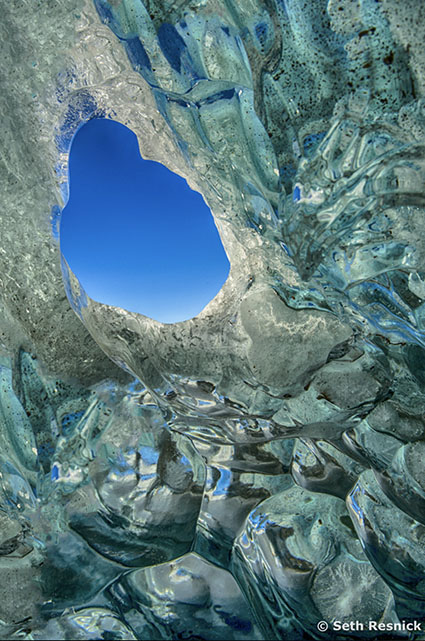
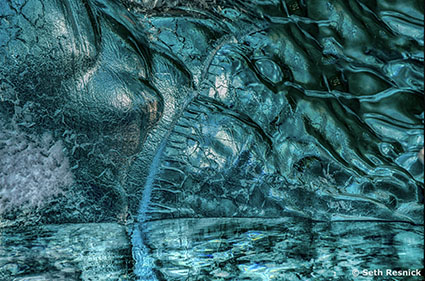
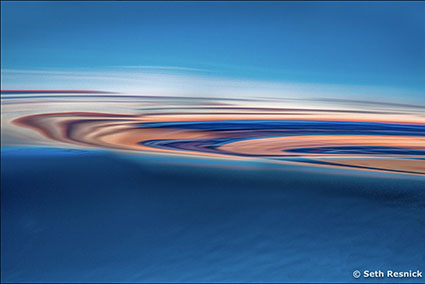
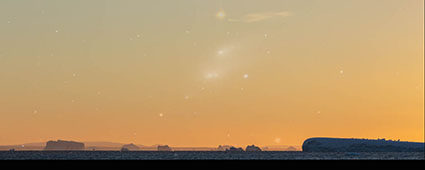
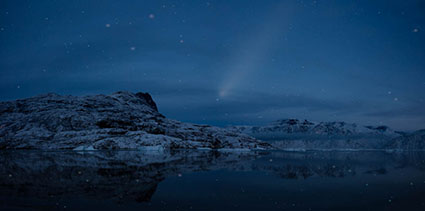
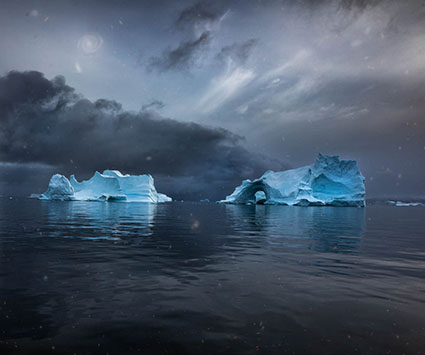
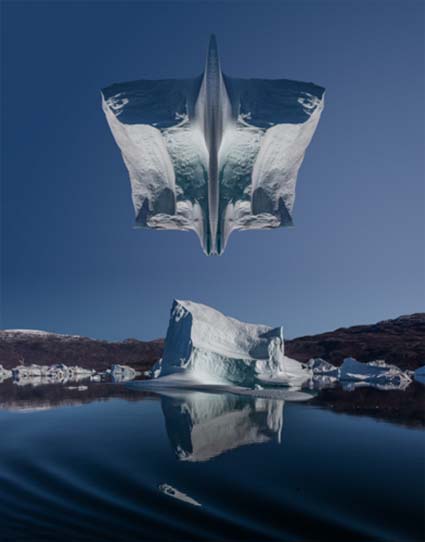
We just got back from our recent DPD workshop in Greenland’s Scoresbysund, the largest and fastest moving ice fiord system in the world.
Seth Resnick continued to explore his fascination with abstraction, getting in close and finding optical illusions.
View more of Seth Resnick’s images from Greenland here.
Find out about our Greenland Photography Workshops here.
Find out about our Antarctica Photography Workshops here.
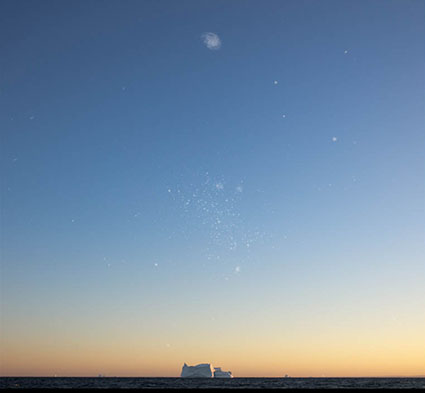


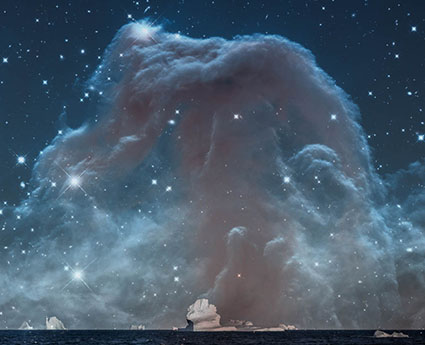
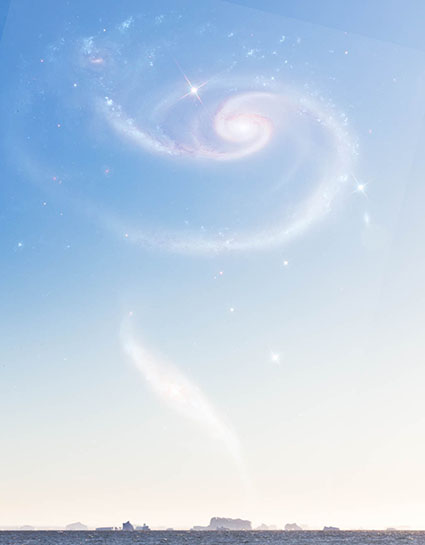
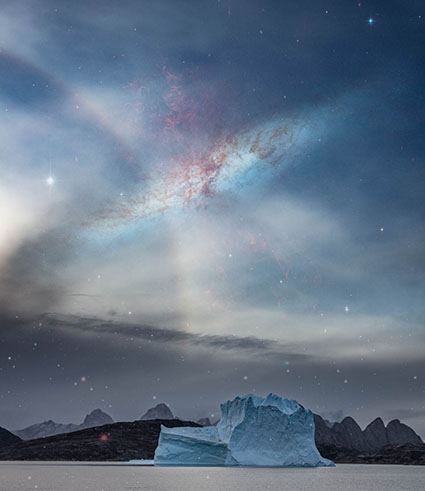
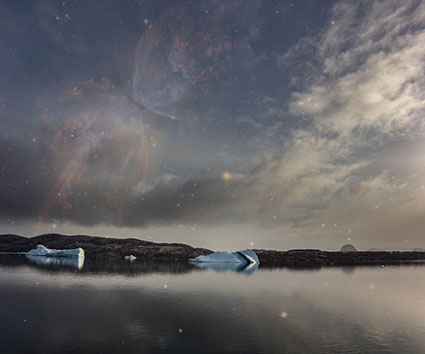
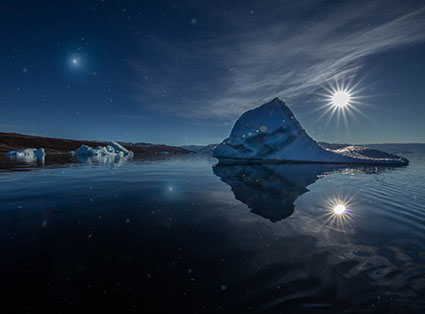
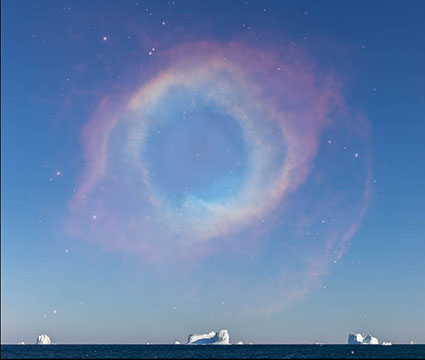
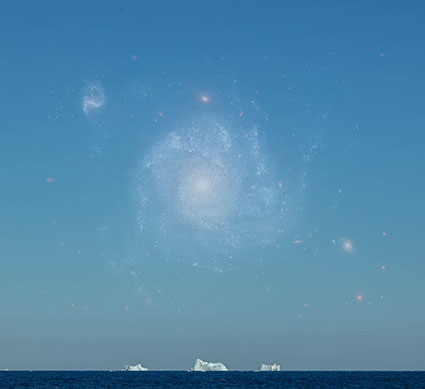
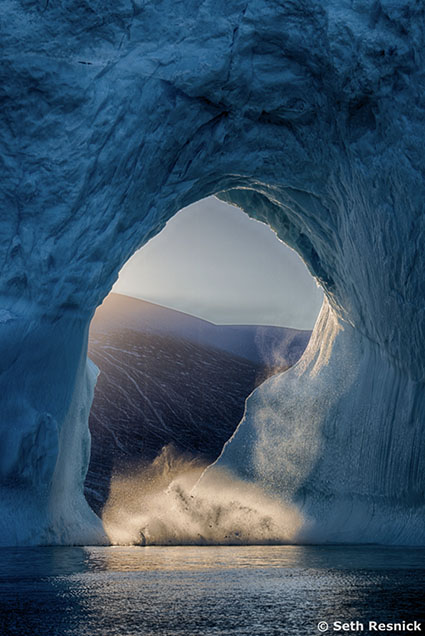
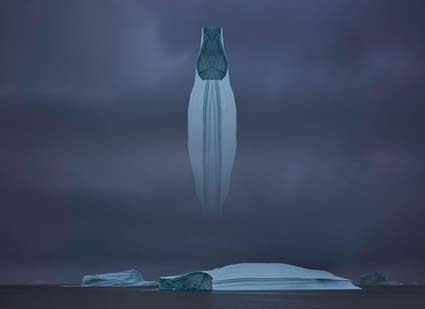
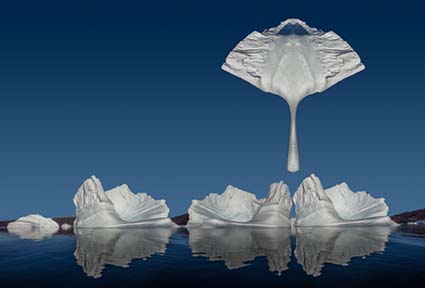
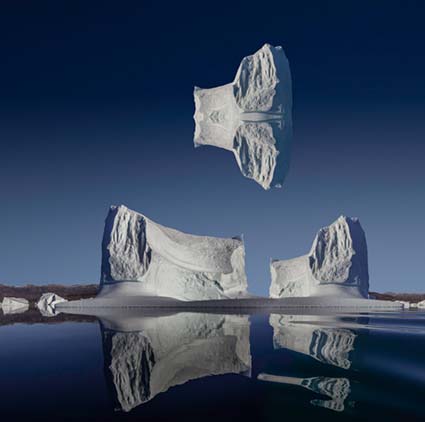
During our 2018 DPD Greenland Workshop I made many exposures for several series but focussed on finishing images for one series in particular – Constellation.
My series Constellation marries the heavens and earth by showing the lands and the stars that lie behind, around, and within us. Carl Sagan reminds us “We’re all star stuff.”
When we gaze at the heavens we see where we came from and what we were, where we are going and what we will be. When we gaze at the land we see where and what we are now. Contemplating both we embrace an expanded view of our place in the universe and ourselves.
To find our way we must first find us. These images encourage us to consider a longer wider view.
View selected images from previous voyages to Greenland here.
View more images from my series Constellation here.
Find out about my Greenland Photography Workshops here.
Find out about my Antarctica Photography Workshops here.
My new video shares inspiring photographs and fascinating facts about the mysterious continent Antarctica.
Download my free ebook Antarctica / Two Visions here.
Find out about my Antarctica photography workshops here.

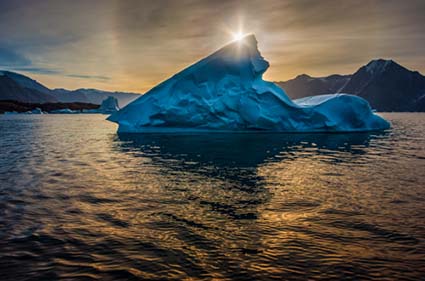
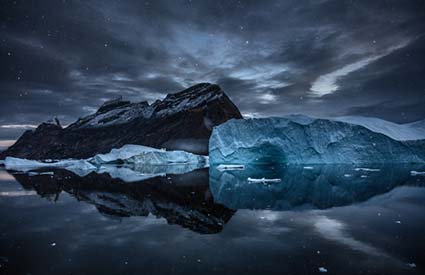
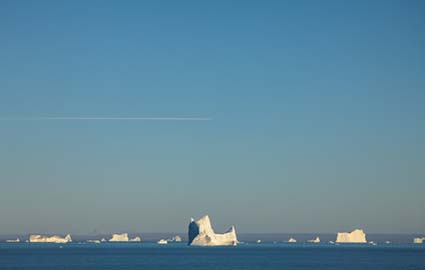
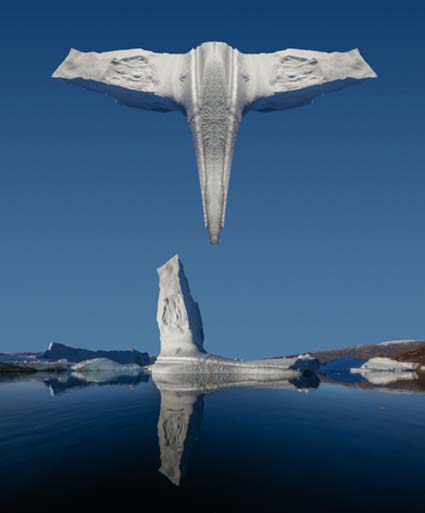
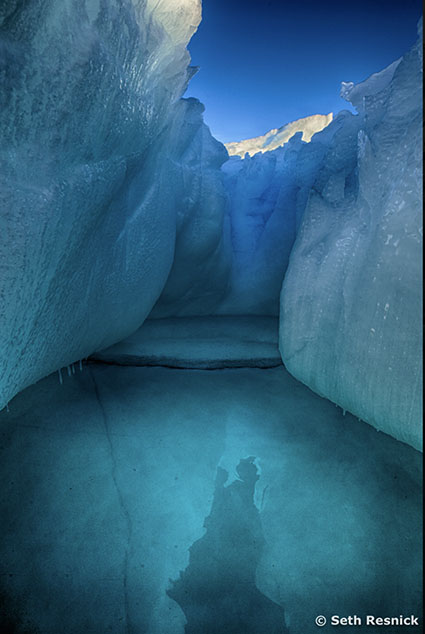
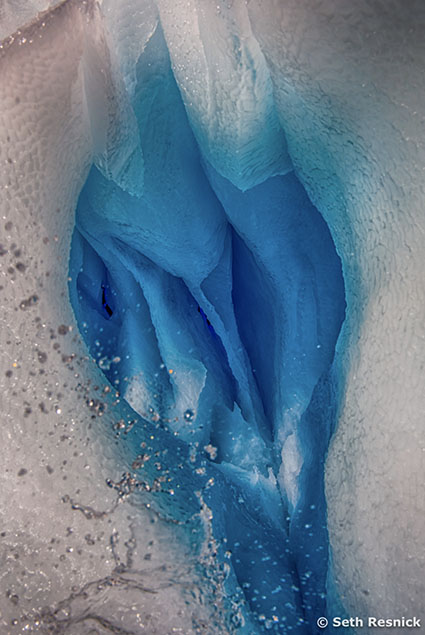
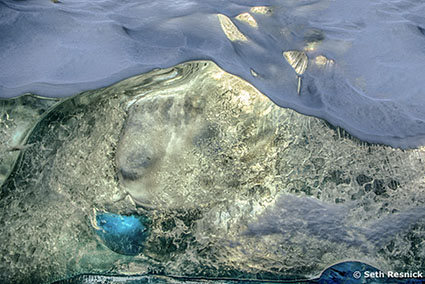
Enjoy this selection of images from Scoresbysund, Greenland.
These images are selected from three ongoing series – Revelation, Constellation, and Contrail.
View more images from Greenland here.
Find out more about my Greenland workshops here.

I’m exhibiting my first metal prints!
My metal prints are produced by Blazing Editions with Epson dye-sublimation technology on ChromaLuxe aluminum panels at very large scales in very limited editions. These materials offer a unique ability to hold and reflect light at expanded scales that increase their impact even further. Viewer’s early responses have been exciting!
You can see my new metal prints at two separate events.
I’ll be speaking at both events.
Come visit!
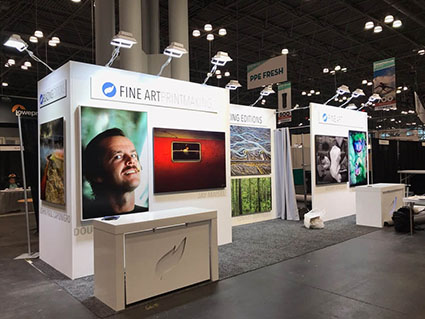
October 25 – 27, 2018
New York City – Jacob Javits Center
Reception on October 25th from 5:30 to 7:30pm
This is a joint exhibit with NYC Dance Company’s Ken Browar and Deborah Ory.
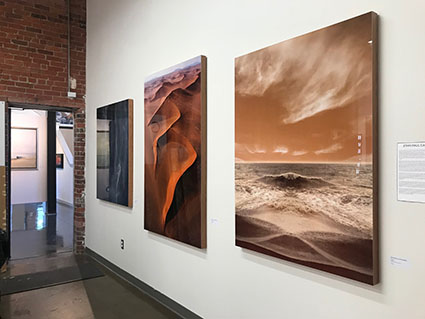
November 9 – December 31, 2018
East Greenwich, Rhode Island
Reception on November 9th from 5:30 to 7:30pm
This is a joint exhibit with Joyce Tenneson
RSVP here!
Austin Kleon offers a collection of pearls of wisdom drawn from his books Steal Like An Artist and Show Your Work.
View more Austin Kleon videos here.
Learn more about Austin Kleon here.
View more Creativity Videos here.
Learn more in my Creativity workshops.

My newsletter Insights is out!
This issue features valuable techniques for making selections in Photoshop easy.
Sign up for my free newsletter here.