My Free July Desktop Calendar Features Iceland
My free July Desktop Calendar features an image from Iceland’s Snaefellsness peninsula.
Download your free copy here.
Find out more about this image here.
My free July Desktop Calendar features an image from Iceland’s Snaefellsness peninsula.
Download your free copy here.
Find out more about this image here.
image without HDR software processing
image with HDR processing in sky only
image blending 50% normal and 50% HDR processing
image with heavy HDR processing using Photomatix
HDR imagery is expanding today’s photographic aesthetics. Identifying the characteristics of contemporary HDR images will help classicists and pioneers alike. The basic ingredients are desirable for both sensibilities, but in varying combinations and to different degrees.
Pronounced Shadow and Highlight Detail
Preserving significant amounts of shadow and highlight detail even in images containing extreme contrast ranges is something long sought after and continually improving in photography. Prior limitations in the medium have established a conventional appearance for photographs than now needs to be reconsidered, first in light of the way the eye sees at a glance, second in light of the way the eye sees adaptively over time, and third in light of the way we might like to represent a scene expressively. Excessive recovery can alter large-scale contrast ratios unnaturally and in extreme cases may yield localized solarization.
Accentuated Edge Contrast
In an effort to preserve midtone separation after extreme dynamic range compression edge contrast is accentuated. This produces dark lines and bright halos, typically feathered rather than hard edged. As they intensify they begin to drive images away from a classic smooth continuous tone appearance.
Get to know photographer Adam Fuss better with these 3 videos.
Read my conversation with Adam Fuss here.
View 12 Great Photographs By Adam Fuss here.
Read 10 Great Quotes By Photographer Adam Fuss here.
View more in the Essential Collection Of Documentaries On Photographers.
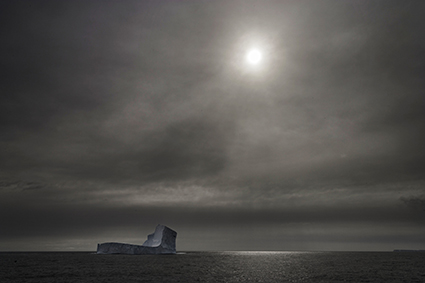
final image double processed
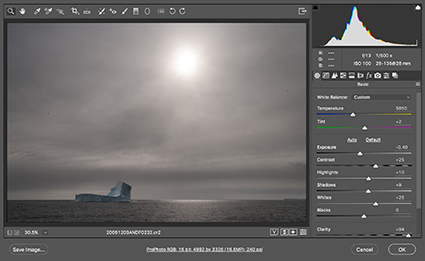
image processed light
image processed dark
the Photoshop layer stack used to blend dark and light together
HDR Without Bracketing
If you need to make an image of a relatively high contrast scene that challenges but does not exceed the dynamic range of your camera (or film), consider double processing. Make two derivative files from one original, one dark and one light. Layer the two together. And blend the best information from each. This practice can substantially improve the quality of the information in your file. Even small changes can make a big difference. Remember, this technique is for challenging files, not for every file. If you can achieve ideal results with Raw processing alone or one layer only - do. Keep it simple, when you can.
HDR software is most typically used to render shadow and highlight detail, but it can also be used to enhance tonal separation and detail in any range of tones, even in images with extremely low contrast. The very same tools that are used to compensate for HDR side effects can be used to sharpen any image.
When multiple bracketed exposures are merged into a single processed file, shadows and highlights that exceed the dynamic range of a camera’s sensor are compressed into the dynamic range of a digital file, taking the midtones with them. Depending on the HDR software used, a variety of tools are available to restore contrast and separation in midtones. If used aggressively, these tools produce the tell tale signs of contemporary or grunge HDR artifacts – halos and texture accentuation. These are the very same artifacts that digital sharpening routines use more conservatively to make images appear sharper - only they look different.
Enjoy this collection of quotes on personal Callings.
“I believe there’s a calling for all of us. I know that every human being has value and purpose. The real work of our lives is to become aware. And awakened. To answer the call.” ― Oprah Winfrey
“Emptiness is a symptom that you are not living creatively. You either have not a goal that is important enough to you, or you are not using your talents and efforts in striving toward an important goal.”– Maxwell Maltz
“We are not in a position in which we have nothing to work with. We already have capacities, talents, direction, missions, callings.”– Abraham Maslow
“We shall never learn to feel and respect our real calling and destiny, unless we have taught ourselves to consider everything as moonshine, compared with the education of the heart.”– Sir Walter Scott
“I have brought myself by long meditation to the conviction that a human being with a settled purpose must accomplish it, and that nothing can resist a will which will stake even existence upon its fulfillment.”– Benjamin Disraeli
“Choose a job you love, and you will never have to work a day in your life.” – Confucius
“Your profession is not what brings home your paycheck. Your profession is what you were put on earth to do. With such passion and such intensity that it becomes spiritual in calling.” – Virgil
“Somewhere someone is thinking of you. Someone is calling you an angel. This person is using celestial colors to paint your image. Someone is making you into a vision so beautiful that it can only live in the mind. Someone is thinking of the way your breath escapes your lips when you are touched. How your eyes close and your jaw tightens with concentration as you give pleasure a home. These thoughts are saving a life somewhere right now. In some airless apartment on a dark, urine stained, whore lined street, someone is calling out to you silently and you are answering without even being there. So crystalline. So pure. Such life saving power when you smile. You will never know how you have cauterized my wounds. So sad that we will never touch. How it hurts me to know that I will never be able to give you everything I have.” – Henry Rollins
“Most of us would like to end our lives feeling both that we had a good time and that we left the world a little better than we found it.”– Philip Slater
“The role of the teacher remains the highest calling of a free people. To the teacher, America entrusts her most precious resource, her children; and asks that they be prepared… to face the rigors of individual participation in a democratic society.”– Shirley Hufstedler
“The growth and development of people is the highest calling of leadership.”– Harvey S. Firestone
“The practice of medicine is an art, not a trade; a calling, not a business; a calling in which your heart will be exercised equally with your head. Often the best part of your work will have nothing to do with potions and powders, but with the exercise of an influence of the strong upon the weak, of the righteous upon the wicked, of the wise upon the foolish.” – William Osler
“Art is the great democrat, calling forth creative genius from every sector of society, disregarding race or religion or wealth or color.” – John Fitzgerald Kennedy
“If you ask me what I came to do in this world, I, an artist, will answer you: I am here to live out loud.” ― Émile Zola
“I don’t tell you this story today in order to encourage all of you in the class of ’04 to find careers in the music business, but rather to suggest what the next decade of your lives is likely to be about, and that is, trying to ensure that you don’t wake up at 32 or 35 or 40 tenured to a life that happened to you when you weren’t paying strict attention, either because the money was good, or it made your parents proud, or because you were unlucky enough to discover an aptitude for the very thing that bores you to tears, or for any of the other semi-valid reasons people marshal to justify allowing the true passion of their lives to leak away. If you’re lucky, you may have more than one chance to get things right, but second and third chances, like second and third marriages, can be dicey propositions, and they don’t come with guarantees…. The question then is this: How does a person keep from living the wrong life?” ― Richard Russo
“The crowning fortune of a man is to be born to some pursuit which finds him employment and happiness, whether it be to make baskets, or broadswords, or canals, or statues, or songs.” ― Ralph Waldo Emerson
“I think it would be well, and proper, and obedient, and pure, to grasp your one necessity and not let it go, to dangle from it limp wherever it takes you.” ― Annie Dillard
“My wish simply is to live my life as fully as I can. In both our work and our leisure, I think, we should be so employed. And in our time this means that we must save ourselves from the products that we are asked to buy in order, ultimately, to replace ourselves.” ― Wendell Berry
“If God gives you something you can do, why in God’s name wouldn’t you do it?” ― Stephen King
“Change makes you find your calling, your legacy, and God’s divine plan for your life. Don’t run from it.” – Iman
“Whatever your calling is as a service, follow it – that’s beautiful.” – Hill Harper
“Every calling is great when greatly pursued.” – Oliver Wendell Holmes
“…it sounds like life is calling you to do something BIG and you haven’t picked up the phone.”– Anonymous
“Go confidently in the direction of your dreams. Live the life you have imagined.”– Henry David Thoreau
“Live your beliefs and you can turn the world around.”– Henry David Thoreau
“Let us become the change we seek in this world.”– Mohandas Gandhi
Explore The Essential Collection Of Creativity Quotes here.
Discover more quotes in my social networks.
You’ll gain real insight into the mind of photographer Kenro Izu in these three videos.
Read more in our conversation.
Read 9 great quotes by photographer Kenro Izu.
View 12 Great Photographs By Kenro Izu.
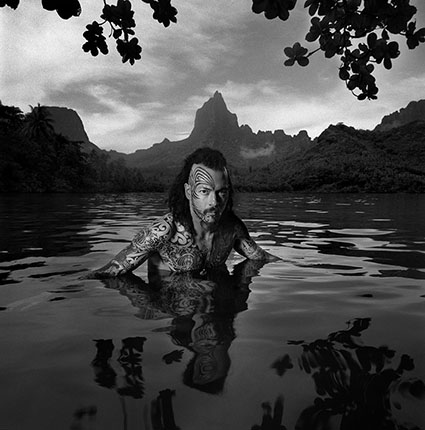
Enjoy this collection of quotes by photographer Chris Rainier.
Enjoy this collection of quotes by photographer Chris Rainier.
“I am a storyteller who uses a camera.” – Chris Rainier
“I always knew that I wanted to be involved in seeing and understanding from seeing around the world. Photography is a perfect way to do that.” – Chris Rainier
“We need to take a moment now and then to trade stories about what it really means to be a human being.”
“I am South African by birth, but because of my father’s job, our family traveled a lot. While living in places like Africa and Australia, we visited indigenous peoples. From the beginning, I carried a camera to document the beauty and wonder of these far-flung countries. I also realized many of these cultures were faced with issues I could not ignore. I understood at a very early age, things were not like they were represented in travel magazines.” – Chris Rainier
“Working with Ansel (Adams), what happened there for me was, “Oh, I could use photography as a social tool.” His use of photography for environmental issues was phenomenal.” – Chris Rainier
“We consider biological diversity of these different flora and fauna crucial to our survival, but don’t think about intellectual diversity — in fact, we kind of look at it in a global market level, wouldn’t it be great to have one language? Well, if all we’re doing is communicating about commerce, perfect. But what about diversity that comes up in a language. Each language has its own unique way of looking at things.”
“We are at a crucial crossroads of human history. We are losing traditional cultures with their ancient ways of life and spiritual beliefs at catastrophic rates … With my photography of the First Peoples of our fragile planet, I hope to show spiritual traditions from our past in the present, and become part of the process in some small way of helping prefer life for future generations. I believe photography plays a crucial role in helping sustain and revitalize cultures on the edge.” – Chris Rainier
“With my photographs, I hope to show the past in the present and become part of the process of pressuring life for the future. As our television sets carry us boldly about the world, and as the chainsaws fell the last trees that hide the lost peoples, we lose an essential mystery, and with it, the wisdom which may lie there. If we would be citizens of that world, then we must do all we can to ensure the survival of that world. As only one form of life on Earth, we must keep our humility and finally honor life itself. Once the fragile umbilical cord to our primal past has been severed, we will find ourselves truly alone, without purpose, adrift in a vast space with nowhere to go.” – Chris Rainier
“What would happen if you gave a camera to the Afghan girl in Steve McCurry’s iconic photo? How different would those photographs be? Not to replace the Steve McCurry’s, but rather to create another chair at the table of the dialogue of what it means to be human. It’s not an either/or. It’s not a good or a bad. It just simply is.There are voices out there that have incredible vision, and we aren’t accessing them enough.” – Chris Rainier
“There’s so many cultures that are still now not connected and are getting left behind in the digital divide. More and more, this is a world where you don’t exist unless you’re online, and you don’t have access to information to education to empowerment, to women’s issues, to job opportunities, unless you’re connected.” – Chris Rainier
“I have come to realize that the further I evolve as a photographer, regardless of where I point my camera, I am taking a self-portrait — a reflection of my own story, my own beliefs, my own point of view. Nothing more. Nor do I presume that where I point my camera and take a picture is a reflection of the absolute truth. There is no such thing as an absolute truth. All images merely reflect the emotion of the photographer and the opinion of the reviewer. As it is stated in photography, there always exists two individuals in every image, the artist and the observer, and their sets of beliefs and cultural biases.” – Chris Rainier
“We’re always told to be objective. Well there is no such thing as objective. There is no such thing. We all have an opinion. As visual storytellers we must form opinions therefore things become subjective and the more intense they become they become extraordinarily subjective. I think the powerful images in documentary and photojournalism, if not in other areas of our field, are the ones where people have taken a stance and made a subjective opinion.” – Chris Rainier
“It’s presumptuous of me to document this culture and call it a documentation. It isn’t a documentation, it is an interpretation of their culture.” – Chris Rainier
“I’m also really trying to be careful not to deal with stereotypes. I was most concerned that I didn’t perpetuate the myth about the savage cannibal. In part that’s why I didn’t go in the direction of National Geographic. They have a colonial approach to the exotic. I didn’t want to get into that. I wanted to try to be as honest about a culture as possible, which is never entirely possible, we always have our own cultural bias.” – Chris Rainier
“I couldn’t get a straight answer when I was with the indigenous people. So I came back, read about it, and went back again and again. The wrong thing that happens, in my mind, is that you’re so prepped on western scientific explanations for things that you’ll miss the point completely.” – Chris Rainier
“What I’ve learned along the way is you have to ask the right question to get the right answer. Often as westerners we go in asking western questions and maybe that’s not the question to be asked. You need to be asking the question in a New Guinea sense. In a sense of the relevancy of their culture not the relevancy of what we think it is. There’s a big difference.” – Chris Rainier
“What’s going on in contemporary anthropology, trying to empower indigenous people to tell their own stories and get a more accurate story to tell other cultures.” – Chris Rainier
“The minute an indigenous culture becomes aware of its value to other cultures it shifts its tone and its perspective.” – Chris Rainier
“There are many examples of where they’re being overrun. But there’s power in information and there are enough organizations like Cultural Survival, Conservation International, Shaman Pharmaceutical. Shaman Pharmaceutical is actually going into the forest and documenting what the shamans are using but they are also linking up the shamans so they can talk to each other. So there are shamans in Borneo talking to shamans in the Amazon, ‘Hey what kind of leaves do you use?’ I think technology is being used in a constructive way to help people preserve their cultures.” – Chris Rainier
“They’re going to be able to hold onto their land and cultural beliefs. You take them out of that context and they’ve lost their roots, they have lost their sense of being nourished. That’s exactly what we’ve lost.” – Chris Rainier
“There are may be questions that we should never find the answers to. You know, in a world that quantifies everything. And this is what I wrote about in one of those essays in the New Guinea book. I hiked through this valley for a couple of weeks, and went through this valley of leeches, and got to the edge of this community, and this valley where this community lived, and the warriors met me – they knew that I was coming – and they said, ‘No. We are not going to let you in. We’re not allowed to let you in.’ I was upset. I was frustrated. I had spent all that time and energy and money to get there. And then after a day or so of spending time on the outer perimeter of this valley with the warriors who were very kind to show me around on the fringes, I got it. It’s good to know that there are places that are untouched, unmapped, not understood, and not quantified because then it still allows us to have the concept of the mystery of life. Once science takes over it quantifies everything, then we’re done for.” – Chris Rainier
“How do you put a value on art? How do you put a value on a little kid who comes wandering through here, and has a shift in his perspective, and is profoundly affected, and becomes the next Picasso or the next President of the United States. It’s these things you can’t put quantitative values on. You can’t do that with art, you can’t do that with indigenous cultures. It’s my belief that it is indigenous cultures that still have family values and a sense of connection between them, the land, and the spiritual connection of all things. That is the greatest gift they can give to us. There are some gifts that we can give to them – certainly medicine and technology to preserve their culture, video or email or the internet. What they need to give to us is a sense of what we have already lost. I think they are really our last chance to reconnect. I think people are appreciating these kind of cultures more and more because they see the differences – what we don’t have and what they do.” – Chris Rainier
“I’d like to touch upon that thing that completes the circle. That’s the documentation of some of these emotional social issues in the world and how it’s for me an important necessity, as much as doing sacred places. It is the yin and yang, the extreme corners of human experience from the Garden of Eden, still left on the planet, to the Dante’s Inferno of places like Sarajevo, Rwanda, or Chechnya for here lies the mysteries of man’s inner light as well as his inner darkness. This truly makes this work complete. As a photographer I’m curious to go into these extreme corners and put them on film.” – Chris Rainier
“I’m trying to create that sense of the spiritual reason why these places or these masks exist.” – Chris Rainier
Read my conversation with Chris Rainier.
View 12 Great Photographs By Chris Rainier.
Watch Chris Rainier’s TED talk.
Visit Chris Rainier’s website.
Skip Cohen asked me to share one of my images and answer one question “Why?”.
I gave him four answers.
1 It was a turning point in my vision.
2 It’s still as strong today as it was then and it continues to take on new life through new images.
3 It’s taught me so much.
4 I’ve learned so much from viewer’s responses.
Skip recorded our conversation.
You can listen to more here.
Plus, listen to more in Skip Cohen’s audio series “Why?” here.
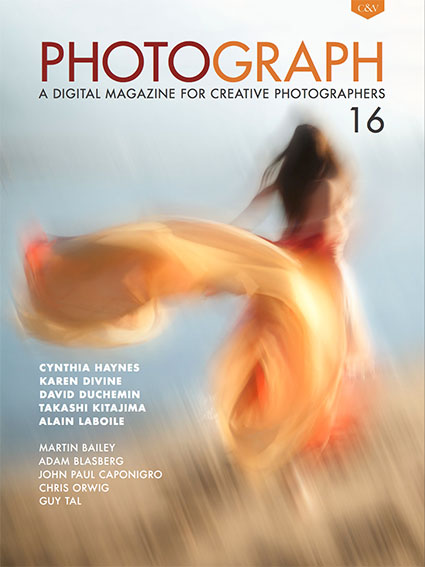
“Issue 16 of PHOTOGRAPH magazine highlights the diversity of vision and creative expression. Issue 16 is a stylish send off (It’s the final issue!), featuring the work of Cynthia Haynes, Karen Divine, David duChemin, Takashi Kitajima, and Alain Laboile, and articles from regular columnists Martin Bailey, John Paul Caponigro, David duChemin, Chris Orwig, and Adam Blasberg. We hope this magazine inspires you to see differently as you continue to hone your vision.”
I discuss Using Psychology To Strengthen Your Composition.
Get your copy here.

