Using Camera Raw As A Smart Filter In Photoshop CC
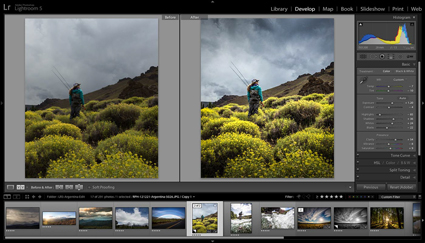
“In this episode of The Complete Picture, Julieanne demonstrates how to take multiple exposures and combine them into a single 32-bit HDR file that can then be edited nondestructively using Adobe Camera Raw as a Smart Filter in Photoshop. In addition, you’ll discover how powerful using Camera Raw as a Smart Filter can be when working with layered files.”
View more Photoshop Videos here.
Learn more in my digital photography and digital printing workshops.