How To Change The Perspective Of Anything In Photoshop

Learn how to change the perspective of anything using the Perspective Warp.

00:00 – Introduction
00:15 – Perspective Warp in Photoshop Guide
04:30 – Perspective Warp and Compositing
06:05 – Change The Perspective of a Room in Photoshop
08:20 – Change The Perspective of a Building in Photoshop
09:25 – Apply a Logo in Perspective in Photoshop
10:28 – Apply a Graphic in Perspective to Multiple Planes

Find more from Jesus Ramirez’s Photoshop Training Channel.
Learn more in my digital photography and digital printing workshops.

The Art Of Distortion

1a_20111203_ANThalfmoonisland_411-Edit
1b_20111203_ANThalfmoonisland_411-Edit-Edit

1          Correct lens distortion

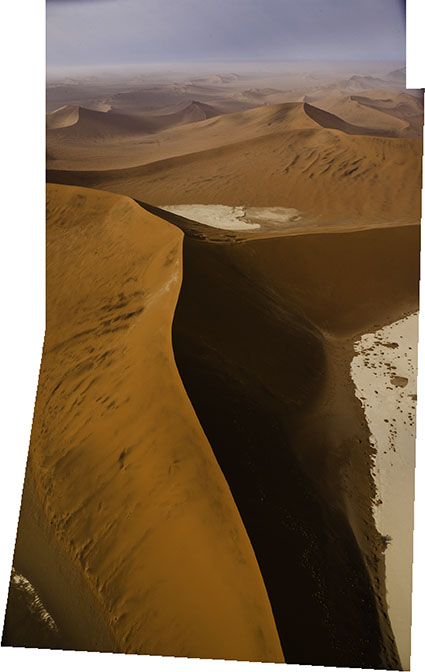
2a_20100924_AFRNamibiaSossusvleiAerials_0264

2b_20100924_AFRNamibiaSossusvleiAerials_0024

2          Remove or reduce panoramic stitch distortions

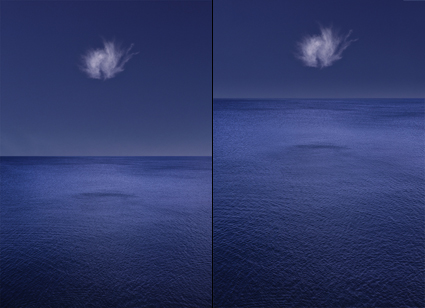
3a_Reflection_XXV_5

3b_Reflection_XXV_5 copy

3          Modify proportion globally including the aspect ratio of the frame

4_Correspondence_SonatainBlueV_2001_5

4b_Correspondence_SonatainBlueV_2001_5

4          Modify proportion locally within the frame

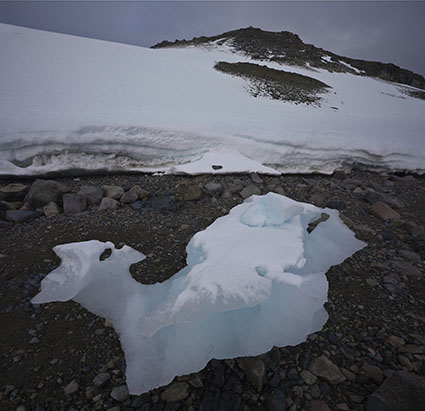
5a_Antarctica_2009-CII copy

5b_Antarctica_2009_CII

5          Change proximity

6a_14_Skogafoss

6b_14_Skogafossb

6          Enhance gesture


We accept the distortions angle of view and lens choice create without a second thought, yet rarely do we give a second thought to the possibilities of expressively distorting our photographs during post-processing. The dazzling array of new tools at our disposal begs us to reconsider this. You need to know what’s possible, whether your goal is to correct the distortions introduced by the tools you use or to aesthetically refine or expressively enhance your images, a little or a lot, or to simply know what other photographers have done so that you can understand their creations better. Learn to see with new eyes, and a vast new horizon of possibilities will reveal itself to you.

Awareness of the distortions produced by an angle of view and lens choice is the beginning of using them creatively. Curiously, permission is the beginning of using distortion in post-processing creatively. Many people have been told that it’s inappropriate to do so. Why? Why accept an unintended mechanical bi-product but not a consciously intended effect? Why take such a powerful tool for expression off the table? While you can, you don’t have to distort your images to the point that they look like they’re being seen in a funhouse hall of mirrors. Even the subtlest applications of distortion can produce powerful results. Once you understand what kinds of distortions are possible in post-processing, you’ll frequently find yourself changing your angle of view or repositioning yourself during exposure.

6 Strategies For Using Distortion In Images

Here’s a short list of six strategies you can use when considering distorting your images creatively.

1          Correct lens distortion; straighten a horizontal or vertical while correcting barrel or pin cushion distortion.
2          Remove or reduce panoramic stitch distortions; undistort edges or smooth out uneven horizontals or verticals.
3          Modify proportion globally, including the frame; make images more or less horizontal or vertical or even turn one into another.
4          Modify proportion locally within the frame; adjust the height and width of both objects and areas.
5          Change proximity; push together or pull apart items.
6          Enhance or change gesture; make a leaning object more tilted or straighten it out.

Photoshop's 11 Weapons Of Mass Distortion


Insights Members can login to read the full article.
Email:
or Sign up

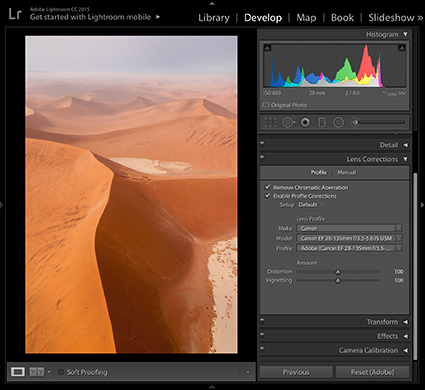
Use Adobe Lens Profiles To Improve Your Image Quality

LensProfiles_Profile_425
Do you wish you could improve the quality of the images your lenses deliver after exposure? You can, using software. Adobe’s Lens Corrections feature uses a digital image file’s EXIF metadata about camera and lens to automate cures for standard lens distortions, including geometric distortion, chromatic aberration, and vignetting.


Insights Members can login to read the full article.
Email:
or Sign up

Create Amazing Distortion With Photoshop’s Liquify Filter

1
Awareness of the distortions produced by angle of view and lens choice is the beginning of using them creatively. Curiously, permission is the beginning of using distortion in post-processing creatively. Many people have been told that it’s inappropriate to do so. Why? Why accept an unintended mechanical by-product, but not a consciously intended effect? Why take such a powerful tool for expression off the table? Even the subtlest applications of distortion can produce powerful results. Once you understand what kinds of distortions are possible during post-processing, you may even find yourself changing your angle of view during exposure.

There are many reasons why you might want to distort an image. Here are four:

1. Correct Optical Distortion
It can be produced by many things, including lens choice, angle of view, motion, panoramic stitches, etc. You can choose to make the selection of a wide-angle lens less about distortion and more about including more.

2. Modify Proportion
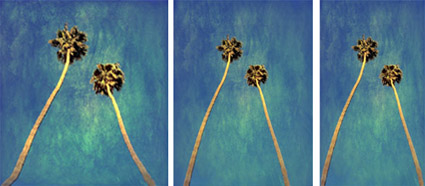
Adjust the height and/or width of objects and/or areas. Just for starters, take off the 10 pounds that the camera adds on.

3. Change Proximity
Reduce or increase the spaces between objects. Make things feel more or less related.

4. Enhance Or Change Gesture
Make a leaning object more tilted or straighten it out. Think of this as adding the words “very” or “less” into a sentence.

When exploring the many distortion tools in Photoshop, you’ll find that the Liquify filter is one of the most powerful. The Liquify filter is so powerful that, when in use, it offers its own toolbar and menus, somewhat like Camera Raw. To get the most of the Liquify filter, it’s worth taking the full tour …

Read all the details on Digital Photo Pro.

Photoshop’s sophisticated distortion capabilities are relatively new to photography, and so is the mindset of using them to photographers. Both are worth acquiring. Everyone can find a use for them at one time or another, if not on every image. As every photographer uses distortion to one degree or another, ultimately, what separates photographers is not whether they use distortion but when, how, and why they use it. The same tools can be used to achieve entirely different effects. There’s a world of difference between using distortion to remove process artifacts for more accurate representations, using distortion to aesthetically refine the formal qualities of images, and using distortion to interpret subjects expressively. Intent is everything. Practice is a reflection of intent. Simply asking yourself how far you are and aren’t willing to go and, finally, why will help clarify yours. Consider these questions seriously, and you’ll find your vision will grow stronger and clearer.

Learn more in my digital photography and digital printing workshops.
New Photoshop CC Feature – Perspective Warp


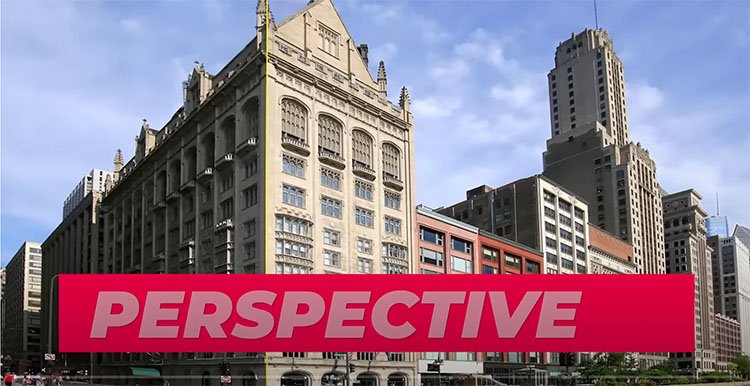
“Watch as Photoshop Product Manager, Stephen Nielson, shows new Perspective Warp in Photoshop CC. See how you can fluidly adjust the perspective of a specific part of your image without affecting the surrounding area, change the viewpoint from which an object is seen, and seamlessly composite images with different vanishing points or camera positions.”
Find out more about the new Photoshop CC (14.2) features here.

View more Photoshop Videos here.
Learn more in my digital photography and digital printing workshops.

4 Ways To Divide The Frame


The four most important lines of any image are the ones that are often least recognized consciously – the frame. Second only to these are the lines that divide the frame, creating frames within the frame. Becoming more aware of how the frame can be used and how it can be divided will help you make more successful compositions.
There are many ways the frame can be divided. You can divide the frame horizontally, vertically, or diagonally; in each case the layers included define the virtual space presented. Different areas in an image can be divided differently. You can divide the frame (or a frame within the frame) multiple times; the more times the frame is divided the more packed and dynamic it becomes, progressively growing more design oriented and finally being reduced to pure texture. Each operation has significant consequences.
One of the most significant results of dividing the frame is the creation of specific proportions. (The combination of the individual aspect ratios of each element creates a new unified aspect ratio.) Much has been made of the ‘rule of thirds’. Dividing the frame into three parts (left/center/right or up/middle/down) is a simple and often useful strategy for making images more directed, by prioritizing one element over another, and dynamic, through imbalance. Too little has been made of other ratios. What of fourths, fifths, sixths, sevenths, or eighths? No musician would be content to only divide an octave into halves and thirds. Every proportion produces particular effects, which are further modified by placement (high/low or left/right) and content. Rather than a rule to be adhered to, proportion is a force to be explored expressively.
When it comes to controlling the division of the frame in your images, you have more options available to you than you might think. You can crop, retouch, distort, or composite. These four operations can be used in combination with one another. For instance, you may decide to first crop an image and then distort it to a standardized aspect ratio. Or, while maintaining a frame of the same aspect ratio, you might increase the scale of a selected area only and in the process crop a portion of it. Many other permutations are possible.
If you find these many new possibilities dizzying, you get it. The only way to understand this intuitively is to explore your options. The development of new possibilities encourages us to ask new questions and develop new habits. For what effect are you dividing the frame? To that end, how many different ways can you think of dividing the frame? My advice? Develop the habit of exploring your options before settling on final solutions, ones that help you create your strongest statements.
Read more at Digital Photo Pro.
See my related post Exploring The Expressive Possibilities Of Aspect Ratio.
Learn more in my digital photography and digital printing workshops.

A Detailed Look At Adaptive Wide Angle – Russell Brown


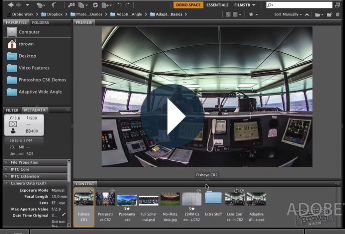
Learn some advanced tips and techniques for working with Adaptive Wide Angle inside of Adobe Photoshop CS6. This tutorial will give you a detailed look at the built-in correction tools that help you adjust the lens distortion in your own images. If you are ready to move to the next level in Adaptive Wide Angle then this video is for you.
View more Photoshop videos here.
Learn more in my digital photography and digital printing workshops.

Dividing The Frame Expressively


A majority of landscapes include the horizon line. (It would be fair to say I’m obsessed with the horizon.) How the frame is divided (creating an aspect ratio within an aspect ratio) by this line speaks volumes. It directs the gaze up or down. It also creates an expressive ratio. Every proportion has a particular psychological inflection.

The ‘rule of thirds’ is an effective way of encouraging people to make images more directed, by prioritizing one element over another, and dynamic, through imbalance. But overlooking the power of other proportions is limiting, if not simplistic and insensitive. So too, is avoiding the middle or balance. Proportion is a visual force to be applied, rather than a rule to be adhered to.

There are a number of ways to achieve a desired effect; distort, crop, copy, or combine are four. Each method brings other effects with it.

How many ways can you think of dividing the frame for effect in your images?

Learn more in my digital photography and digital printing workshops.

Magically Change The Proportion Of Your Photographs With The App 'Liquid Scale'


You can use the app Liquid Scale to distort the frame of an image without distorting key elements in it. Like Adobe Photoshop’s Content Aware Scale, this software identifies image elements that are most likely to be more important than others and distorts other areas, typically areas that are smooth or randomly textured. There are limits to how far you can go before less distorted image elements begin to look unnatural, which are largely image dependent. In some cases, you can go so far as to convincingly turn a vertical image into a horizontal image. It’s magic.
This app will do more than change your images, it will change the way you see.
Read more and see more on The Huffington Post.
Plus find more app reviews.