Borrow Lenses – Or Any Other Photographic Equipment Of Your Dreams


You can get discounts on rentals if you’re a member of my workshop alumni or my enews Insights.
Check the last issue of Insights or email info@johnpaulcaponigro.com.
I’m impressed! Short of winning the lottery and owning any and every piece of equipment you want, BorrowLenses is a dream come true. Reading online reviews can only go so far. There’s nothing like actually using the equipment. BorrowLenses lets you use the equipment of your dreams, in great condition, with lightning fast delivery and first-rate customer service. BorrowLenses helps me make more informed equipment purchases; I buy the equipment I buy with more confidence – after I’ve tested it. BorrowLenses has saved me money by helping me decide not to make certain purchases.
How does BorrowLenses work?
Shop for Photography & Videography Gear

  • Browse the largest online selection of photo and video gear
    available for rent on BorrowLenses.com.
  • Choose your rental duration, whether or not you want insurance.

Have It Shipped or Pick It Up

  • Choose when you need your order and whether
    you want it shipped to your home or any UPS store or picked-up locally at one of dozens of locations across the US.

Shoot to Your Heart’s Content

  • Your order will arrive on the day you specify.

 Send It Back

  • Use the prepaid  shipping label and the box your order came in to ship
    it back or drop it off locally.

It’s fast and easy!
Rent a lot? Become a BorrowLenses member.
You can also purchase used equipment at a discount.
Find out more about how to BorrowLenses here.
Browse BorrowLenses’ inventory here.

Visible Dust Sensor Cleaning System


Let’s face it, dust happens.
The first step is to use an ounce of prevention. Minimize your equipment’s exposure to dust during storage and use, as much as practical. (I store and transport all my gear in Ziploc plastic bags.)
The second step is to remove dust from your camera’s sensor.
To protect themselves against carelessness of a minority of their clients, camera manufacturers claim to void warranties if you use third party cleaning solutions and recommend instead that you send the camera to them to be professionally cleaned. Even if you are not on a tight deadline or traveling in remote locations, this is often impractical. Initially, I was concerned about my ability to clean my camera’s sensor without damaging it. Then I found that cleaning your camera’s sensor is surprisingly easy and that you have to go to some length to actually damage a sensor. A little care and forethought is all that’s required. (See cleaningdigitalcameras.com for more information.)
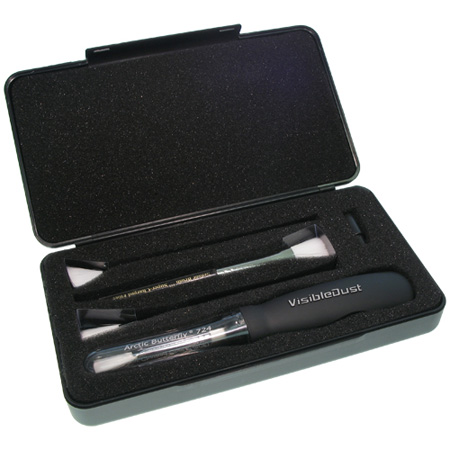
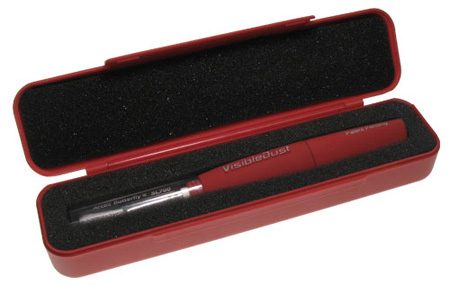
Visible Dust’s (visibledust.com) Arctic Butterfly is my preferred sensor cleaning solution. Unlike many other solutions the Arctic Butterfly doesn’t use fluids that may produce streaking on your sensor; instead, they use static electricity to attract the dust. Visible Dust has been making electrostatically charged brushes that won’t damage your camera’s sensor when you use them. The first brush solutions from Visible Dust used compressed air to create a static charge, which could be difficult to store and transport (impossible on airlines). The Artic Butterfly uses motion to create a static charge; the brush rotates at high speed. (The new units and their cases are far more durable than previous models.)
How easy is it to use? Extremely. Simply remove the top of the Arctic Butterfly and press the button to spin the brush. Turn your camera (without a lens) to sensor clean mode. Sweep the sensor a few times. Turn the camera off and put a lens back on it. Done! It takes less than a minute. It will save you hours of retouching. I recommend making this a regular practice whenever you change lenses – the time when most dust enters and moves.
Keep the brush clean; free of dust and oil (typically picked up from your hands or the chamber of your camera). If a brush becomes soiled, you can replace the ferules instead of the entire unit.
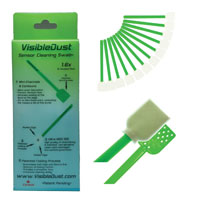
For difficult to remove dirt on sensors that can’t be swept away, Visible Dust’s Sensor Cleaning Swabs may be your final solution. Swabs and Sensor Clean or Vdust Plus liquid can be used to remove water and oil stains, providing even coverage without streaking and creating a light static barrier to help repel dust.
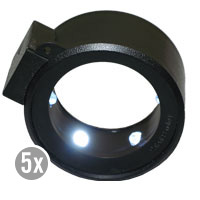
Optionally, a Sensor Loupe can be used to view the sensor under illumination at high magnification to ensure that the sensor is clean.
Whenever practical, confirm that your camera’s sensor has been successfully cleaned, by making an exposure of a flat field of color (such as a sky) at a small aperture (to better resolve the dust). Thoroughly check the file in Photoshop (or the image editor of your choice) at 100% magnification.
The Visible Dust sensor cleaning system hasn’t failed me yet. It goes everywhere I go. It’s easy to store, transport, and use. It’s saved me countless hours of time in image processing. It will save you valuable time too.
Arctic Butterfly SL700 ($70.95)
Sensor Loupe ($79.95)
Ultra MXD-100 Sensor Cleaning Swab ($37.95)
Sensor Clean ($35.90) and VDust Plus ($19.95)


Find more about visibledust here.
Read more about the tools I use here.
Learn more in my digital photography and digital printing workshops here.

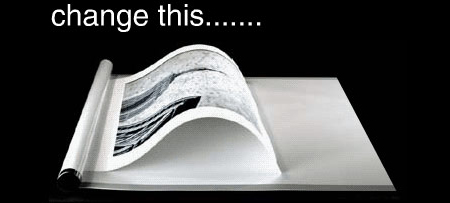
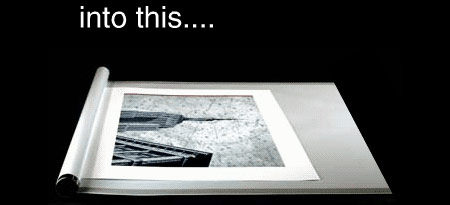
D-Roller – Uncurl Your Prints


Quickly cure curl in prints made from roll papers with D-Roller.
This device is extraordinarily simple and effective.
You might wonder why a simple plastic tube with an attached sheet of plastic costs as much as it does – 24” $259.99, 36” $279.95, and 50” $299.99. When you see how effective, easy, and fast it is to use you’ll realize it’s money well spent.
Here’s how easy it is.
1 Place a print on the white carrier film near the tube.
2 Roll the tube away from you, wrapping the print between the tube and the film.
3 Hold for a few seconds.
4 Unroll the tube
5 Turn the print 180 degrees and repeat.
6 Remove the flattened print.
Here are a couple of tips for using it.
The longer you hold the paper rolled up the more curl you take out; you can actually reverse the curl if you hold the paper too long.
Paper coming off the outside of the roll requires less derolling than paper coming of closer to the core.
Low humidity requires more derolling.
Non-rag papers require more derolling.
Though the very smooth plastic won’t damage print surfaces, you can include a cover sheet in the derolling process for exceptionally delicate materials.
Special rollers can be custom ordered for very long prints.
Is it really that simple? Yes!
Does it really work? Yes!
Visit inkjetart.com for more information.
Read more about the tools I use here.
Learn more in my digital photography and digital printing workshops here.

InkAID – Coat Your Own Substrates


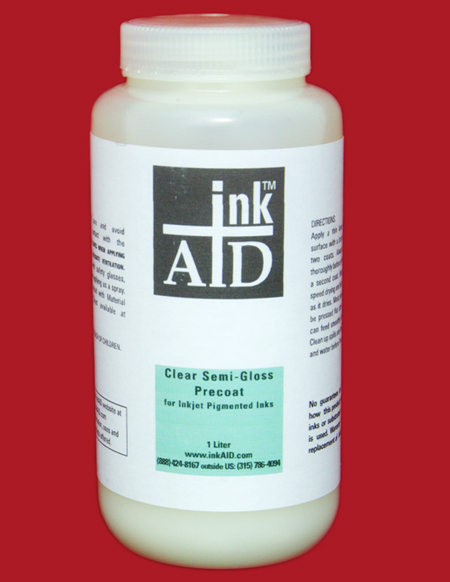
Interested in printing on exotic substrates? Consider InkAID (inkaid.com). InkAID is a liquid coating that prepares surfaces for inkjet printing. Coating an exotic substrate’s surface will do several things. It will reduce dot gain, allowing the print to hold more detail. It will increase gamut, providing greater saturation. It will increase dmax, yielding a better black.
Artists are experimenting with many types of exotic substrates from aluminum, to acrylic sheets, to wood, to uncoated fine art and handmade papers. Basically, if you can get it through the printer and you can get the ink to stick you can print on it. InkAID helps the ink stick.
InkAid is easy to use. Stir it. Brush it on. Let it dry. Print.
There are currently five InkAid products. White Matte Precoat creates a white matte coat on any surface. Clear Semi-Gloss Precoat creates a transparent semi-gloss finish on any surface.  InkAID Adhesive and Clear Gloss Precoat create a transparent glossy surface with two coats. Clear Gloss Precoat II creates a transparent glossy surface with one coat. When using clear coats, you can choose to let the coloration of the base surface show through (the material itself or a surface with an image) or you can coat it first with White Matte Precoat.
ping and handling.
Surfaces are water resistant and can be reworked with subsequent printings, over painting, or distressing.
You may be able to use ICC profiles for similar inkjet surfaces (if you get lucky), but it’s more likely that you will have to create new ICC profiles specifically for this surface to achieve the optimum results, especially if the final state of the coated substrate is not white.
InkAID is acid free and contains no optical brighteners. Nonstandard tests (hang samples in a window in direct sunlight next to other prints and compare) indicate longevity is roughly on par with similar inkjet prints. Longevity ratings obtained from standardized tests are not available as the variety of substrates being used today is so vast.
A liter costs $25. A gallon costs $65. A sample set (5 ounces of five products) is available for $21 plus ship
InkAID.com has a useful FAQ section answering many common questions about it’s use. The book Digital Art Studio: Techniques for Combining Inkjet Printing with Traditional Art Materials by Bonnie Lhotka, Karen Schminke, and Dorothy Simpson Krause is another source of useful information.
Find InkAid here.
Read more about the tools I use here.
Learn more in my digital photography and digital printing workshops here.

Print Shield – Protective Print Spray

There’s a print spray that anyone making inkjet prints needs to know about – Premier Art’s Print Shield. It’s a UV water resistant lacquer that comes in a variety of finishes – matte, semi-gloss, and glossy. It offers protection from light, water, moisture, airborne contaminants, and fingerprints. It doesn’t produce any visible changes in the print, either in color or density or surface.  It dries fast and doesn’t have a strong odor. It reduces burnishing and scuffing somewhat. Most importantly, it greatly increases longevity, in some cases by as much as 200%
Each $15 400ml can covers approximately 75 8×10” prints.
Henry Wilhelm has tested prints sprayed with Print Shield. Visit wilhelm_research.com for his most current data on longevity.
I spray all of my prints with Print Shield now.
Just like spraying a pastel, apply the fixative carefully. If the substrate gets soaked the surface may darken permanently. Instead of spraying the print directly, spray the air above the print and let the mist fall onto the print surface. Let the print dry for a few minutes. Then reapply.
Find PrintShield here.
Read more about the tools I use here.
Learn more in my digital photography and digital printing workshops here.

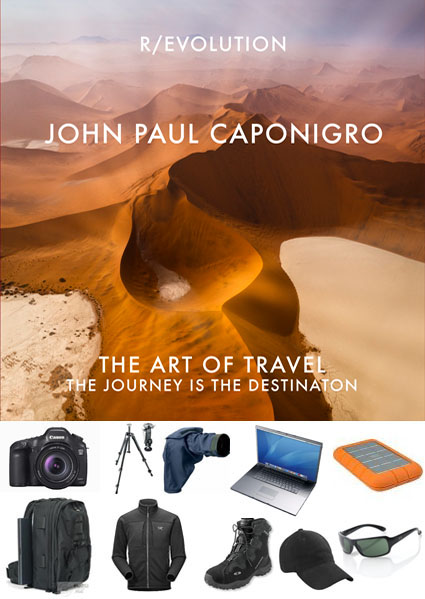
The Art of Packing

ArtOfTravel
There’s an art to packing. Practice it with care. You’ll get better every time you do it. Learning this art will help you make the most of any photographic expedition and enjoy it more.
Do pack the essentials. Don’t pack too much. Traveling with too much is hard to handle, tiring, and can be costly. Less is more – up to a point.
Clothing
It’s tempting to bring too much clothing. Bring only versatile essentials. Find light, washable, quick-drying, versatile clothing you can walk or go to a casual dinner in. Find out ahead of time what kinds of laundry services will be available during your trip and plan to use them – frequently. Bring a good pair of light waterproof hiking boots. Dress shoes don’t work when you’re walking in the wilderness. Bring sun protection; sunscreen, hat, and sunglasses. Unless you’re traveling in a desert, bring waterproof rain shells (jacket and pants). If you’re likely to be in cold situations (early mornings or snow), bring light gloves, hat, long underwear, and a warm light sweater or pullover. If you’re going to be in an arctic or alpine environment bring two pairs; staying dry is key. Leave the big ski parkas and pants home. Layers rule.
Bags
The right bags can make journeys easier. Wheels save you an enormous amount of wear and tear. Make sure your camera and/or computer bag fits under an airplane seat or in overhead compartments. (I use LowePro MiniTrekker and Roadrunner bags.) If you’re flying on small airplanes to more remote regions, check weight limits and take them seriously. Check your clothes; carry your gear. Avoid checking your gear; it can get damaged or stolen. If you’re ever forced to check your gear, carry on one camera and lens around your neck. I travel with one larger camera bag and one small backpack. I carry on the camera bag and pack the backpack in my checked baggage. Once I’m in the field, I walk with my small backpack carrying only the things I need for that location – camera, cards, extra battery, two lenses, water, power bar. (I always pack power bars, for morning when breakfast is light or late or mid afternoon when my fuel reserves can get low.) I also pack an extra duffle bag, just in case I need to check an extra bag – it comes in handy for laundry too.
Cameras and Lenses
Always carry a backup camera. If one is damaged or stolen, you’ll still be able to shoot with the other. It’s convenient (but not necessary) if the two cameras you carry are the same. That way you’ll only need to carry one set of accessories, like batteries, chargers, cords, etc.
Your choice of lenses is important. Lenses help you make the most of many situations. I travel with lenses for three ranges – wide, medium, and long. I rarely walk with all three lenses. To decide which lenses to take, I first look at the location and decide whether I’m most likely to work wide (close environments) or long (wide open spaces), take the appropriate lens, and a medium lens for versatility. All of my lenses are zooms, providing extra versatility. (Canon 16-35mm, 28-135mm, and 100-400mm) Lens shades are important. Polarizing filters are the most useful filters.
Dust and Moisture
Protecting your equipment from moisture and dust is a significant concern. I pack all of my lenses and cameras in sealable plastic bags. (I use Ziplocs.) I store them in them, whenever I’m not using them. I never put my gear away wet. Pack a small cloth to wipe down equipment that does get damp. If you’re likely to shoot in rain or snow consider using a rain cover for your camera. (I use  Aquatech’s.) Bring a sensor cleaning system. (I use Visible Dust products.) Dust happens. It’s a lot more efficient to remove it in the field than in post-processing.
Storage
Having the right media to store your images is important. It’s worth investing in a few large media cards so you don’t run out of storage to shoot with in the field. (I use SanDisk 32GB CF cards). At the end of each day, I download onto one portable hard drive and backup to a second.. (I use LaCie 1TB Rugged drives.) When I fly, I pack one in my suitcase and carry one with me at all times. You might also consider carrying a large capacity thumb (32GB plus) drive with you at all times. Put your 5 star images on it. What if your hard drives were lost or stolen? You can replace equipment, but you’ll never be able to replace your images.
Customs
Getting all your gear through security and customs is rarely a problem. That said, in any security situation where my equipment is being screened I take as many precautions as practical to ensure equipment doesn’t fall out of a bag or bin and isn’t dropped when it’s handled. Clearing customs can be more problematic in some countries than others. Do a little research on the web and determine if a carnet (an official government document proving ownership) is recommended. Even if it’s not, I always travel with a copy of my insurance policy that lists my equipment and the serial numbers of each piece.
Before you travel, take the time to get organized and be prepared. You’ll make better photographs and enjoy traveling more too.
Learn more in my digital photography workshops.
View my webinar The Art Of Travel here.

View my Equipment Packing List here.

View my Clothes Packing List here.

Find out about the tools I use here.
Gear_Guide_425

Packing List – Equipment

ArtOfTravel
I  store this packing list in my bag to make packing efficient. I modify it if a trip has special considerations. Please feel free to copy this list and modify it for your unique needs or to share this link with your friends.
Camera Bag
Store cameras and lenses in plastic bags …
2 Cameras – Canon 5DSR
2 Camera – Battery Charger With Extra Battery
1 Universal Power Strip
1 Universal Electrical Adaptor
1 Lens – 11-24mm
1 Lens – 24-170mm
1 Lens – 70-200mm
1 2X Extender
1 Camera Rain Cover
4 Memory – CF Cards
4 Memory – SD Cards
1 Sensor Cleaner Dry Brush
2 Sensor Cleaner Wet Swab
1 Lens Cloth
1 Tripod and Tripod Head (store with clothing)
1 Gorillapod
1 iPhone Tripod Adaptor
 
Computer Bag
Store hard drives and pens in plastic bags …
1 Computer – Mac Book Pro
1 Computer – Mac Book Pro – Power Supply With Adaptors
1 Harddrive – Bootable Copy of Portable Computer
2 Harddrives – Raw Files and Raw Files Backup
1 Card Reader and Cable
1 Microphone and adaptor
1 iPad Power Supply and Cord
1 iPad to VGA Adaptor
1 Miniport to VGA Adaptor
1 iPad and Cable
1 Earbuds
1 Apple Pencil
1 Mechanical Pencil
3 Pens Varying Thickness
1 Pack of Paper (emergency contact info, copy of insurance, copy of passport, notes, blank)
1 Screencleaner
1 Hand Sanitizer
1 Eyedrops
1 Benadryl
1 Powerbar
 
If International Add
1 Passport
1 Carnet (or paper of insurance policy above)
1 Global Entry
Learn more in my digital photography workshops.
View my webinar The Art Of Travel here.

View my Equipment Packing List here.

View my Clothes Packing List here.

Find out about the tools I use here.

Gear_Guide_425

The Future of Video Projection?


Princess Leiah, can you color manage that?
Now I know I’m a geek.
A bad Star Wars joke and color management in the same line?
But, this technology stuff is very cool.
Check this out.
Video in thin air?
The Helio display is a video projector that casts images on condensed air.

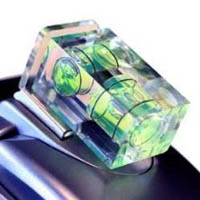
I Use – Opteka HotShoe TwoAxis DoubleBubble SpiritLevel


Alright, now I have to admit it. I like toys. This little item is stylish, inexpensive, and useful.
Straight lines are important to me. While I practice refining my eye for seeing when things are level and parallel, in some situations it helps to have a level that will double check things for you.
Check out more of the gear I Use on this blog (search for Equipment), on this site, and in my AStore.
Check out my field workshops here.
Get a 20% discount on my Iceland (8/18-22) workshop here.
Get a 15% discount on my Fall Foliage (10/17-20) workshop here – until 8/17.
The first 5 Insights Members get $1000 off South America (2/2-14/09), thereafter $250.
Space just became available in my workshop in Namibia.

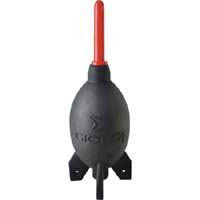
I Use – Giotto's Rocket Air Blaster


It’s a first line of defense. Before you touch your sensor, see if you can blow the dust off. Don’t blow with your mouth. Spit happens. Don’t blow with canned air. Spit still happens. Try a manual blower like this one.
Check out more of the gear I Use on this blog (search for Equipment), on this site, and in my AStore.
Check out my field workshops here.
Get a 20% discount on my Iceland (8/18-22) workshop here – expires 8/10.
Get a 15% discount on my Fall Foliage (10/17-20) workshop here – until 8/17.
The first 5 Insights Members get $1000 off South America (2/2-14/09), thereafter $250.
Space just became available in my workshop in Namibia.