AI Denoise Updated In Adobe Camera Raw – Lightroom Soon
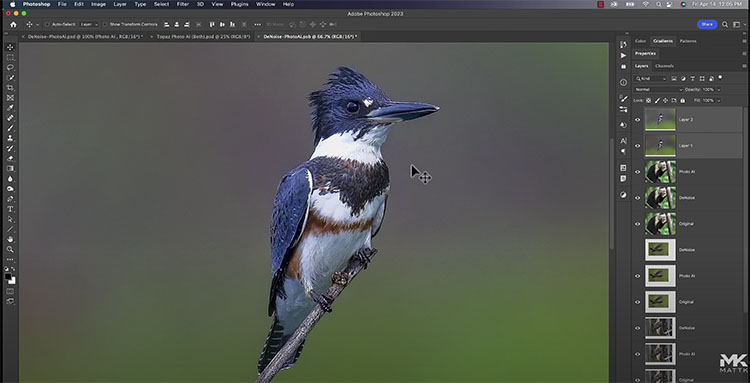
You no longer need to convert to DNG to use AI Denoise!
Watch more from Matt Kloskowski here.
Learn more in my digital photography and digital printing workshops.
You no longer need to convert to DNG to use AI Denoise!
Watch more from Matt Kloskowski here.
Learn more in my digital photography and digital printing workshops.
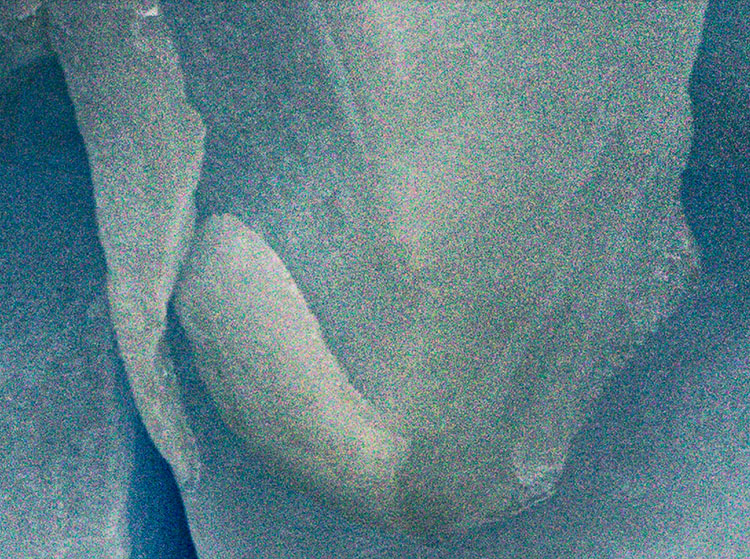
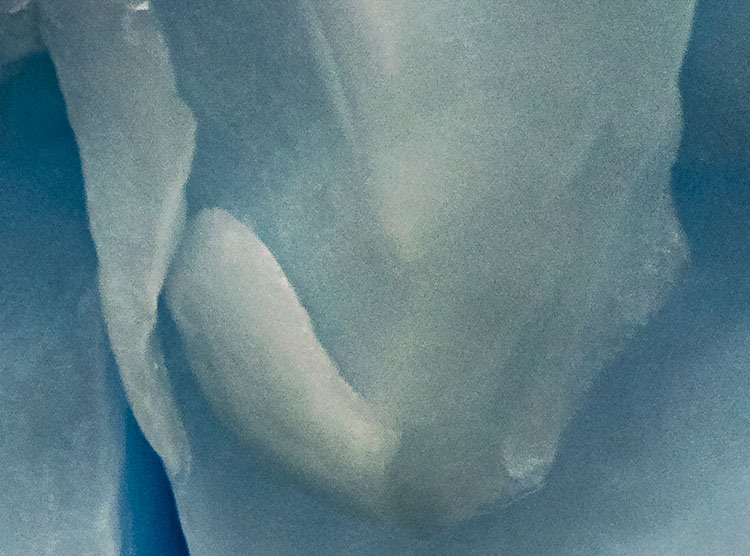
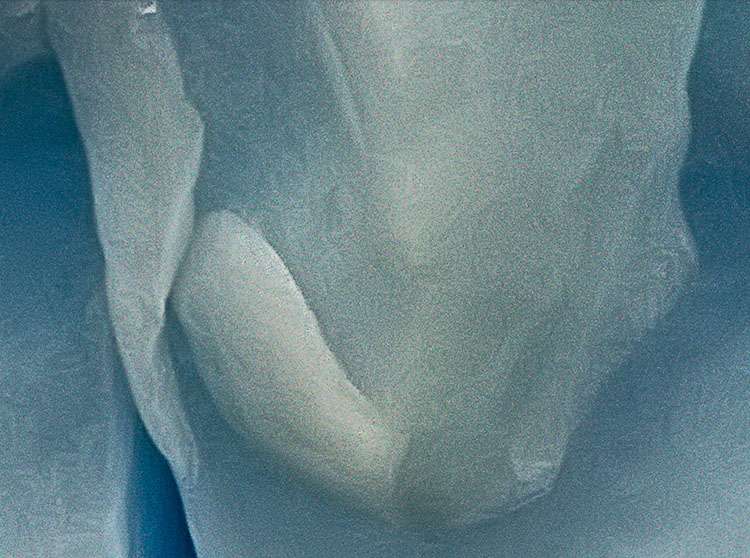
Zero noise reduction
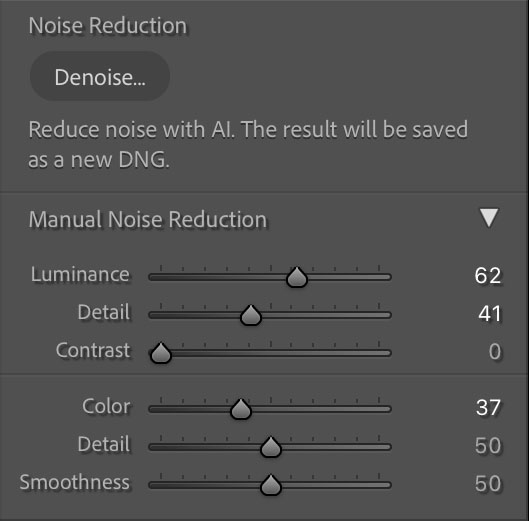
Adobe’s Camera Raw / Lightroom Manual Noise reduction
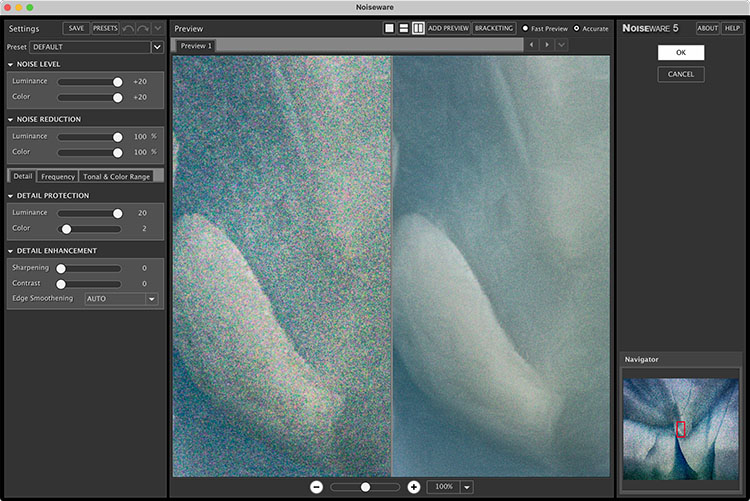
Imagenomic’s Noiseware
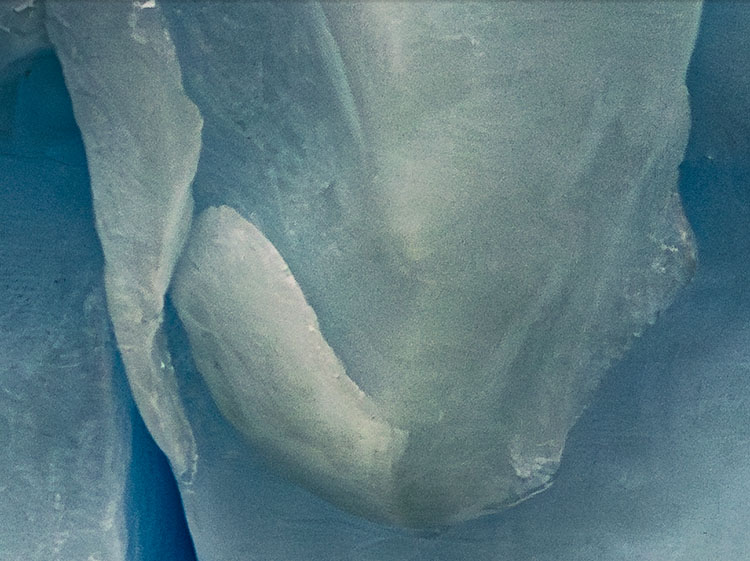
Adobe’s Camera Raw / Lightroom AI Noise Reduction
There’s noise in every file. This is why noise reduction is applied to every image you open in Camera Raw / Lightroom, unless you turn this default setting off. What tool you use to remove noise depends on how much noise there is. Moving from a little to a lot, here are the three options and why you would choose one over the other.
1 – A little
If you’ve got only a little noise Adobe’s Manual Noise Reduction is up to the task.
Read more on Lightroom Manual Noise Reduction here.
2 – Some
If you’ve got significant noise in non Raw file formats (like JPEGs) or in layers in a Photoshop file, use Imagenomic’s Noiseware.
Read more on reducing noise with Noiseware here.
3 – A lot
If you’ve got substantial noise in a Raw file, use Adobe’s AI Noise Reduction.
Read more on Adobe’s AI Noise Reduction here.
In a nutshell, for Raw files choose Manual Noise Reduction (a little noise) or AI Noise Reduction (more than a little noise). For other file types use Imagenomic’s Noiseware.
Read more about noise here.
Learn more in my digital photography and digital printing workshops.
It’s a game-changer – and it will modify your workflow.
When processing image files, noise reduction used to be one of the last things I did; now, it’s the first thing I do, if I plan to use Adobe’s AI Noise Reduction.
When don’t I use it? When I’m processing files with only a little noise and Adobe’s Manual Noise Reduction has no problem getting the task done.
Whenever I encounter substantial image noise, Adobe’s AI Noise Reduction is the best solution currently available, bar none.
It’s really easy to use; that’s an understatement.
1
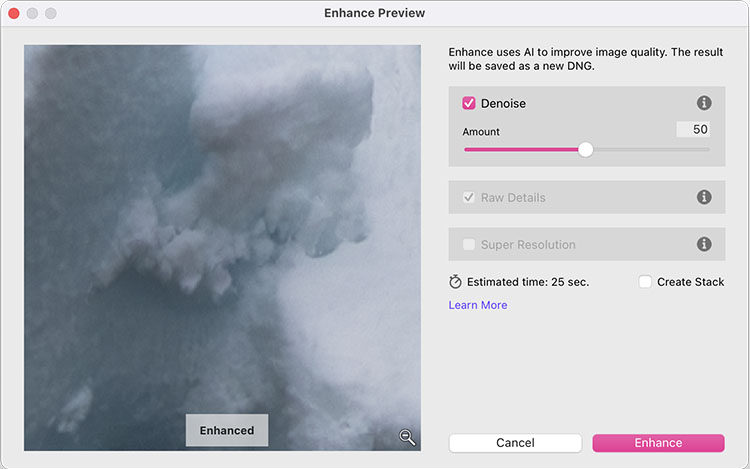
Click Denoise and in the new Enhance window set Amount.
Start at 100 and lower the value until edges look crisp and realistic texture is restored.
Applying Denoise will automatically apply Raw Details.
2
If, and only if, you want to upres an image (4X larger) check Super Resolution.
In many cases it’s unnecessary, but when it’s needed it’s exceptional.
3
Click Enhance.
The results will be saved in a new DNG file.
When you continue processing the new DNG file, Manual Noise Reduction sliders will be set to zero, but still available, though no longer needed in the vast majority of cases.
You’d think something this sophisticated would be more complicated. It’s not. Welcome to the new world of AI.
Read Eric Chan’s detailed explanation here.
Read more about noise here.
Learn more in my digital photography and digital printing workshops.
high noise / low noise

column and row noise / severe under-exposure

hot pixel noise / very long exposure or very hot conditions

Bayer pattern noise / substantial under-exposure

random noise / high ISO
While it’s best to eliminate noise in images at the point of capture (by choosing optimum tools and making exposures), taking the steps to do this may be impractical and/or lead to unacceptable trade-offs, so you may need to make a compromise settling for reducing it (first during exposure and second during post-processing). But which compromises should you make? Knowing the types of noise that are produced in digital images and how they are produced will help guide you to solutions that will eliminate, reduce, or remove it.
There are three types of noise; random noise, fixed pattern noise, and banding noise.
Random Noise
Random noise appears as both luminance (light and dark) and chrominance (hue/saturation) variations not native to an image but produced by the electrical operation of a capture device. The electrical signal produced in response to photons is comingled with electrical variations in the operation of the capture device. Random noise patterns always change, even if exposure conditions are identical. Random noise is most sensitive to ISO setting. Again, digital cameras have one native ISO setting; higher ISO settings artificially boost the signal produced by the sensor and the noise accompanying it. The results? You get a brighter picture from less light and exaggerated noise. Since the pattern is random it is challenging to separate the noise from the image, especially texture, and even the best software used to reduce it through blurring may compromise image sharpness; how much depends on the level of reduction.
Fixed Pattern Noise
Fixed pattern noise (“hot pixels”) is a consistent pattern specific to an individual sensor. Fixed pattern noise becomes more pronounced with longer exposures. Higher temperatures also intensify it. Since the pattern is consistent, it can be easily mapped and reduced or eliminated.
Column & Row Noise
Banded noise is introduced with the camera reads the data produced by the sensor. It’s camera-dependent. Banding noise is most visible at high ISOs, in shadows, and when an image has been dramatically brightened. This type of noise quickly becomes obvious and objectionable; the regular row and column patterns from the sensor quickly call attention to the capture device; it is challenging to reduce without severely compromising image sharpness.
Noise can be broken down into two kinds; chromatic (hue/saturation variances) and luminance (brightness variances).

chrominance / color noise
Chromatic Noise
Chromatic noise produces a more ‘unnatural’ appearance, it is easier to reduce without compromising image sharpness than luminance noise. Chromatic blurring is less noticeable than luminance blurring, as human perception tends to see color contained within contours, even when it is not precisely true. It’s a convenient optical illusion. Larger chromatic variances may result from bayer pattern demosaicing. (Digital sensors typically capture photons with an array of two green, one red, and one blue photosites that register separate luminance values for each site. This data is then processed, ‘averaged’ if you will, to generate a final color, such as brown or lavender, or even a specific green, red, or blue. If done under suboptimal conditions, such as underexposure, larger areas of color variances may occur and will require additional post-processing. Extreme amounts of chromatic noise reduction may results in reduced saturation, especially along contours separating strongly contrasting colors.
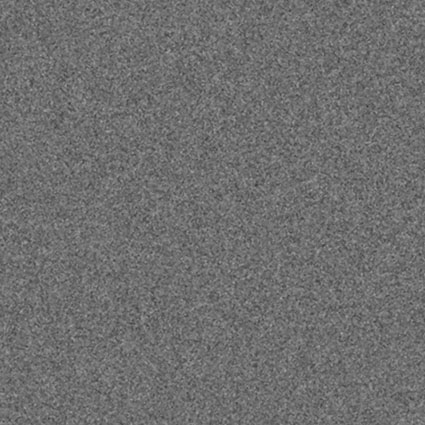
luminance / light & dark noise
Luminance Noise
The presence of luminance noise is more readily accepted than chrominance noise. Luminance noise is harder to reduce than chrominance noise. Luminance information encodes contour, volume, and texture, key elements in representational images. Aggressive amounts of luminance noise reduction subdue image texture, creating a synthetic or overly smooth appearance, and blurs contours, lessening the appearance of focus. Camera noise reduction tends to be crude. Raw conversion software produces significantly improved results. For more extreme noise reduction, third-party software (such as Define, NoiseNinja, and NoiseWare) offer superior functionality and results.
Noise also varies in both magnitude and spatial frequency. Noise occurring over short distances has a high frequency (it’s ‘fine-grained’), while noise occurring over long distances has a low frequency. Noise magnitude, often described by the statistical measure of ‘standard deviation’, quantifies the variance a pixel will have from its ‘true’ value. Higher magnitude noise overpowers fine texture and becomes exceptionally difficult to remove.
The noise floor dominates other forms of noise. It is created by the type of read circuits in the sensor, the transistor characteristics, and support circuits such as the analog to digital converter. As light levels increase the noise associated with light (‘photon shot noise’) exceeds the noise floor. If the signal is increased by a factor of two (one f-stop), then the noise increases by a factor of one and the signal to noise ration increases by one. A higher signal to noise ratio makes noise less visible. When the signal exceeds the maximum value the sensor is capable of capturing (dynamic range is a measure of the largest ratio of the capture signal to the noise floor), the noise drops because the signal is pinned at the saturation value.
With a thorough understanding of what produces noise, how it is produced, what kinds and types of noise to be on the lookout for, you can take steps to reduce it at the point of capture. You want to start with as little noise as possible. If you want noise, you can always add it later, which gives you the possibility of customizing it with almost infinite precision. If you begin with noise in your originals, you’re locked in, and it can be challenging to reduce it without compromising image quality – sharpness, texture, saturation, and hue variety. Given that noise isn’t the only concern you balance, for some uses this may be an acceptable trade-off.
Check your inboxes!
My newsletter Insights is out.
This issue features need to know noise reduction techniques.
And there are inspiring quotes about technique and craft.
Plus, there are great discounts on my printing workshops.
Before & After Noiseware
Who doesn’t have noise? If you don’t run into noise in your digital images, at least once in a while, you may not be pushing the envelope enough. You can photograph long after dark; if you haven’t tried it, you owe it to yourself to experience this—it’s magical. And if you find you don’t have a DSLR on hand, this should be no reason not to make pictures with a point-and-shoot or cell phone.
Whether you’re using a cell phone, a point-and-shoot digital camera or a DSLR at high ISOs or with very long exposures, you’re bound to run into some noise. Noise happens. When you have it, there’s a lot you can do about it. There are many ways you can reduce noise during postprocessing; you could even say there’s an art to it. Learning these techniques can improve good exposures and save others.
If Lightroom and Photoshop fail to adequately reduce noise in your images, it’s time to move to third-party plug-ins. For years, they’ve done a superior job of reducing noise, and they still do. While there are many fine third-party plug-ins for Photoshop (Noise Ninja, Neat Image, Dfine, etc.), one stands out from all the rest: Imagenomic Noiseware Professional.
For me, Noiseware is the most robust noise-reduction software available. Ironically, while it offers the most sophisticated feature set, very often the default settings when you first open an image are all you’re likely to need. In many cases, very little, if any, additional tweaking is necessary.
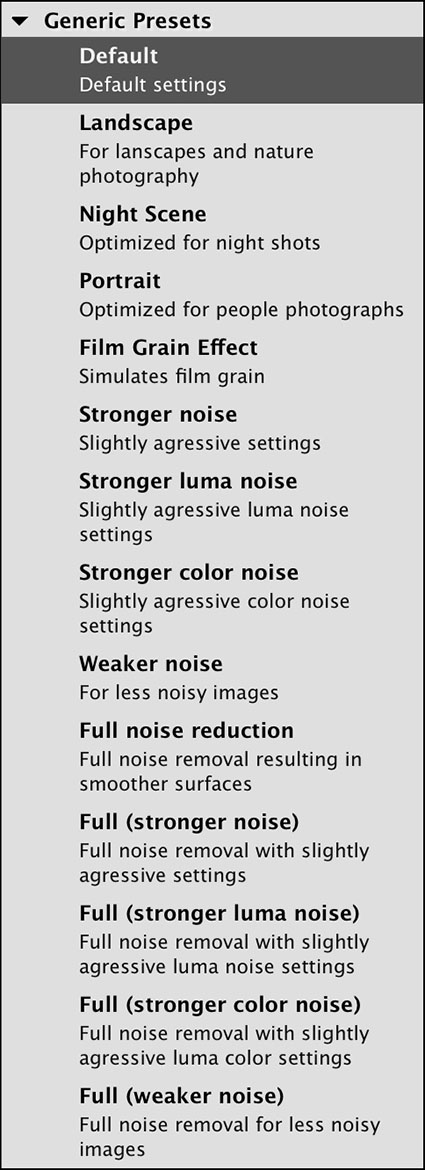
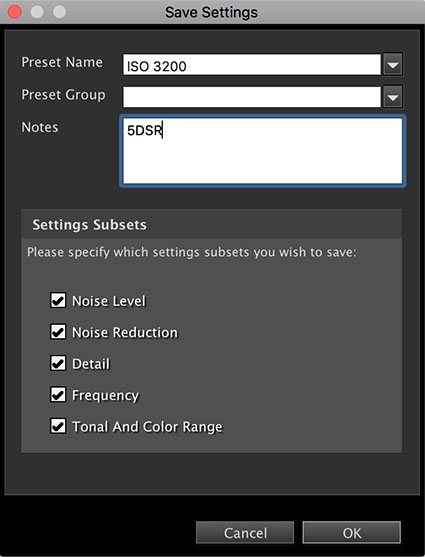
In part, this is because Noiseware analyzes the images you process and creates “profiles” or saved settings that it uses every time you open a new image. It intelligently learns your needs by tracking your past images and analyzing your new images. You can also use Noiseware’s tools to create your own profiles, which can be saved and reused. You can save your own Preferences for how you’d like Noiseware to behave and learn. Noiseware also offers 13 default settings (like Landscape, Night Scene, Portrait, Stronger Noise, etc.) and allows you to save your own custom settings, which can be created from scratch or by modifying the provided presets.
Custom Preset
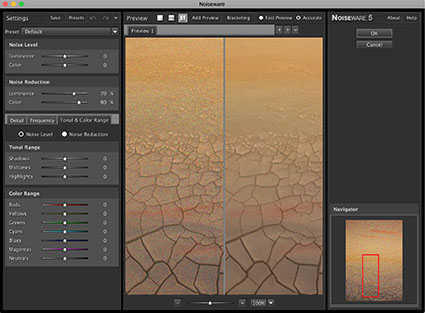
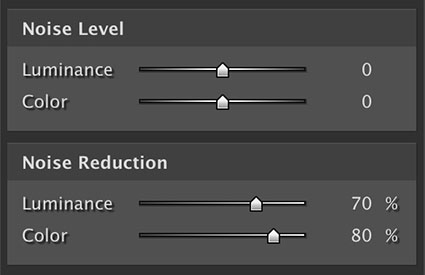
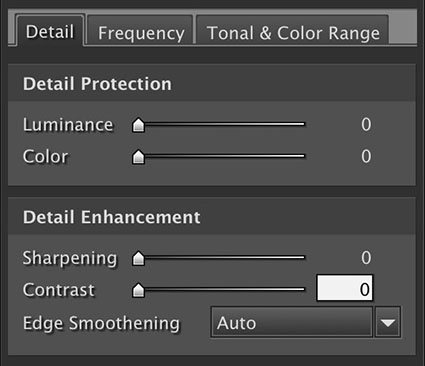
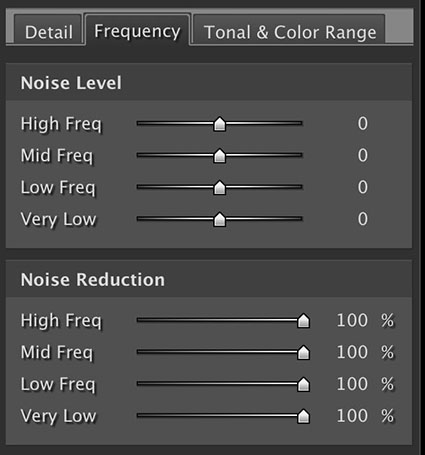
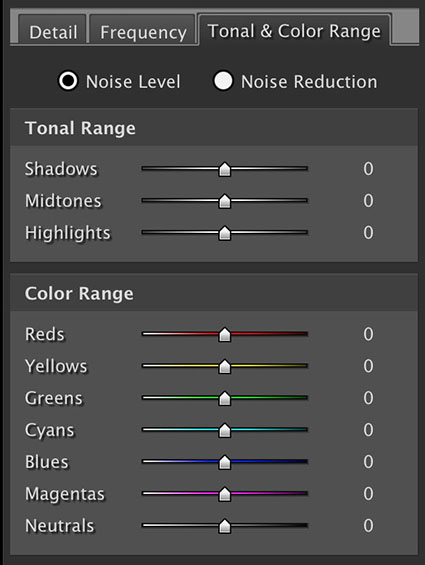
Noiseware’s ability to target noise reduction to specific aspects of an image is what makes it unparalleled. You can adjust Noise Reduction based on Luminance or Chrominance; higher settings produce stronger noise reduction. You can target Noise Level based on Luminance or Chrominance; higher settings tell the software there’s more noise. You can target Color Range; Noise Reduction and Noise Level can be customized by hue—reds, yellows, greens, cyans, blues, magentas, neutrals. You can target Tonal Range; Noise Reduction and Noise Level can be customized for shadows, midtones and highlights. You can target image areas based on Frequency (or amount of detail); Noise Reduction and Noise Level can be customized to High, Mid, Low and Very Low frequencies. Finally, you can enhance detail, first, by using Detail Protection to reduce the effect based on Luminance or Color, and second, by using Detail Enhancement, which provides Sharpening, Contrast and Edge Smoothening.
Defaults
Noise Level helps prepare the filter by analyzing the image
Noise Reduction is the blurring effect
Detail Enhancement – turn it off and use Photoshop instead
Frequency (of detail) targeting
Tonal & Color Range targeting
Noiseware’s ability to provide this level of selectivity is extraordinary. It allows you to easily customize noise reduction for separate areas of an image without making complex masks. You’ll want to do this. Here’s just one example, among many, of why you want to do this. Smooth image areas reveal noise much more readily and they support more noise reduction, while highly textured image areas hide noise, but don’t support as much noise reduction without compromising apparent image sharpness.
Use Noiseware’s sharpening sparingly (if at all) and only for the most modest boosts to image sharpness, as you can create much more sophisticated and selective results in Photoshop—and almost every image can use a little sharpening after noise reduction. Always reduce noise before sharpening.
Combine today’s digital cameras with the latest software, and you’ll find that you’ll rethink many things about when and where you make exposures. You’ll shoot at higher ISOs that you once thought were unusable. You’ll shoot in low levels of light where you once thought it was impossible to get an exposure, much less a usable one. You’ll look at your digital files, and where once you thought noise was a deal-breaker, you’ll find it no longer is. Noise-reduction skills and noise-reduction tools are essential to any photographers skill set and toolkit. Master them, and liberate yourself.
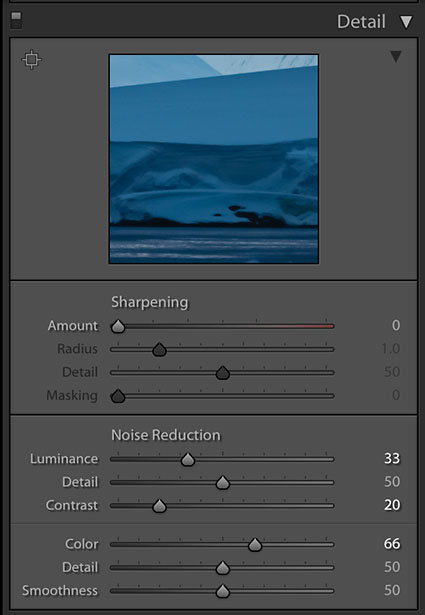
Lightroom’s Detail panel
Reducing noise in Adobe Camera Raw and Lightroom (the controls and results are identical) is easy.
The Detail panel provides tools to reduce two kinds of noise – Luminance (light and dark) and Color. Results can be targeted with the Detail slider into smoother (low setting) or more textured (high setting) areas. The effects for luminance noise reduction can be further modified by adjusting the Contrast slider; a higher setting affects only high contrast noise, while a lower setting affects even closely matched values. And finally, the effects for color noise an be further modified with the Smoothness slider, a higher setting creates a more aggressive effect.
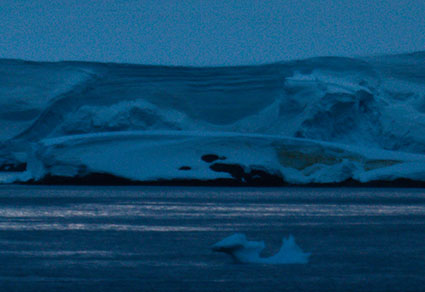
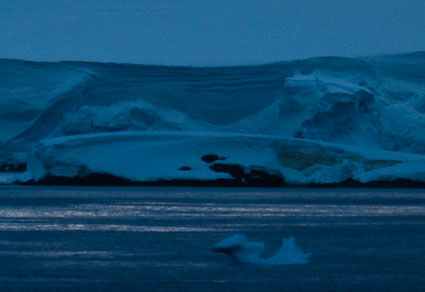
Zoom into an image at 100% magnification and move the sliders until noise is reduced, but image quality isn’t compromised. Use restraint. In a majority of situations, it’s better to preserve a little noise than to blur the image substantially.
All noise reduction blurs images. Sharpening after noise reduction during RAW conversion is recommended. Knowing that you’ll sharpen an image after noise reduction, you may reduce noise slightly more aggressively initially.
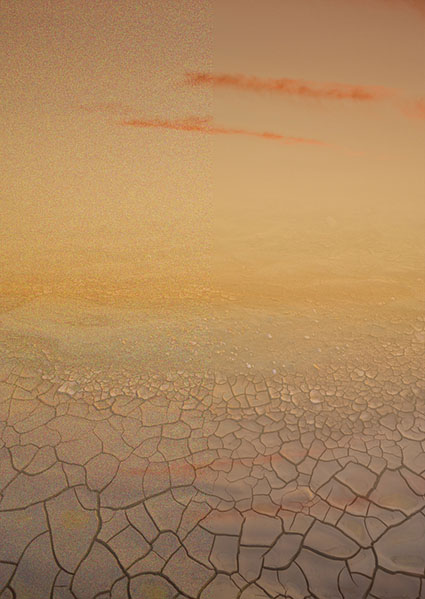
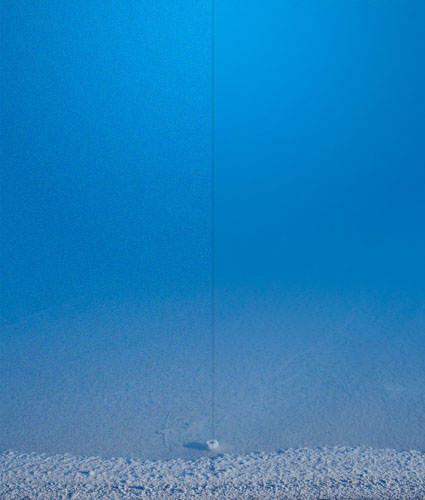
no noise reduction
appropriate noise reduction
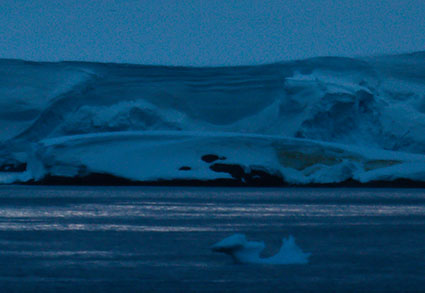
excessive noise reduction
There are limits to how far you’ll want to go. Noise can be so aggressively reduced that surfaces within images become textureless and begin to seem synthetically rendered with software rather than optically captured photographically. This effect may become more pronounced if contours are strongly exaggerated during sharpening. While sharpening, take care not to accentuate noise further. Develop a sensitivity to texture and contour, and use your best judgment. You know what things look like. Make your images look convincing to you, and you’ll quickly convince others.
RAW converter tools have limits. RAW converter tools do a good job with moderate amounts of color noise. Even high settings don’t tend to compromise image quality; sharpness, saturation and hue variety are all preserved. But sometimes they don’t go far enough. For aggressive noise reduction, especially for larger noise produced by Bayer pattern demosaicing, turn to Photoshop and possibly third-party noise-reduction software.
RAW converter tools do a reasonable job with luminance noise, but aggressive applications may compromise sharpness (some, but not all of this can be compensated for with RAW converter sharpening tools), and at times they don’t go far enough. When you encounter situations like this, turn to Photoshop and third-party noise-reduction software.
Most images can benefit from a little noise reduction and sharpening during RAW conversion. For many situations, this is all the noise reduction you’ll need. Many exposures don’t require substantial post-processing. However, some exposures require more power and finesse than these tools can deliver. When you encounter these, move to more sophisticated tools found in Photoshop and third-party plug-ins. But always start here.
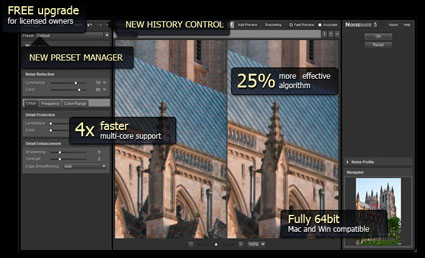
Noiseware 5 did an even better job than Noiseware 4 at reducing noise on a new series of images I’m printing now.
Noiseware 5 is now available.
– New algorithms are 25% more effective and retain more detail
– 64 bit compatible (Mac and Windows)(CS6)
– 4X faster with multi-core support
– New History feature with unlimited undos
– New Preset Manager for presets, notes, and import/export
The upgrade is free for registered users.
New users get a 20% discount with this code JPC2007.
Read my review here.
Download Noiseware 5 here.
Learn more about controlling noise in digital images here.
Learn more in my digital photography and digital printing workshops.
Get 20% off Imagenomic products with this discount code JPC2007.
Noiseware is the most robust noise-reduction software available. Ironically, while it offers the most sophisticated feature set, very often the default settings when you first open an image are all you’re likely to need. In many cases, very little, if any, additional tweaking is necessary.
In part, this is because Noiseware analyzes the images you process and creates “profiles” or saved settings that it uses every time you open a new image. It intelligently learns your needs by tracking your past images and analyzing your new images. You can also use Noiseware’s tools to create your own profiles, which can be saved and reused. You can save your own Preferences for how you’d like Noiseware to behave and learn. Noiseware also offers 13 default settings (like Landscape, Night Scene, Portrait, Stronger Noise, etc.) and allows you to save your own custom settings, which can be created from scratch or by modifying the provided presets.
Noiseware’s ability to target noise reduction to specific aspects of an image is what makes it unparalleled. You can adjust Noise Reduction based on Luminance or Chrominance; higher settings produce stronger noise reduction. You can target Noise Level based on Luminance or Chrominance; higher settings tell the software there’s more noise. You can target Color Range; Noise Reduction and Noise Level can be customized by hue—reds, yellows, greens, cyans, blues, magentas, neutrals. You can target Tonal Range; Noise Reduction and Noise Level can be customized for shadows, midtones and highlights. You can target image areas based on Frequency (or amount of detail); Noise Reduction and Noise Level can be customized to High, Mid, Low and Very Low frequencies. Finally, you can enhance detail, first, by using Detail Protection to reduce the effect based on Luminance or Color, and second, by using Detail Enhancement, which provides Sharpening, Contrast and Edge Smoothening.
Noiseware’s ability to provide this level of selectivity is extraordinary. It allows you to easily customize noise reduction for separate areas of an image without making complex masks. You’ll want to do this. Here’s just one example, among many, of why you want to do this. Smooth image areas reveal noise much more readily and they support more noise reduction, while highly textured image areas hide noise, but don’t support as much noise reduction without compromising apparent image sharpness.
Read my full review on Digital Photo Pro.
Find Imagenomic’s Noiseware here.
Read more in my digital photography resources.
Learn more in my digital printing workshops.