5 Great Ways To Eliminate Image Noise At The Source

Reflection XXXVII

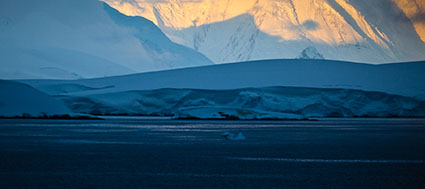
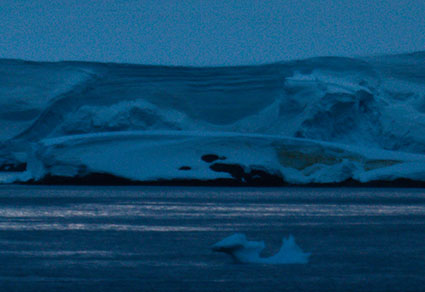
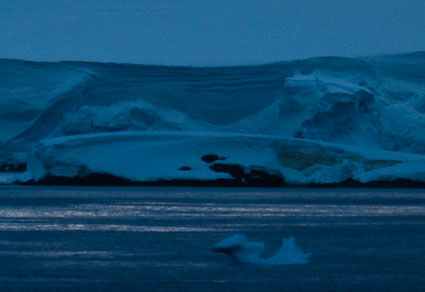
high noise / low noise

Noise happens. There is always some degree of noise present in any electronic device that receives or transmits a signal. Though noise is unavoidable, it can become so small relative to the signal that it is no longer visible. It’s all about a good signal to noise ration (SNR). The image is the signal. The capture and carrier mediums’ biproducts are the noise. (Film grain is noise.)The higher the SNR the more the image overpowers the noise; the lower the SNR the more the image becomes confused with noise. While some noise increases the apparent sharpness of images, the vast majority of noise found in images degrades quality. It’s best to avoid it.

There are a number of things you can do to reduce noise in your digital images at the point of capture.

1       Expose to the right
2       Use lower ISO settings
3       Use bigger sensors
4       Use faster exposure times
5       Keep equipment cool

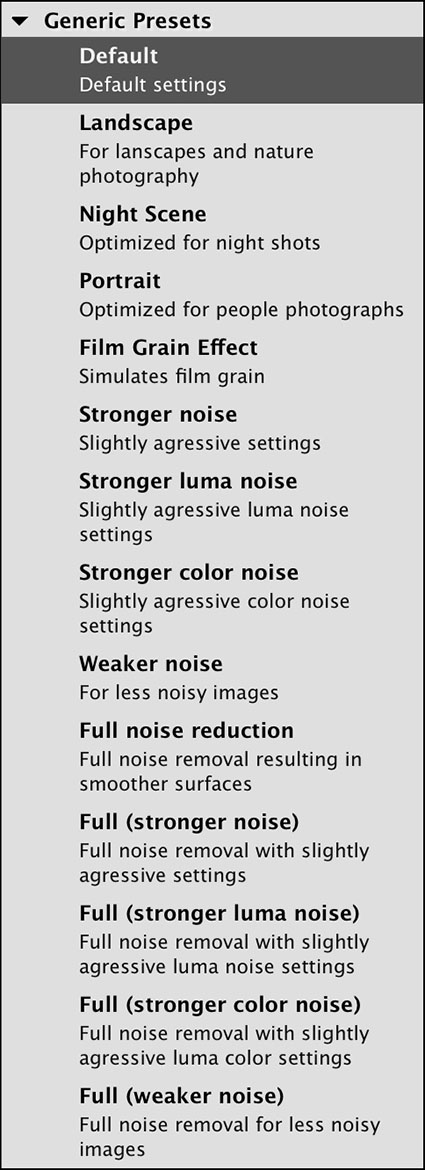
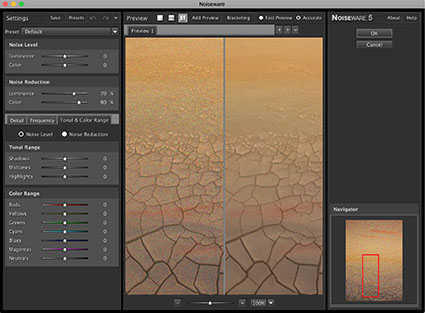
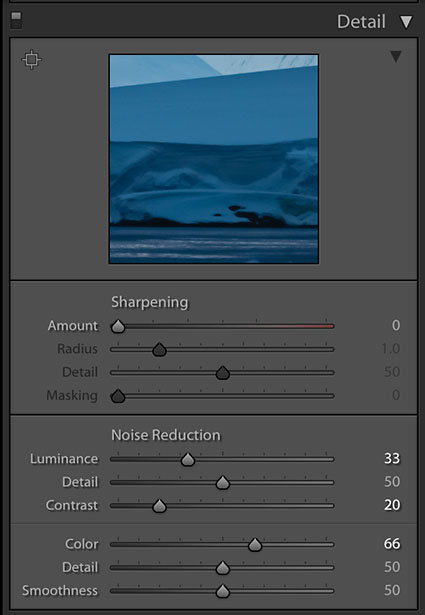
Start here. Use software to reduce the appearance of noise only when needed. (Of course, reducing noise may not be the only deciding factor when selecting conditions, tools, and techniques. As with all things, you will have to balance many concerns simultaneously. Adhere to the above principles when practical.)

Knowing how noise is produced will help you avoid it.

histograms_zones_caution

avoid the red zone, caution in the yellow zone, go for the green zone

ETTR
Underexposure results in more visible noise. Darker regions contain more noise than lighter regions in digital capture; the opposite is true of film. This is because the darker regions are recorded with fewer photons and less bits of data. It stands to reason that darker regions of images are produced with fewer photons. But why are they recorded with less bits of data? Digital cameras record data in a linear progression. If a digital sensor is capable of recording 14 bits of data (or 16,384 shades of gray) with a dynamic range of 8 stops, the lightest stop contains half the data in the file; the next lightest stop contains half as much data; and so on; it generates this progression from dark to light – 32 / 64 / 128 / 512 / 1024 / 2048 / 4096 / 8,192. This means you want to expose to the right. Avoid the lower 2 stops whenever possible; they contain less than 1% of the total data in the file. With so little data the signal becomes confused with the noise; the signal to noise ratio is very low. What’s more, when these tonal regions are adjusted, brighter or contrastier, the noise contained there quickly becomes more pronounced and with so few bits of data it also has a tendency to posterize. In addition, significant under exposure greatly increases the chances of producing Bayer pattern noise, a type of noise that is seen in larger areas and is more challenging to remove in post-processing. You’re much better off making a light exposure and darkening the Raw file during post-processing; this way your shadows will be represented with much more data and contain less noise. When light becomes challenging, which should you choose – under expose (without clipping) or raise the ISO? The precise cut off point is different for every camera, but in general avoid the lower 20% of the histogram. You’ll get less noise if you boost ISO and move the histogram up.

ISO
Higher ISOs amplify noise. ISO (International Standards Organization) is a descriptor that signifies absolute sensitivity to light. A digital sensor has one native ISO. Higher ISO settings simply boost the resulting signal. This is useful, but not ideal. When the brightness of the image is boosted, the noise is too.

Use “Shorter” Exposure Times
Longer exposures generate more noise. Hot pixels become hotter. All sensors have a few pixels that heat up faster than others, producing brighter than expected values. Some even have a few dead pixels that never fire, producing only black pixels. During longer exposures hot pixels are given more opportunity to heat up, growing brighter still; slightly hot pixels not visible at shorter exposure times become visible. As digital sensors age, hot pixels may become hotter and more pixels may become hot. Hot pixels produce a consistent fixed pattern of noise that can be recorded for given exposure times, making it easy to reduce. There is a duration at which a sensor suddenly produces a lot more noise; in older models this could be seen in exposures lasting only one minute, but with newer sensors this is greatly extended and most users will not encounter this; if you’re making very long exposures it’s useful test this and find the duration at which this happens for a your specific camera.

Use Bigger Sensor Sites
When it comes to noise, bigger is better – theoretically. Bigger sensors have more light gathering capacity, producing a higher signal to noise ratio, or cleaner images. More isn’t necessarily better. Cameras with more photosites (yielding more megapixels) packed into smaller areas tend to produce a lower signal to noise ratio, or noisier images. That said, a stronger signal does not necessarily guarantee lower noise. It’s the relative amounts of signal to noise that determines how noisy an image appears. The way a camera processes the file it makes has a significant impact on the final quality. Consequently, many medium format cameras that produce beautiful files in daylight typically produce noisier files than DSLR’s with smaller sensors in low light.

Stay Cool
High temperatures exacerbate noise. Thermal energy (leakage current) in semiconductors can generate an electrical signal that is difficult to distinguish from the optical signal. Ambient temperature increases leakage current by a factor of 2 for every 8 degrees Centigrade. Whether due to ambient temperature (You might start to see some effect over 90 F / 32 C degrees.) or storage (Don’t leave your camera in the sun, especially on a car seat, for long periods of time.), your camera can get hot and this will increase noise, which you can reduce by cooling off and keeping your camera cooler.

The best way to avoid noise is to produce as little of it as possible during exposure. These five tips will help you do just that.

Noise Reduction With Noiseware – The Best Photoshop Plug-In

BeforeAfter

Before & After Noiseware

Who doesn’t have noise? If you don’t run into noise in your digital images, at least once in a while, you may not be pushing the envelope enough. You can photograph long after dark; if you haven’t tried it, you owe it to yourself to experience this—it’s magical. And if you find you don’t have a DSLR on hand, this should be no reason not to make pictures with a point-and-shoot or cell phone.

Whether you’re using a cell phone, a point-and-shoot digital camera or a DSLR at high ISOs or with very long exposures, you’re bound to run into some noise. Noise happens. When you have it, there’s a lot you can do about it. There are many ways you can reduce noise during postprocessing; you could even say there’s an art to it. Learning these techniques can improve good exposures and save others.

If Lightroom and Photoshop fail to adequately reduce noise in your images, it’s time to move to third-party plug-ins. For years, they’ve done a superior job of reducing noise, and they still do. While there are many fine third-party plug-ins for Photoshop (Noise Ninja, Neat Image, Dfine, etc.), one stands out from all the rest: Imagenomic Noiseware Professional.

For me, Noiseware is the most robust noise-reduction software available. Ironically, while it offers the most sophisticated feature set, very often the default settings when you first open an image are all you’re likely to need. In many cases, very little, if any, additional tweaking is necessary.

In part, this is because Noiseware analyzes the images you process and creates “profiles” or saved settings that it uses every time you open a new image. It intelligently learns your needs by tracking your past images and analyzing your new images. You can also use Noiseware’s tools to create your own profiles, which can be saved and reused. You can save your own Preferences for how you’d like Noiseware to behave and learn. Noiseware also offers 13 default settings (like Landscape, Night Scene, Portrait, Stronger Noise, etc.) and allows you to save your own custom settings, which can be created from scratch or by modifying the provided presets.

PresetsGeneric Standard Presets

PresetsCustom

Custom Preset

Noiseware’s ability to target noise reduction to specific aspects of an image is what makes it unparalleled. You can adjust Noise Reduction based on Luminance or Chrominance; higher settings produce stronger noise reduction. You can target Noise Level based on Luminance or Chrominance; higher settings tell the software there’s more noise. You can target Color Range; Noise Reduction and Noise Level can be customized by hue—reds, yellows, greens, cyans, blues, magentas, neutrals. You can target Tonal Range; Noise Reduction and Noise Level can be customized for shadows, midtones and highlights. You can target image areas based on Frequency (or amount of detail); Noise Reduction and Noise Level can be customized to High, Mid, Low and Very Low frequencies. Finally, you can enhance detail, first, by using Detail Protection to reduce the effect based on Luminance or Color, and second, by using Detail Enhancement, which provides Sharpening, Contrast and Edge Smoothening.

TonalColorRange

Defaults

LevelReduction

Noise Level helps prepare the filter by analyzing the image

Noise Reduction is the blurring effect

Detail_Only

Detail Enhancement – turn it off and use Photoshop instead

Frequency_Only

Frequency (of detail) targeting

TonalColorRange_Only

Tonal & Color Range targeting

Noiseware’s ability to provide this level of selectivity is extraordinary. It allows you to easily customize noise reduction for separate areas of an image without making complex masks. You’ll want to do this. Here’s just one example, among many, of why you want to do this. Smooth image areas reveal noise much more readily and they support more noise reduction, while highly textured image areas hide noise, but don’t support as much noise reduction without compromising apparent image sharpness.

Use Noiseware’s sharpening sparingly (if at all) and only for the most modest boosts to image sharpness, as you can create much more sophisticated and selective results in Photoshop—and almost every image can use a little sharpening after noise reduction. Always reduce noise before sharpening.

Combine today’s digital cameras with the latest software, and you’ll find that you’ll rethink many things about when and where you make exposures. You’ll shoot at higher ISOs that you once thought were unusable. You’ll shoot in low levels of light where you once thought it was impossible to get an exposure, much less a usable one. You’ll look at your digital files, and where once you thought noise was a deal-breaker, you’ll find it no longer is. Noise-reduction skills and noise-reduction tools are essential to any photographers skill set and toolkit. Master them, and liberate yourself.

.

Reducing Noise with Adobe Camera Raw and Lightroom

1_Antarctica_2009-XC
2_LRACRnoise

Lightroom’s Detail panel

Reducing noise in Adobe Camera Raw and Lightroom (the controls and results are identical) is easy.

The Detail panel provides tools to reduce two kinds of noise – Luminance (light and dark) and Color. Results can be targeted with the Detail slider into smoother (low setting) or more textured (high setting) areas. The effects for luminance noise reduction can be further modified by adjusting the Contrast slider; a higher setting affects only high contrast noise, while a lower setting affects even closely matched values. And finally, the effects for color noise an be further modified with the Smoothness slider, a higher setting creates a more aggressive effect.
Zoom into an image at 100% magnification and move the sliders until noise is reduced, but image quality isn’t compromised. Use restraint. In a majority of situations, it’s better to preserve a little noise than to blur the image substantially.

All noise reduction blurs images. Sharpening after noise reduction during RAW conversion is recommended. Knowing that you’ll sharpen an image after noise reduction, you may reduce noise slightly more aggressively initially.

3_noNRorsharp

no noise reduction

5_appropriateNR

appropriate noise reduction

7_excessluminanceNR

excessive noise reduction

There are limits to how far you’ll want to go. Noise can be so aggressively reduced that surfaces within images become textureless and begin to seem synthetically rendered with software rather than optically captured photographically. This effect may become more pronounced if contours are strongly exaggerated during sharpening. While sharpening, take care not to accentuate noise further. Develop a sensitivity to texture and contour, and use your best judgment. You know what things look like. Make your images look convincing to you, and you’ll quickly convince others.

RAW converter tools have limits. RAW converter tools do a good job with moderate amounts of color noise. Even high settings don’t tend to compromise image quality; sharpness, saturation and hue variety are all preserved. But sometimes they don’t go far enough. For aggressive noise reduction, especially for larger noise produced by Bayer pattern demosaicing, turn to Photoshop and possibly third-party noise-reduction software.

RAW converter tools do a reasonable job with luminance noise, but aggressive applications may compromise sharpness (some, but not all of this can be compensated for with RAW converter sharpening tools), and at times they don’t go far enough. When you encounter situations like this, turn to Photoshop and third-party noise-reduction software.

Most images can benefit from a little noise reduction and sharpening during RAW conversion. For many situations, this is all the noise reduction you’ll need. Many exposures don’t require substantial post-processing. However, some exposures require more power and finesse than these tools can deliver. When you encounter these, move to more sophisticated tools found in Photoshop and third-party plug-ins. But always start here.

Noiseware 5 – The Best Got Better


Noiseware 5 did an even better job than Noiseware 4 at reducing noise on a new series of images I’m printing now.
Noiseware 5 is now available.
– New algorithms are 25% more effective and retain more detail
– 64 bit compatible (Mac and Windows)(CS6)
– 4X faster with multi-core support
– New History feature with unlimited undos
– New Preset Manager for presets, notes, and import/export
The upgrade is free for registered users.
New users get a 20% discount with this code JPC2007.
Read my review here.
Download Noiseware 5 here.
Learn more about controlling noise in digital images here.
Learn more in my digital photography and digital printing workshops.

Suffusion XXII – The Making Of The Print


I’m having a great time printing this series of images!
At first glance, they look like classic black and white images. In reality, they’re full color captures of a near neutral subject, processed and printed as color images. The trace amounts of color from the original subject make a very subtle but meaningful addition to the final image and print.
The trace amounts of color in the image are so subtle, I wasn’t sure which color management options would yield the best printed results; shadow detail, gradation, neutrality and graybalance all play major roles.
To get the final prints today, I tested multiple printer color management routes (Photoshop, Printer, Printer Adv B&W)(my ImagePrint tests are pending). Using Printer color management  for color offered the results I was looking for – not Photoshop, which clipped deep shadow detail and not Printer Adv B&W which rendered warm grays by default and cool toning solutions added more cool toning to the highlights than the shadows making the prints look like they carried a faint color cross).
They’re really touchy images. I found out how touchy when I went from 4×6 proofs to 11×14 prints, which when enlarged looked slightly lighter and lower contrast. A contrast curve for enlargement solved this.
At larger scale the noise became an issue, which I’m sleeping on. On the one hand, the subject is made of particles of water, which you can see when you are there. On the other hand it looks distracting to people who don’t know this. Water blurs with motion but the motion is frozen in these very fast exposures. I polled other people around me (including my father). Then I settled on an unexpected solution. I let some of the noise come through only in the areas of greatest focus, drawing slightly more attention to them. (Some noise can makes images appear sharper.)
There was a another surprise. I tested the images on glossy paper (Epson Exhibition Fine Art Paper). The extra depth in the blacks made another improvement in the image, so much so that it was worth the trade off for the soft surface of the matte paper. I made a similar test with a related series, Fumo, and didn’t make this choice. But here it was clear. This is the first time I’ve made my final prints on glossy paper.
I made these images while scouting my 2011 Focus On Nature workshop with Ragnar Th Sigurdsson and Arthur Meyerson. Arthur and I, two colorists who love the colors black gray and white and talk about them as colors.
I’m looking forward to returning to Iceland (and this waterfall) this August to lead a workshops again for Focus On Nature with +Einar Erlendsson , +Ragnar Th. Sigurdsson and +seth resnick .  +Arthur Meyerson Arthur Meyerson will join us at the end of our Iceland workshop for our Arctic Voyage workshop/cruise from Longyearben to Greenland and finally back to Iceland.
We have a few more spaces left our Iceland workshop.
There’s one space left in our Greenland workshop.
There are a two more spaces in my Fine Digital Print Advanced workshop.
Learn more in my digital photography and digital printing workshops.

5 Ways To Listen Better – Julian Treasure


5 Ways To Listen Better – Julian Treasure

4 Ways Sound Affects Us – Julian Treasure

Sound Health In 8 Steps – Julian Treasure
In our louder and louder world, says sound expert Julian Treasure, “We are losing our listening.” In this short, fascinating talk, Treasure shares five ways to re-tune your ears for conscious listening — to other people and the world around you.
View more creativity videos here.
Read more in my creativity ebooks.
Learn more in my creativity workshops.

Save 20% On Imagenomic's Noiseware Pro


Get 20% off Imagenomic products with this discount code JPC2007.
Noiseware is the most robust noise-reduction software available. Ironically, while it offers the most sophisticated feature set, very often the default settings when you first open an image are all you’re likely to need. In many cases, very little, if any, additional tweaking is necessary.
In part, this is because Noiseware analyzes the images you process and creates “profiles” or saved settings that it uses every time you open a new image. It intelligently learns your needs by tracking your past images and analyzing your new images. You can also use Noiseware’s tools to create your own profiles, which can be saved and reused. You can save your own Preferences for how you’d like Noiseware to behave and learn. Noiseware also offers 13 default settings (like Landscape, Night Scene, Portrait, Stronger Noise, etc.) and allows you to save your own custom settings, which can be created from scratch or by modifying the provided presets.
Noiseware’s ability to target noise reduction to specific aspects of an image is what makes it unparalleled. You can adjust Noise Reduction based on Luminance or Chrominance; higher settings produce stronger noise reduction. You can target Noise Level based on Luminance or Chrominance; higher settings tell the software there’s more noise. You can target Color Range; Noise Reduction and Noise Level can be customized by hue—reds, yellows, greens, cyans, blues, magentas, neutrals. You can target Tonal Range; Noise Reduction and Noise Level can be customized for shadows, midtones and highlights. You can target image areas based on Frequency (or amount of detail); Noise Reduction and Noise Level can be customized to High, Mid, Low and Very Low frequencies. Finally, you can enhance detail, first, by using Detail Protection to reduce the effect based on Luminance or Color, and second, by using Detail Enhancement, which provides Sharpening, Contrast and Edge Smoothening.
Noiseware’s ability to provide this level of selectivity is extraordinary. It allows you to easily customize noise reduction for separate areas of an image without making complex masks. You’ll want to do this. Here’s just one example, among many, of why you want to do this. Smooth image areas reveal noise much more readily and they support more noise reduction, while highly textured image areas hide noise, but don’t support as much noise reduction without compromising apparent image sharpness.
Read my full review on Digital Photo Pro.
Find Imagenomic’s Noiseware here.
Read more in my digital photography resources.
Learn more in my digital printing workshops.

Reduce Color Noise With Photoshop


It’s challenging to reduce the luminance (light and dark) component of noise without compromising image sharpness; often it requires a careful application of specialized software.

However, you can easily reduce the color component of noise using Photoshop.

Here’s how.

1    Duplicate the Background layer and turn the duplicate layer’s blend mode to Color.

2    Blur the layer (Filter: Blur: Gaussian Blur).

Be careful not to use the blur filter too aggressively. If contours exhibit reduced saturation, use a lower filtration
Using this technique, only the color of an image will be blurred, not its luminance; image sharpness will not be compromised. Luminance noise will persist; other methods are required to remove it.

This industrial strength technique is most useful when dealing with serious color noise when a Raw converter’s features can’t go far enough, such as the larger areas of color noise found in some images from Bayer pattern demosaicing.

Reduce Noise With Dark Slides


Some noise is random; some noise is fixed. Hot-pixel noise is fixed. What are “hot pixels”? Photosites on digital sensors that generate brighter information faster than their neighbors. Hot pixels get brighter at higher ISOs, with longer exposures, and in warmer temperatures. You can map where hot pixels are and exactly how bright they get under specific conditions with a dark slide. Then you can use a dark slide to drop out fixed “hot-pixel” noise with a simple postprocessing technique in Photoshop.
To make a dark slide, simply make a separate exposure made at the same ISO, exposure time and temperature as the image you intend to use it with. Exposure of what? Darkness. Leave your lens cap on.
To use a dark slide in Photoshop, open the dark slide and the image you’d like to use it with and drag and drop the dark slide into that image file, holding the Shift key to make sure it’s precisely registered (wait to crop or rotate an image until after this is accomplished). Change the blend mode of the dark-slide layer to Difference and watch the hot-pixel noise vanish.
Learn more about making and using dark slides on Digital Photo Pro.
Learn more about noise here.
Learn more in my digital printing workshops.